Introduction
In this guide, we will see how to recover from accidentally running # chmod -R 777 / on any RPM-based Linux Operating systems. If an application owner or some user have root privilege they might accidentally do this or unknowingly ran this commands. Let’s see how to restore the server to working condition, but not all files. Using chmod 777 is not a good idea in any environment.
For demonstration purpose, we will intentionally run chmod 777 on one of the test servers and try to recover by running only two commands. After restoring the proper permission still, most of the log files and user files will have world-writable permission. Those can be recovered by running find and change the required permissions.
Warning: Never run on a production or development servers.
If you need to test this guide run these commands on your own risk in a test server.
# chmod -R 777 /Once after running the chmod everything will have rwx.
[root@web04 ~]# ls -lthr /
 total 16K
 drwxrwxrwx.   2 root root    6 Apr 11  2018 srv
 drwxrwxrwx.   2 root root    6 Apr 11  2018 opt
 drwxrwxrwx.   2 root root    6 Apr 11  2018 mnt
 drwxrwxrwx.   2 root root    6 Apr 11  2018 media
 lrwxrwxrwx.   1 root root    7 Mar  7 22:48 bin -> usr/bin
 lrwxrwxrwx.   1 root root    9 Mar  7 22:48 lib64 -> usr/lib64
 lrwxrwxrwx.   1 root root    7 Mar  7 22:48 lib -> usr/lib
 lrwxrwxrwx.   1 root root    8 Mar  7 22:48 sbin -> usr/sbin
 drwxrwxrwx.  13 root root  155 Mar  7 22:48 usr
 drwxrwxrwx.  20 root root  278 Mar 27 16:31 var
 drwxrwxrwx. 109 root root    0 Mar 28 01:51 proc
 drwxrwxrwx.  13 root root    0 Mar 28 01:51 sys
 drwxrwxrwx.  21 root root 3.1K Mar 28 01:51 dev
 drwxrwxrwx.   5 root root 4.0K Mar 28 01:52 boot
 drwxrwxrwx.  25 root root  720 Mar 28 01:52 run
 drwxrwxrwx.   2 root root  167 Mar 28 18:23 root
 drwxrwxrwx.  11 root root  137 Mar 28 19:34 home
 drwxrwxrwx.  75 root root 8.0K Mar 28 22:40 etc
 drwxrwxrwx.   8 root root  170 Mar 30 03:25 tmp
[root@web04 ~]#
These are the important SSH related files which need to have correct permission and ownership. But all the below files have wrong permissions because of running chmod 777.
[root@web04 ~]# ls -lthr /etc/ssh/sshd_config
 -rwxrwxrwx. 1 root root 3.9K Mar 27 15:23 /etc/ssh/sshd_config
[root@web04 ~]#

[root@web04 ~]# ls -lthr /etc/ssh/ssh_host_*
 -rwxrwxrwx. 1 root root      382 Mar 27 00:47 /etc/ssh/ssh_host_rsa_key.pub
 -rwxrwxrwx. 1 root ssh_keys 1.7K Mar 27 00:47 /etc/ssh/ssh_host_rsa_key
 -rwxrwxrwx. 1 root ssh_keys  227 Mar 27 00:47 /etc/ssh/ssh_host_ecdsa_key
 -rwxrwxrwx. 1 root root      162 Mar 27 00:47 /etc/ssh/ssh_host_ecdsa_key.pub
 -rwxrwxrwx. 1 root root       82 Mar 27 00:47 /etc/ssh/ssh_host_ed25519_key.pub
 -rwxrwxrwx. 1 root ssh_keys  387 Mar 27 00:47 /etc/ssh/ssh_host_ed25519_key
 [root@web04 ~]#
 [root@web04 ~]# ls -lthr /etc/sudoers*
 -rwxrwxrwx. 1 root root 4.3K Nov 27 22:38 /etc/sudoers
[root@web04 ~]#
SSH with chmod 777 Permissions
Let’s try to SSH into the same server. Now we will get denied because of wrong permissions (chmod 777) on ssh host key files.
After changing the permission and exit from the current session you will get “Connection reset by peer” error. You are not allowed to SSH without proper permissions. Even from the console, we can’t log in using the root account.
workstation01@Laptop-user1:~$ ssh root@192.168.0.175
 ssh_exchange_identification: read: Connection reset by peer
workstation01@Laptop-user1:~$
Start to Recover
Boot from the DVD or ISO, To recover from this chmod 777 permission change we need to boot the server using the Installation media or ISO file.
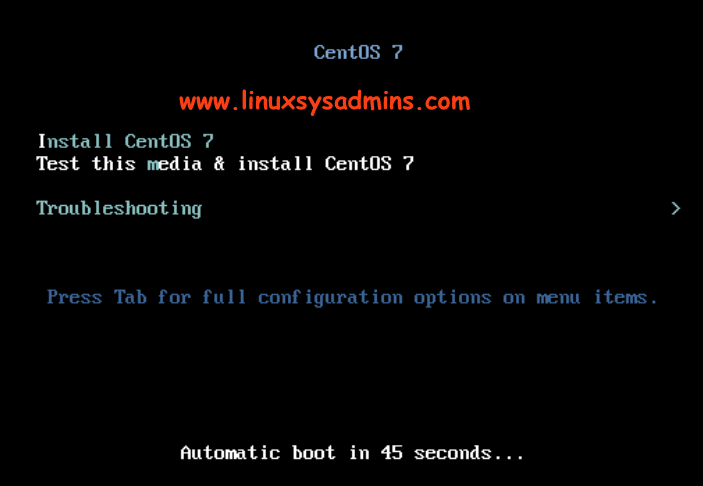
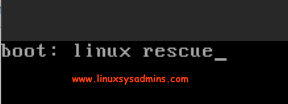
Booting into Rescue Mode
Once we get the above options choose the Troubleshooting –> Rescue a CentOS System or press ESC key and type “linux rescue” and hit enter to boot the server into rescue mode.
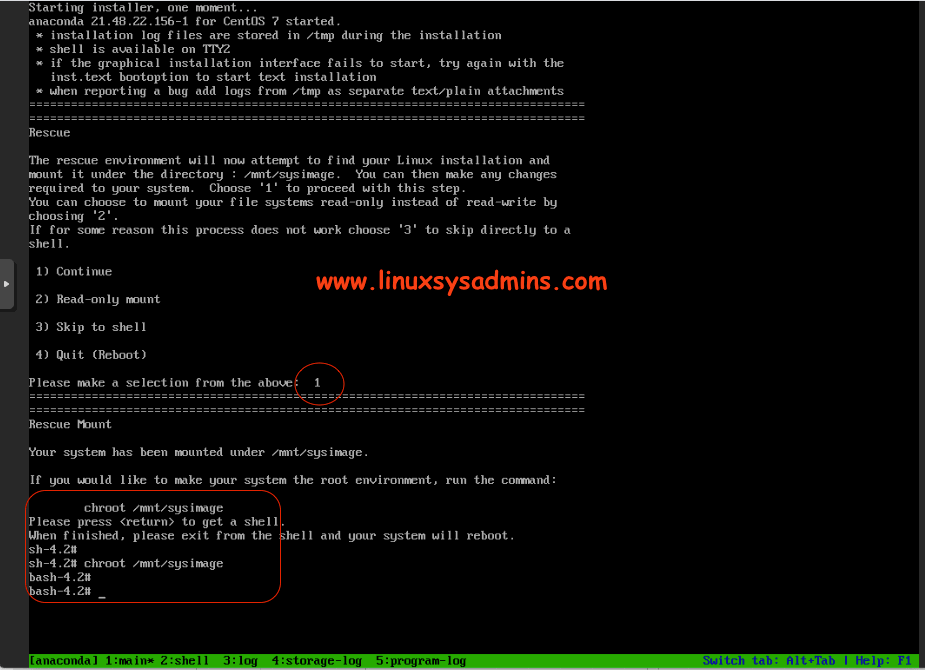
Chroot to recover
Once we reach the Rescue environment type “1” to continue. As shown in below picture type the “chroot /mnt/sysimage” to enter the chroot environment. To make sure you are in chroot your prompt will change from sh shell to bash shell in RHEL 7/8 based servers.
Restore the Permission
Run with below two commands to restore the permissions of all files, directories and configs. While running this command it will throw permission denied error and can’t access error. Just ignore the errors.
# rpm --setugids -a
# rpm --setperms -a
The options used here are --setugids, --setperms and -a
--setperms – This will set permissions of files in an RPM package.--setugids – This will set the user/group ownership of files in the given RPM package.-a – While we using -a or –all it applied for all installed RPM packages.
Once completed, exit from the chroot and from the sh shell by running exit two times.
SSH with Correct Permission
Once the server rebooted SSH and verify the permission. If the ssh host files do not have proper permissions still we will get connection refused error.
workstation01@Laptop-user1:~$ ssh root@192.168.0.175
 ssh: connect to host 192.168.0.175 port 22: Connection refused
workstation01@Laptop-user1:~$
These are the required permission for these configs and host keys. By changing the permissions we are good to login now.
# chmod 644 /etc/ssh/ssh_config
# chmod 600 /etc/ssh/sshd_config
# chmod 640 /etc/ssh/ssh_host_rsa_key /etc/ssh/ssh_host_ecdsa_key /etc/ssh/ssh_host_ed25519_key
# chmod 644 /etc/ssh/ssh_host_rsa_key.pub /etc/ssh/ssh_host_ecdsa_key.pub /etc/ssh/ssh_host_ed25519_key.pub
Finally, we have login using ssh.
[root@web04 ~]# uptime
  19:10:14 up 18 min,  2 users,  load average: 0.02, 0.21, 0.15
 [root@web04 ~]#
 [root@web04 ~]# ls -lthr /etc/ssh/ssh*
 -rw-r--r--. 1 root root     2.3K Aug  9  2019 /etc/ssh/ssh_config
 -rw-r--r--. 1 root root      382 Mar 27 00:47 /etc/ssh/ssh_host_rsa_key.pub
 -rw-r-----. 1 root ssh_keys 1.7K Mar 27 00:47 /etc/ssh/ssh_host_rsa_key
 -rw-r-----. 1 root ssh_keys  227 Mar 27 00:47 /etc/ssh/ssh_host_ecdsa_key
 -rw-r--r--. 1 root root      162 Mar 27 00:47 /etc/ssh/ssh_host_ecdsa_key.pub
 -rw-r--r--. 1 root root       82 Mar 27 00:47 /etc/ssh/ssh_host_ed25519_key.pub
 -rw-r-----. 1 root ssh_keys  387 Mar 27 00:47 /etc/ssh/ssh_host_ed25519_key
 -rw-------. 1 root root     3.9K Mar 27 15:23 /etc/ssh/sshd_config
[root@web04 ~]#
That’s it, we have successfully restored the permissions for installed RPM packages and recovered the server. Never use chmod 777 on any filesystems or configurations.
Conclusion
By running a single command with two options we can recover the proper permissions. Subscribe to our newsletter and stay connected for more articles.
Excellent