
Table of Contents
Introduction
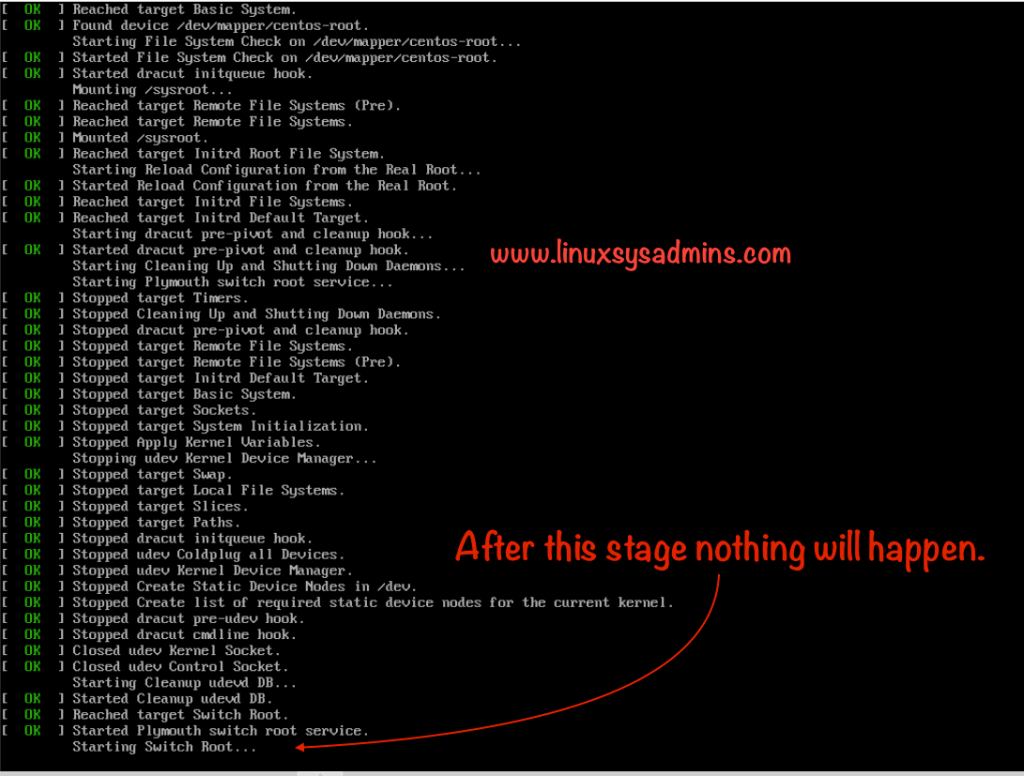
Starting Switch Root: While starting the server it will not move forward after “Starting Switch Root” as shown below. The reason behind this could be a corrupted glibc package or totally it’s not available in the server.
Recently we have faced this issue in one of the Kubernetes production server running on CentOS 7.7. In this guide, we are going to use a CentOS 7.7 operating system. Additionally, the following guide will help to fix the glibc error as well. Interrupting ongoing patching which includes Glibc will also corrupt the Glibc.
How to troubleshoot
In case if you have a chance to boot the server run below command to find the missing packages and dependencies.
# rpm -Va-V –verify-a –all
Let’s try to reproduce the same error and walk through how to fix the same.
Reproducing the Starting Switch Root
For demonstration purpose intentionally we are removing Glibc from our test server.
To reproduce the issue let’s start with finding the Glibc package using rpm command by doing a query.
[root@web04 ~]# rpm -qa | grep glibc
 glibc-common-2.17-292.el7.x86_64
 glibc-2.17-292.el7.x86_64
[root@web04 ~]#
-q – To do a Query (–query)-a – All packages (–all)
Warning: Never perform this in a production server if you are not aware what you are doing.
Now remove the Glibc without removing its dependencies, Without using --nodeps you can’t remove the glibc at all. Type the full package name including package version, distribution version and arch.
[root@web04 ~]# rpm -e --nodeps glibc-2.17-292.el7.x86_64
 warning: /etc/nsswitch.conf saved as /etc/nsswitch.conf.rpmsave
 warning: %postun(glibc-2.17-292.el7.x86_64) scriptlet failed, exit status 127
[root@web04 ~]#
Now the status of the server will be without glibc package, and you can’t complete with the boot. Refer above picture how it looks, Now let’s start to recover the server.
Boot into the rescue mode
To start with the rescue procedure first we need to boot from the DVD or from an ISO file.
Choose the Troubleshooting option from the menu and choose the Rescue an installed System from the menu.
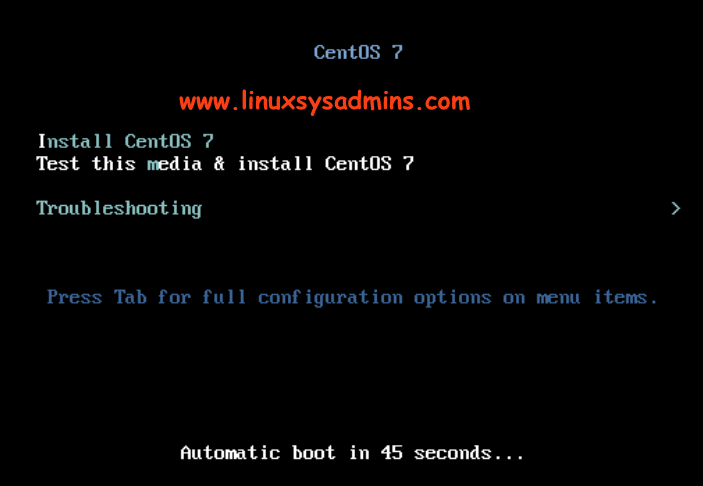
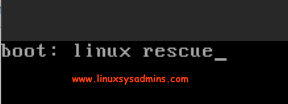
Else, run “linux rescue” by pressing the ESC key and hit enter.
Once we reach the rescue environment, continue by typing 1. Now it will print in screen to run chroot. But we need to ignore it, without doing a chroot we are going to fix this issue.
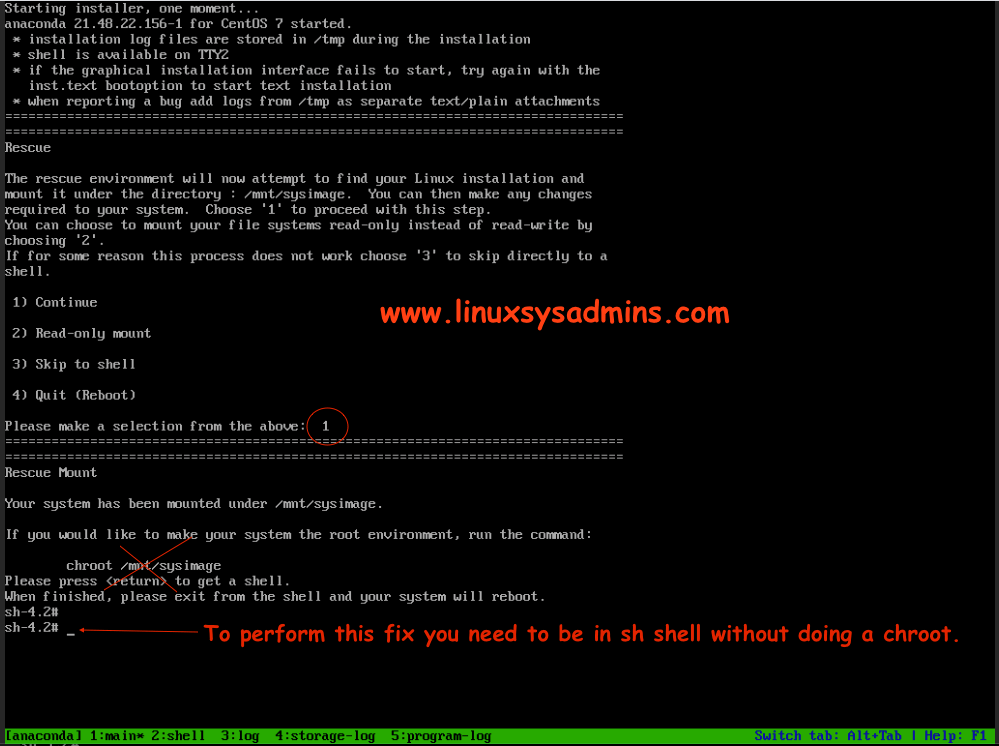
If you try to do a chroot it will throw an error as “No such file or directory“


Find package from the DVD/ISO
As we have boot this server from DVD or ISO and without doing chroot all the package in DVD/ISO can be found under /run/install/repo/Packages.
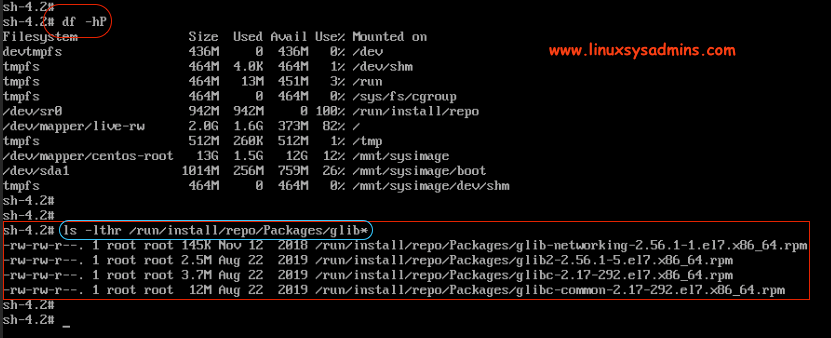
To install any packages you will find under this location.
Reinstall Glibc package
Let’s start to reinstall the glibc package from the DVD/ISO using rpm command. Before installing the package we need to make sure what the command will do. Use --test to do a dry run without installing the package.
# rpm -ivh --root=/mnt/sysimage --test --replacefiles --replacepkgs /run/install/repo/Packages/glibc-2.17-292.el7.x86_64.rpmOnce we are confident about what we are doing, just remove the –test and run the same command to reinstall the glibc.
# rpm -ivh --root=/mnt/sysimage --replacefiles --replacepkgs /run/install/repo/Packages/glibc-2.17-292.el7.x86_64.rpm
Type exit to reboot the machine. Once you are back online you will be good.
To confirm the package installation you can find from /var/log/yum.log as well.
[root@web04 ~]# tail -n 2 /var/log/yum.log
 Mar 28 01:50:15 Updated: tzdata-2019c-1.el7.noarch
 Mar 31 17:58:11 Installed: glibc-2.17-292.el7.x86_64
[root@web04 ~]#
That’s it, we have successfully recovered from Starting Switch Root.
Conclusion
By reinstalling the glibc package we have recovered a server from (Starting switch root) non-booting state to the working state. Will come up with more troubleshooting guides, subscribe to our newsletter and stay with us.