Table of Contents
Introduction to Software RAID
RAID or Redundant array of independent disks even it can be called as redundant array of inexpensive disks. RAID’s are used for reliability, resilience, performance and avoid a single point of failure in a set of disks.
RAID Series
- Introduction to Software RAID and RAID Levels in Linux
- How to create a RAID 0 (striping) with mdadm in Linux
- Creating a Software RAID 1 (mirroring) in Linux
- Configure RAID 5 (striping with distributed parity) in Linux
- How to configure RAID 6 (double distributed parity) in Linux
- How to create a Nested RAID 10 or 1+0 in Linux
How does it work?
RAID won’t work as a single disk, minimum of two or more disks will be used to form a RAID. For example, While we write a data the content will be spread across multiple disks and highly available from the multiple sources. In case, a single disk failed we will be still on the safer side and won’t lose any data.
Types of RAID’s
There are two types of RAID’s they are software raid and hardware raid. Throughout this guide, we are going to use a Linux RAID or can be called as software RAID. To implement the software raid Linux comes with MD driver, to create and manage the same we can use “mdadm” utility. By combing multiple disks a RAID array can be created with the help of mdadm.
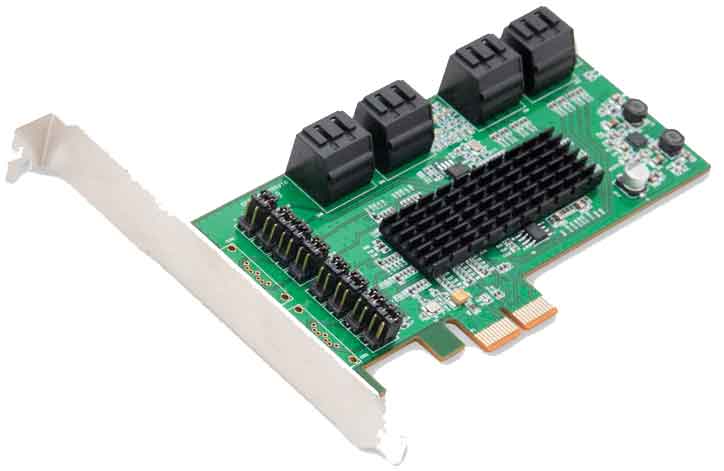
Hardware raid will be a PCI or PCI-E card or integrated on the motherboard. They have their own BIOS inbuild in it, we need to configure the RAID levels and options from it before installing any operating Systems on the top of the RAID device. A RAID controller will look like below.

In real production setups, most of the expensive servers will come with hot-swap option. Hot-Swap means, whenever a disk fails we can replace the disk without bringing down the whole server. If any option allowed to swap on the fly they are hot-swappable.
What are the LEVELS in RAID?
The levels of RAID are listed as follows. However, we will focus on only the levels commonly used in a production environment. In our upcoming guides, all the raid levels will be briefly covered with examples.
| RAID LEVEL | METHOD | MINIMUM OF DISKS | USAGE | PROS | CONS |
| 0 | Striping | 2 | Heavy Read Operations | High Performance in speed | Data will lost if one disk fails |
| 1 | Mirroring | 2 | Application Servers | Fault tolerance and high read performance | Little lag in write OPS, Reduced stotage 1/2. |
| 5 | Striping & Parity | 3 | Application & Normal file Storage | Speed and Fault tolerance | Little lag in write OPS, Reduced stotage 1/3. |
| 6 | Striping & Double parity | 4 | Application Servers & Large file Storage | Extra level of Redudancy with High Speed performance | Low write performance, Reduced storage by 2/5. |
| 10 or 1+0 | Striping & Mirroring | 4 | Highly utilized Database Servers | Write Performance + Strong Fault tolerance | Reduced storage 1/2, Limited scalability. |
When we combine the number of disks and create a RAID it can be called as RAID set, RAID Array or RAID group to form a logical disk with resilience against the drive failures.
Managing Failed Drives and Spares
In case, anyone of disk failed the recovery process will kicks in and start to rebuild the RAID group by itself. Moreover, during failures, if a spare disk available then it will be used while recovery kicks in. Spares will not be used until unless any one of the disks fails in an array.
Let’s start to create the software raid in anyone of Linux server. In our guide, we will be using CentOS Linux server 8. However, most of all RHEL based Linux distributions can follow this guide.
Conclusion
Data is the most important thing while we consider during a server set up in a real-time production environment. To make sure our data are safe during a disk failure RAID is the best option to implement in our environment. Will cover step by step guide to setup RAID levels in our upcoming guides. Subscribe and stay tuned for more guide related to RAID.