
Table of Contents
Introduction
oVirt is a free Enterprise ready OpenSource Virtualization platform. The author of Ovirt is Red Hat and developed on Java, which is licensed under Apache License 2.0. The oVirt consists of two basic components they are oVirt engine and oVirt node. In our guide, we are about to prepare an Ovirt engine on top of CentOS Linux 7 based hypervisor (Ovirt Node).
There are two methods of setting up an Ovirt node. First, one will be using a minimal operating system based on CentOS act as a virtualization Hypervisor (Thin Operating System). And another one will be Linux based hypervisor (Thick Operating System). In our setup, we will stick with thick node. The thick node can be any operating system like CentOS, RHEL or Scientific Linux.
The Ovirt engine can be deployed separately on a virtual machine or within the cluster by running on a hypervisor as a virtual machine. To perform the installation of the oVirt engine we can use manual installation method or the installation can be automated using an appliance.
To prepare a RHEL based hypervisor we can start with the first guide from the below list. Once you are ready with minimum one CentOS server jump back to this guide.
Ovirt Setup Series
- Preparing Red Hat Enterprise Linux or CentOS Linux server for Ovirt.
- Up and running oVirt 4.3 on CentOS 7
Let’s begin with preparing our Ovirt Engine on top of CentOS Linux server.
Few Basic Packages
Lets install few of basic needed packages for our setup.
# yum install wget curl vim bash-completion net-tools -yThis can be skipped if you are aware and done with the installation.
Setting up Locale
If you have done a minimal OS installation locale setup maybe not in place or you may have skipped. If you get any warning regarding locale while you login into the server then run below command to set the proper locale.
# localectl set-locale LC_CTYPE=en_US.utf8Enable Time Synchronization
The time is very important in this setup, make sure to install and configure chrony.
# yum install chrony -yEnable the service persistently and start the service.
# systemctl enable chronyd
# systemctl start chronyd
# systemctl status chronyd
Enable the ntp time synchronisation by running below commands. By following, check for the status as well.
# timedatectl set-ntp true
# timedatectl status
Installing Packages
Enable repository
First, we need to install the required packages. Let’s start with installing ovirt yum repository package.
# yum install https://resources.ovirt.org/pub/yum-repo/ovirt-release43.rpmIf you need to explore the beta version 4.4 use below repo file. To perform a Ovirt 4.4 version setup we should have CentOS 8 based Linux servers.
# yum install https://resources.ovirt.org/pub/yum-repo/ovirt-release44-pre.rpmOnce the repository enabled let’s start with installing Ovirt setup package. Here in our setup, we are about to perform the easiest way to install the Ovirt Manager. Back in 3.x version’s setting up a manager is a crucial part, nowadays the life made easier using cockpit with Ovirt dashboard.
Install Ovirt Package
Install the cockpit ovirt dashboard package.
# yum install cockpit-ovirt-dashboardEnable and start the service.
# systemctl enable cockpit.socket
# systemctl start cockpit.socket
Enable firewall
To enable the required ports use firewalld. The ports required in our setup will be cockpit and nfs related services.
# firewall-cmd --add-service=cockpit --permanent
# firewall-cmd --add-service=nfs --add-service=nfs3 --permanent
# firewall-cmd --permanent --add-service=rpc-bind --permanent
# firewall-cmd --permanent --add-service=mountd --permanent
# firewall-cmd --permanent --add-port=2049/tcp --permanent
# firewall-cmd --permanent --add-port=2049/udp --permanent
# firewall-cmd --reload
NFS for Data, Export and ISO domains
We have enough space in our Linux based hypervisor. To store Virtual machine images and ISO files we will set up an NFS share in our hypervisor itself. Hence, this is our test environment we are setting up NFS share in our hypervisor.
In real production environments, the ISO domain can be in an NFS share from NAS, other Data domain will be under SAN storage disks. Let’s create the required mount points for
- Data storage to store the virtual machines disk files.
- Export mount point for backups.
- ISO domain to store the ISO files.
The created directories should be owned by vdsm user with UID and GID 36. The role of this user will be Node Virtualization Manager.
# mkdir -p /exports/{data,export,iso}/
# chown -R 36:36 /exports/*
# chmod 0755 /exports/*
NFS for Hosted Engine and DataStore
Hence we don’t have SAN storage let’s create two more directories and share it through NFS to host the hosted engine virtual machine (Ovirt Manager) and other to store the virtual machines.
# mkdir /hosted_engine
# mkdir /datastore1
Created directory should be owned by vdsm user.
# chown -R 36:36 /hosted_engine
# chown -R 36:36 /datastore1
Let’s start to export.
Export the NFS shares
Export all nfs shares which we created for data domains, ISO and hosted engine.
# vim /etc/exportsAppend with nfs share informations.
/hosted_engine 192.168.0.0/24(rw,sync)
/datastore1 192.168.0.0/24(rw,sync)
/exports/iso 192.168.0.0/24(rw,sync)
Start the NFS server and enable it persistently.
# systemctl enable nfs-server.service
# systemctl start nfs-server.service
# systemctl status nfs-server.service
Once the service started export all the share.
# exportfs -a[root@pve3 ~]# showmount -e 192.168.0.13
Export list for 192.168.0.13:
/exports/iso 192.168.0.0/24
/datastore1 192.168.0.0/24
/hosted_engine 192.168.0.0/24
[root@pve3 ~]#Starting with Ovirt Manager Setup.
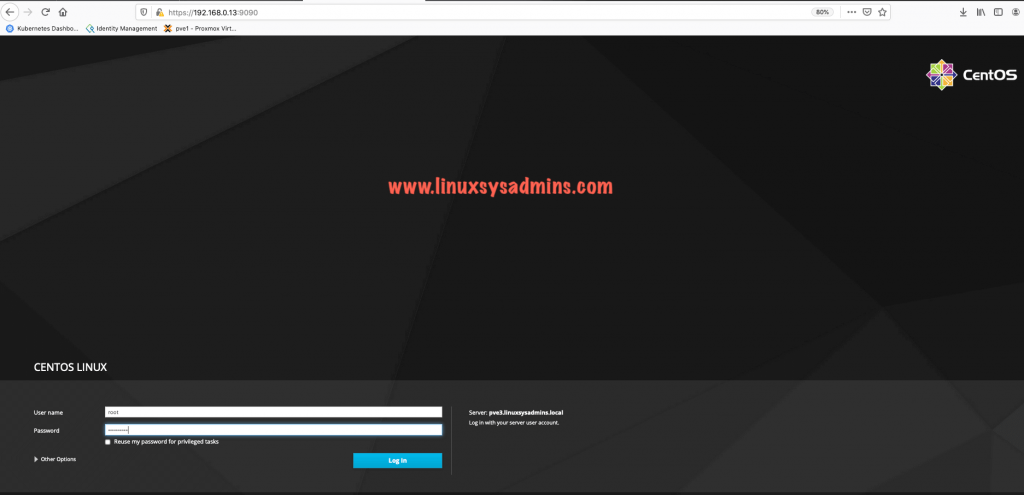
To start with setting up the Ovirt Manager navigate to the anyone of web browser using your first hypervisors IP with cockpit port number.
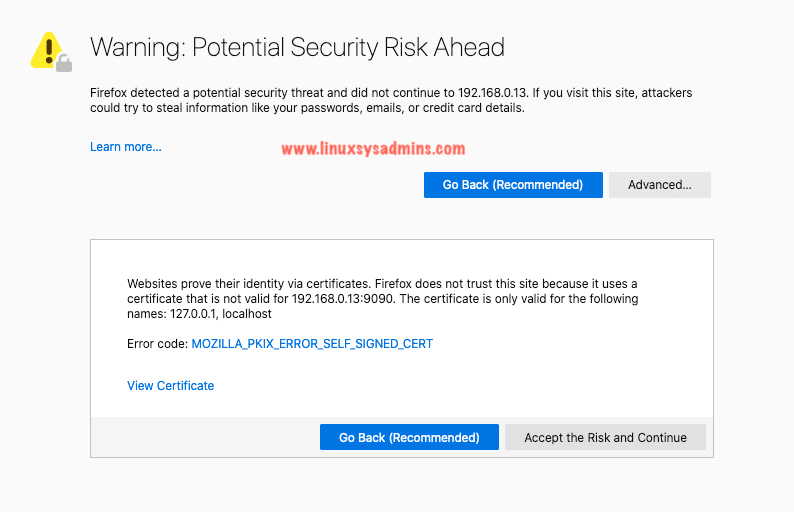
https://192.168.0.13:9090/Click on Advanced, and click Accept the Risk and continue.
We will be redirected to the Linux servers cockpit login screen. Use the root account credentials to perform the future steps.
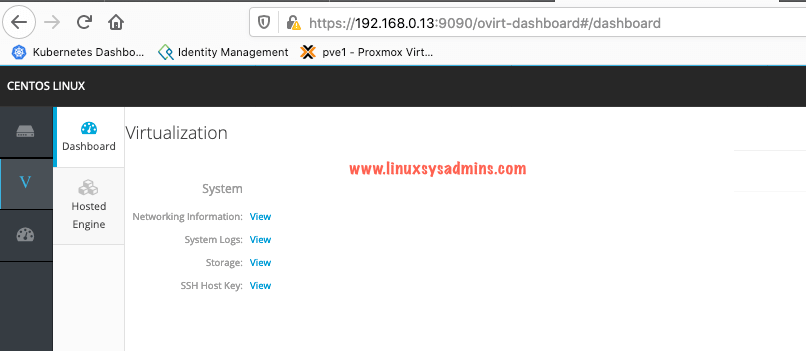
Once after the successful login we will be redirected to the Virtualization Dashboard.
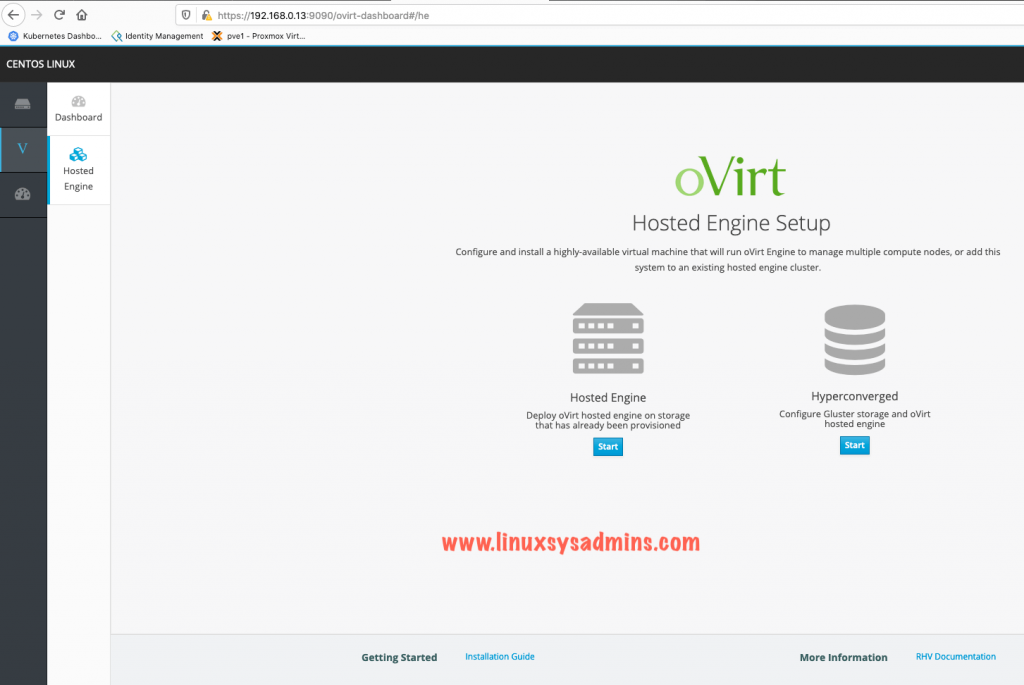
Click on Hosted Engine and you will get two options in the right-hand side pane. We need to set up a Hosted Engine, so click on start to begin the setup.
We will get the below Hosted Engine Deployment window. Fill with all information as shown in the below snip.
- The hostname of the hosted engine virtual machine should resolve forward and reverse names.
- The MAC address information will be automatically fetched by the deployer.
- Use the same IP address which you planned and created with DNS entry and fill out remaining information as shown in below figure.
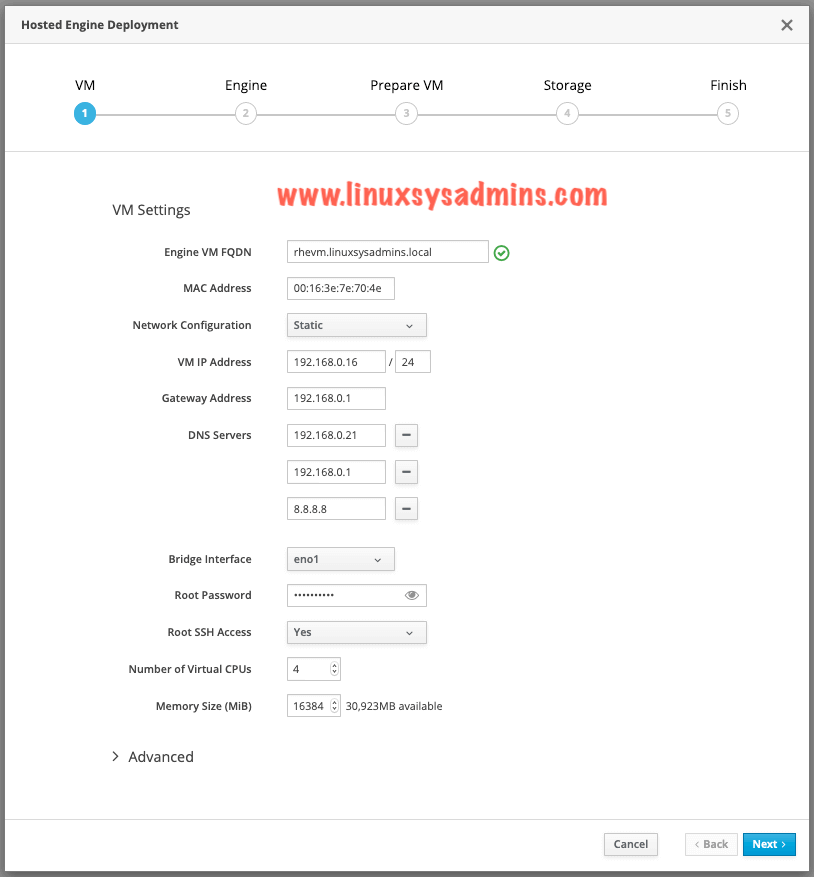
Click on the advanced option to choose the “Apply OpenSCAP profile” to apply the required security hardening setting for our Hosted Engined virtual machine. Click “Next” to continue the setup.


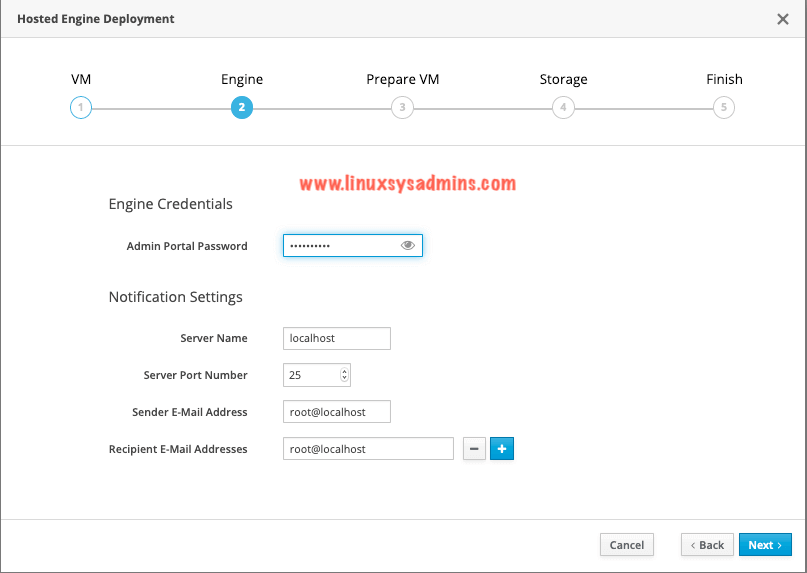
Enter the Administration portal password for Ovirt Managers and enter with notification settings. To receive the notification alert on multiple email ID click + symbol and add more email ID’s. Click Next to move forward.
Review the information before proceeding with preparing the VM.
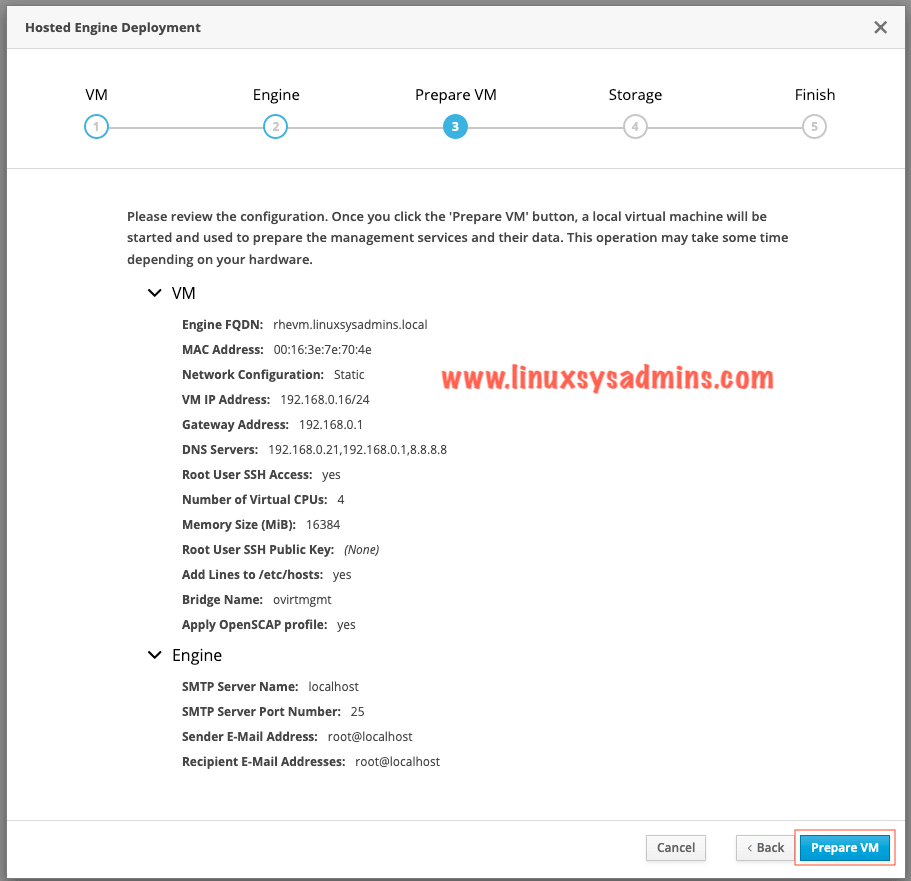
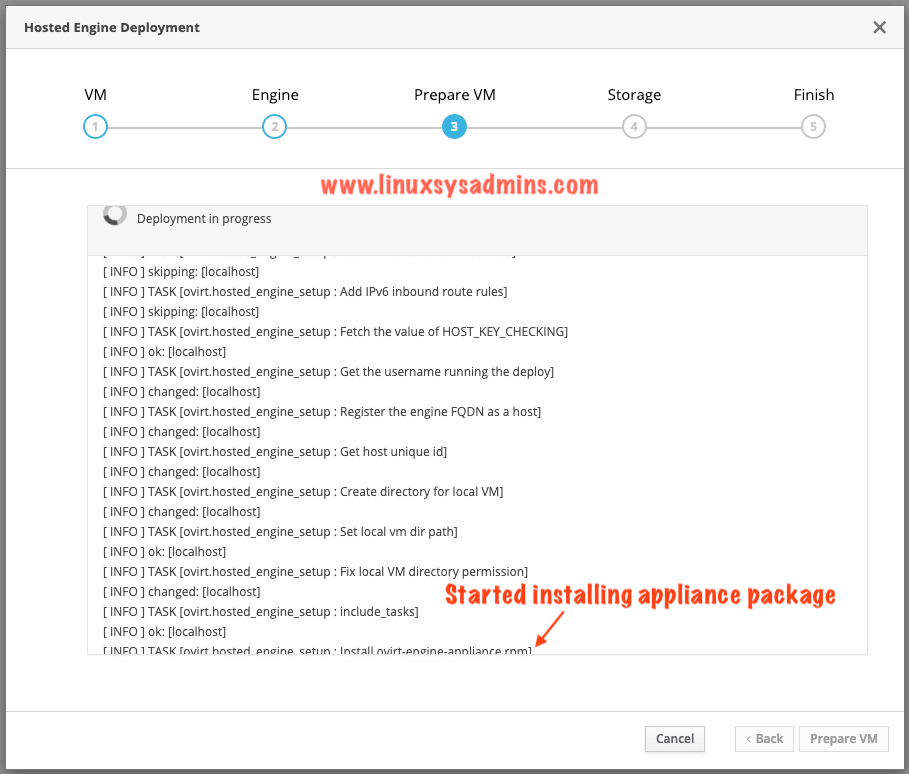
Once we click the Prepare VM it will download the required packages including “Ovirt-engine-appliance.rpm” to set up the Hosted Engine.
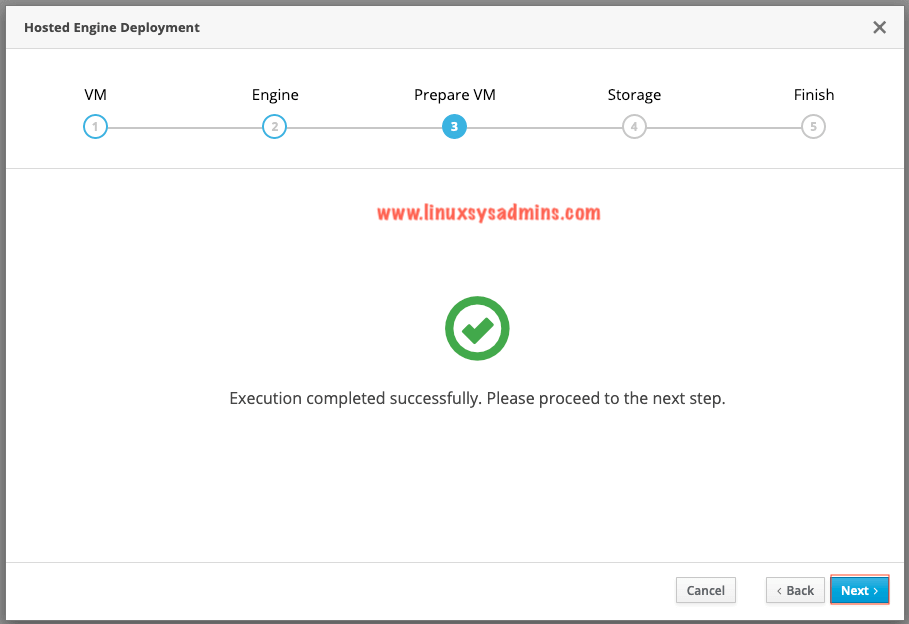
In this stage, it will take a few minutes to complete the downloads and installation.
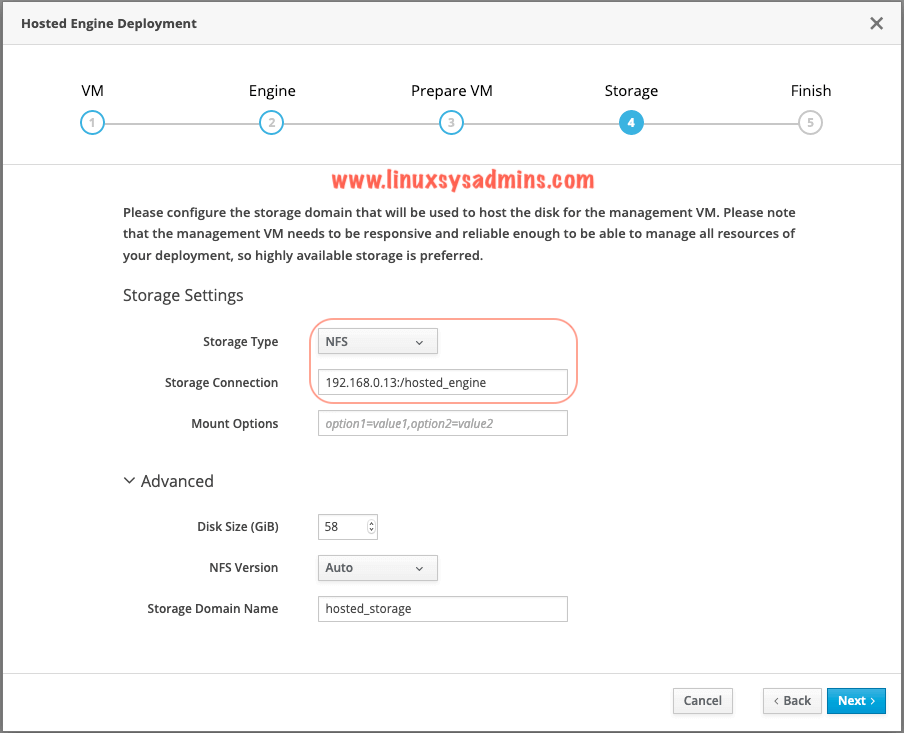
Proceed with setting up the storage.
Enter the hosted engine storage information. As we discussed in our earlier step use the hosted_engine NFS share to install the Ovirt Manager on it.
- Storage Type as NFS.
- Storage connection as 192.168.0.13:/hosted_engine
- If you need to add more mount options we can enter the same here. And leave the remaining settings under advance as it is.
Review the information and click Finish Deployment.
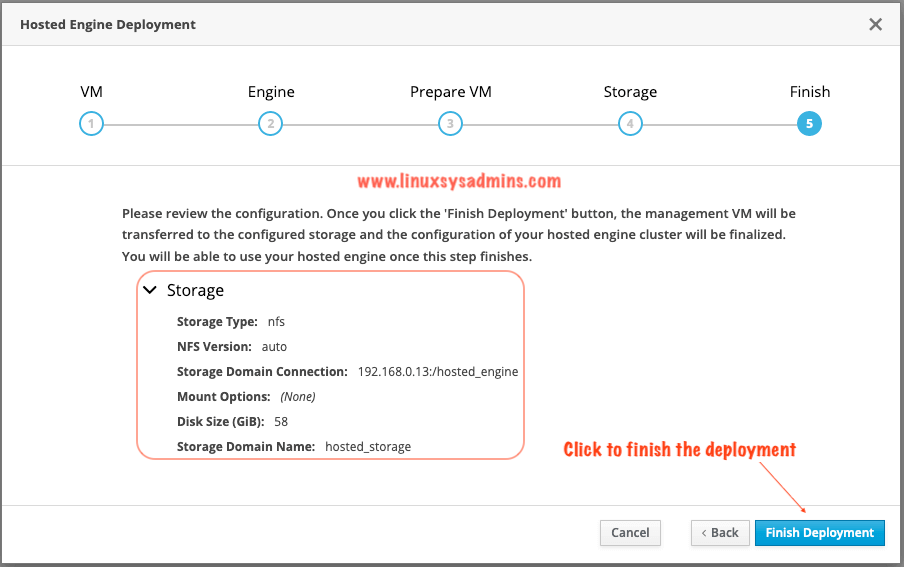
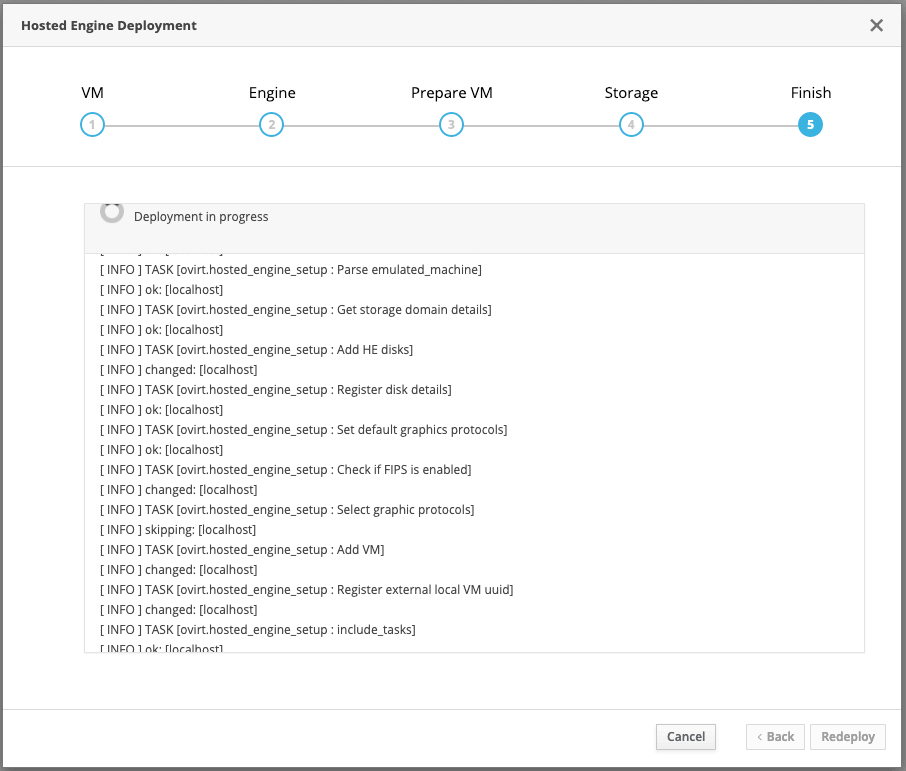
This may take long time to complete the installation of Hosted Engine.
Now you should see a new mount point on our hypervisor.
[root@pve3 ~]# df -hP
Filesystem                   Size  Used Avail Use% Mounted on
devtmpfs                      16G     0   16G   0% /dev
tmpfs                         16G  4.0K   16G   1% /dev/shm
tmpfs                         16G   34M   16G   1% /run
tmpfs                         16G     0   16G   0% /sys/fs/cgroup
/dev/mapper/pve-root         114G  7.6G  106G   7% /
/dev/nvme0n1p2              1014M  145M  870M  15% /boot
/dev/nvme0n1p1              1022M   12M 1011M   2% /boot/efi
tmpfs                        3.2G     0  3.2G   0% /run/user/0
192.168.0.13:/hosted_engine  114G  7.6G  106G   7% /rhev/data-center/mnt/192.168.0.13:_hosted__engine
[root@pve3 ~]#
Click close to exit from the deployment.
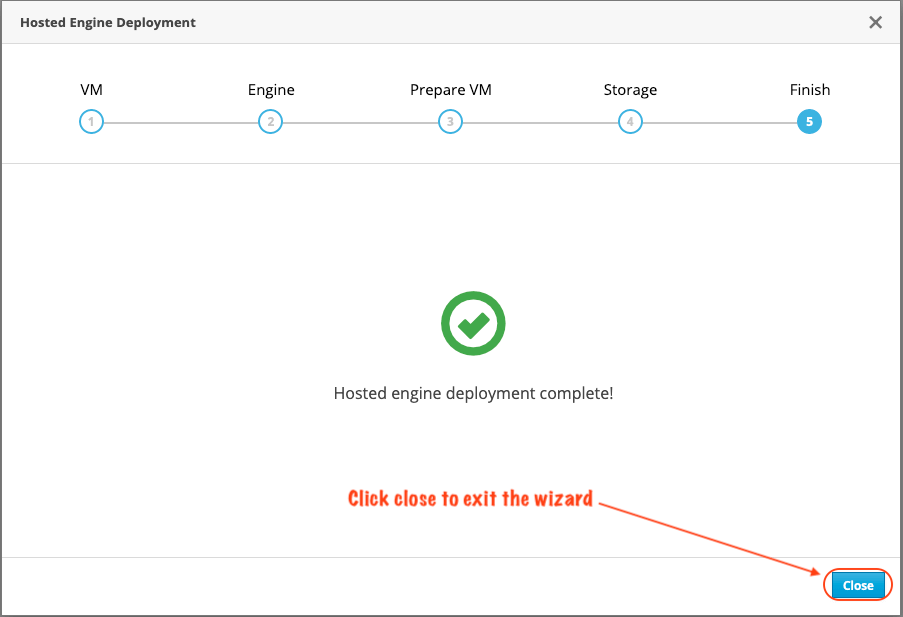
Click Yes to exit from the wizard.

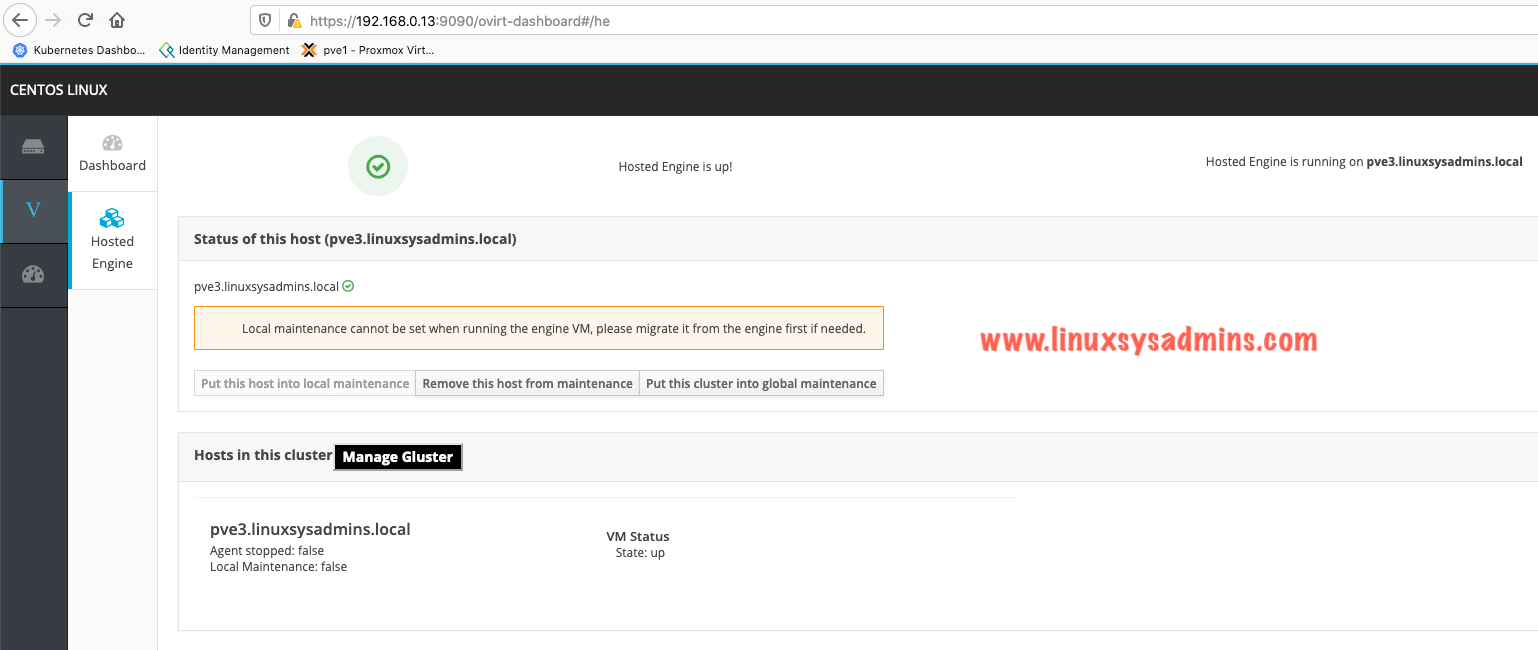
After exiting from the setup wizard we can see the Hosted Engine status from Cockpit it self.
SSH into the Ovirt Manager and verify the memory and mount points.
[root@rhevm ~]# free -mh
total used free shared buff/cache available
Mem: 15G 3.1G 11G 39M 570M 12G
Swap: 8.0G 0B 8.0G
[root@rhevm ~]#
[root@rhevm ~]# df -hP
Filesystem Size Used Avail Use% Mounted on
devtmpfs 7.8G 0 7.8G 0% /dev
tmpfs 7.8G 12K 7.8G 1% /dev/shm
tmpfs 7.8G 9.0M 7.8G 1% /run
tmpfs 7.8G 0 7.8G 0% /sys/fs/cgroup
/dev/mapper/ovirt-root 8.0G 2.3G 5.8G 29% /
/dev/vda1 1014M 157M 858M 16% /boot
/dev/mapper/ovirt-home 1014M 33M 982M 4% /home
/dev/mapper/ovirt-tmp 2.0G 33M 2.0G 2% /tmp
/dev/mapper/ovirt-var 20G 450M 20G 3% /var
/dev/mapper/ovirt-log 10G 45M 10G 1% /var/log
/dev/mapper/ovirt-audit 1014M 40M 975M 4% /var/log/audit
tmpfs 1.6G 0 1.6G 0% /run/user/0
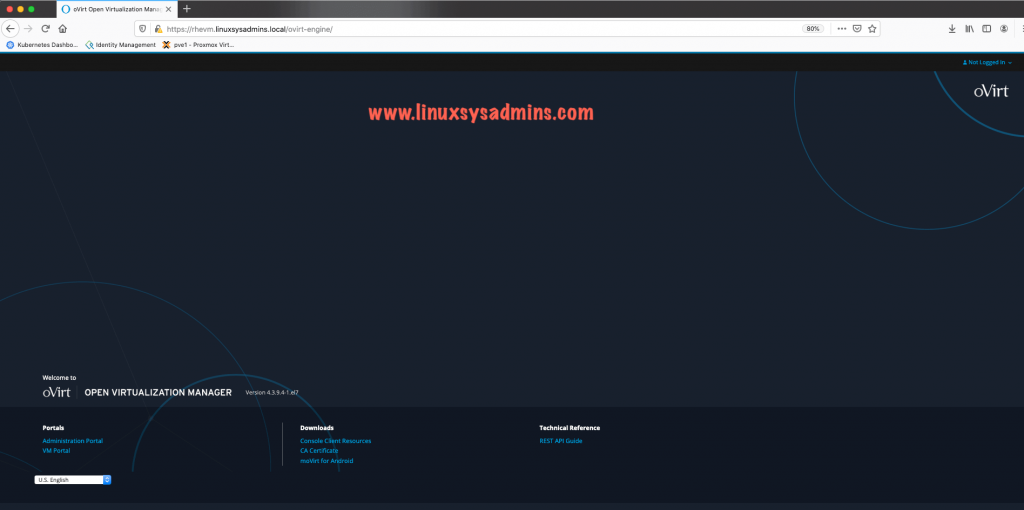
[root@rhevm ~]# Accessing Ovirt Admin Portal
It’s time to access the admin portal using the IP or domain name. In my case https://rhevm.linuxsysadmins.local/. Click on Administration portal at the bottom left side corner to access the Ovirt Manager.
Enter the credentials which we entered during the Ovirt appliance deployment.

After the login we will be redirected to below dashboard of the Ovirt Manger.
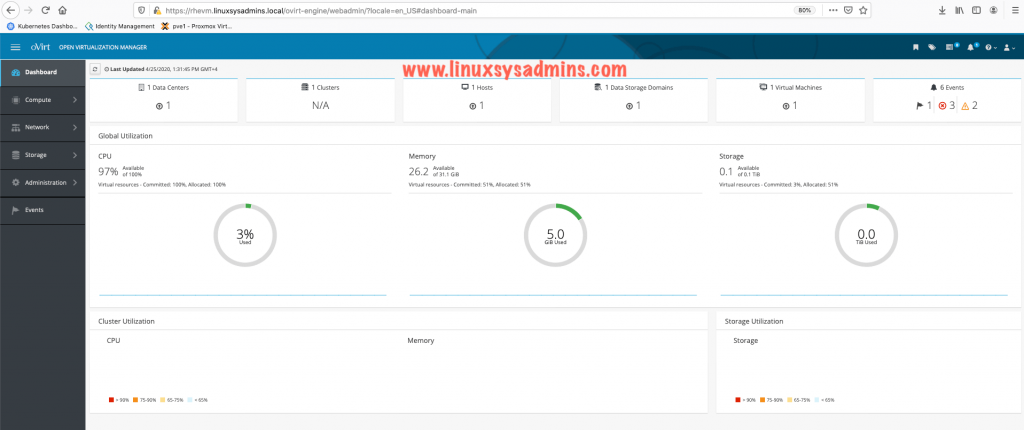
Navigate to all other options like compute, virtual machines, storage, cluster and much more to familiar with it.
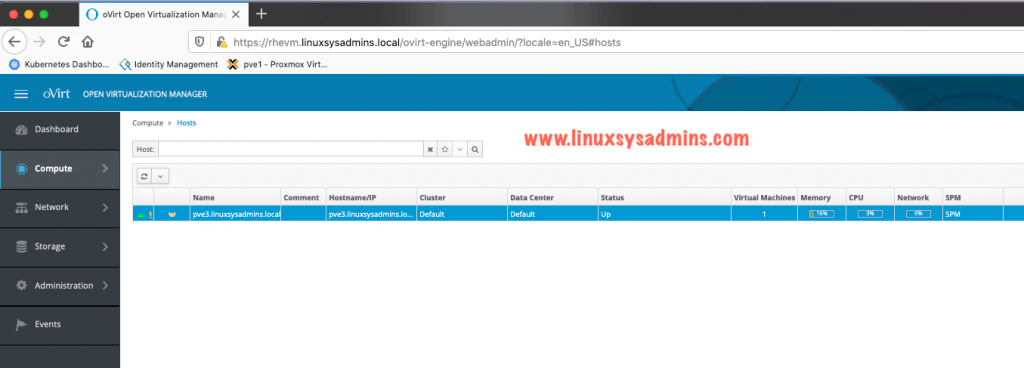
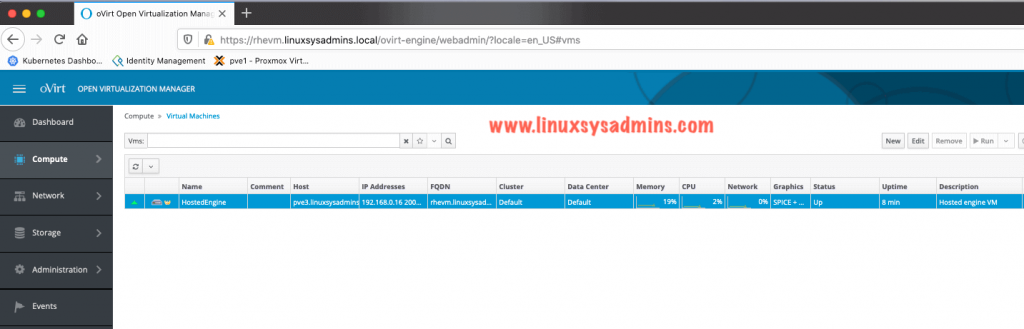
We have successfully completed with our Open Source virtualization platform. Let’s begin with setting up storage, creating virtual machines and much more.
Conclusion
Ovirt is an Open-source production-ready Virtualization environment from Red Hat. In our current guide, we have gone through how to up and running with Ovirt on top of a basic CentOS-based operating system. Let’s follow with setting up storages, additional hosts and much more.
Thank you for posting this article. I was struggling with installing 4.4 using nfs. Your instructions worked.