Table of Contents
In this guide lets see how to create a different filesystem and mount it in Linux, the following steps can be followed in almost all Linux flavours. We are focusing only on how to create a filesystem in Linux Desktop and Servers using Logical volume or RAW disks. When we install the operating system it will create with only the required filesystems which we define during installation. In case we got a requirement to create a new filesystem this guide will help with it.
To know all mkfs.* commands press TAB TAB to list all the enabled commands in Linux. In this guide, we are covering with only ext4 and XFS.
[root@fileserver ~]# mkfs
mkfs mkfs.cramfs mkfs.ext3 mkfs.minix
mkfs.btrfs mkfs.ext2 mkfs.ext4 mkfs.xfs
[root@fileserver ~]# mkfs
Creating a filesystem in two methods:
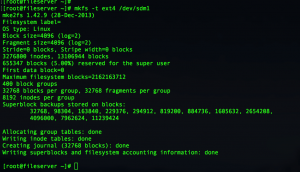
We can create any filesystem using “mkfs” command with the option “-t“. Even not specifying the type of filesystem we can create one using available commands like “mkfs.ext2, mkfs.ext3, mkfs.etx4, mkfs.xfs, mkfs.btrfs, mkfs.minix”.
- -t To specify the type of filesystem.
# mkfs -t ext4 /dev/mapper/vg01-backup
# mkfs.ext4 /dev/mapper/vg01-backup
Step 1: Creating filesystem in a partition:
Creating filesystem in a RAW disk is possible however its advice to create in a partitioned disk, While we trying on a RAW disk it will warn us before continuing with creating on a RAW disk.
Read more about how to “Create a partition using FDISK in Linux“.
# mkfs -t ext4 /dev/sdm1

# mkfs.xfs /dev/sdn1

Step 2: Creating XFS filesystem:
To create an XFS file system under any one of logical volume use with “mkfs.xfs” by following device name. Even we can accomplish this one by using only “mkfs” command with “-t” option and argument as “XFS” by the following pointing to a logical volume.
# mkfs.xfs /dev/mapper/vg01-data
# mkfs -t xfs /dev/mapper/vg01-data

Step 3: Getting information about created XFS filesystem:
Once done with creating the filesystem it will display a summary it. However, if we need to know filesystem information in future we can use “xfs_info” by following device name.
# xfs_info /dev/mapper/vg01-data

Step 4: Mounting the XFS filesystem.
To mount a created filesystem first we need to create with a mount point. Mount points are just a directory we used to mount devices which contain valid filesystems. Without creating the filesystem in a device we can’t mount them to any directory (mount point).
Here we are using /data as mount point and mounting the created filesystem from logical volume (vg01-data).
# mkdir /data
# mount /dev/mapper/vg01-data /data/

Step 5: Listing the mounted filesystem:
To list the mounted filesystem use df -hP by pointing to the mount point.
# df -hP /data/
Click here to read more about DF Command and usage in Linux.

Step 6: Getting the mount point information:
Once we mounted the filesystem, we need to create a fstab entry to make the mount point persistent during the server reboots.
To get the mount information cat the file “/etc/mtab” we will get mounted filesystem information from mtab similar to FSTAB entry. This will save our time only by replacing few options in fstab entry.
I am just doing a cat on mtab file and getting only with the last line about my recently mounted filesystem.
# cat /etc/mtab | tail -1

Step 7: Creating the persistent mount point:
To make it persistent we need to add the “Device Name, Mount point, Type of filesystem, Mount options and FS check” entry in FSTAB which copied from /etc/mtab output. Edit and append at the end of the FSTAB file and make changes to filesystem options by replacing with defaults. Save and exit from fstab using wq!.
# vi /etc/fstab

Step 8: Verify FSTAB entry in Linux
Once saved and exit from FSTAB make sure to verify the entry we made. By just doing a cat on FSTAB and listing only the last (-1) line using “tail” command.
# cat /etc/fstab | tail -1

That’s it we have successfully completed with creating and mounting a filesystem in Linux servers.
Conclusion:
This required in our day to day operations by creating a filesystem in Linux Server, We have seen how to create an FS in Linux server from scratch using a Logical volume and RAW disk. In future filesystem creation topic, we will cover with more advanced options, Till then subscribe to our newsletter to get the regular updates. We are expecting your feedback in below comment section.
