Introduction
In our previous Pacemaker Linux cluster setup, we have gone through CLI mode of configuration. However, let’s see how to add those Pacemaker clusters from a graphical mode. Let’s see how to use the Pacemaker Web UI.
The Web Interface has a lot of limitation while comparing to CLI. We have listed a few available options.
- Creating a new cluster
- Add existing cluster
- Deleting the cluster
- Creating a fencing device
- Creating resources
- Assigning permission on cluster
- Configuring Access control list
If you have not yet started with setting up a cluster from CLI have a look into below URL.
Install and configure High Availability Linux Cluster with Pacemaker on CentOS 7.6
In case, already done with CLI continue reading.
Accessing the Pacemaker Web UI (GUI)
By default use the hostname or IP with the port number to access the cluster GUI.
https://192.168.107.200:2224/loginNavigate to the Pacemaker Web UI.
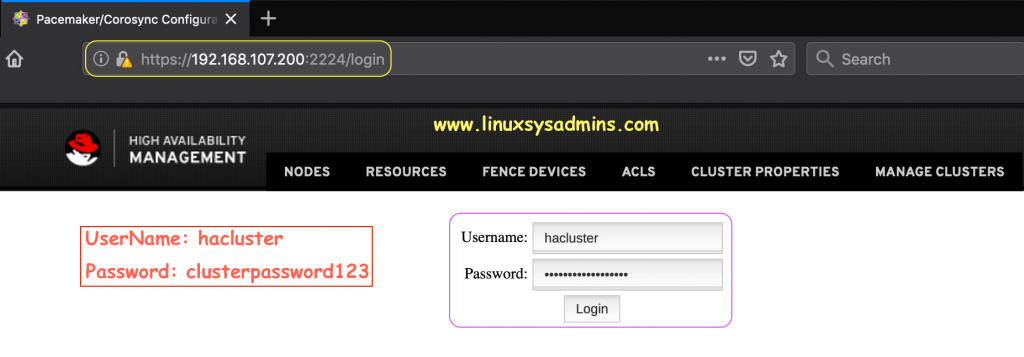
While setting up we used the Username “hacluster” and Password: “clusterpassword123“, use the credentials to access the GUI.
Add the Cluster from Pacemaker web UI (GUI)
Once login from the GUI we will get the options to add the existing cluster are creating a new cluster. Click on “Add Existing” to add our already created cluster.
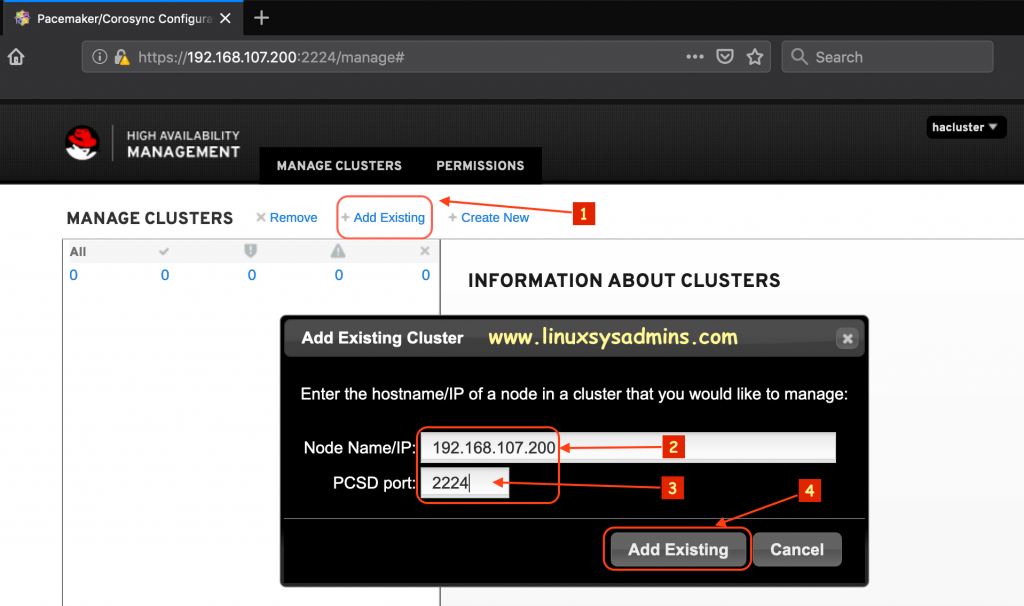
- Click “Add Existing” to add the existing cluster created from CLI.
- Use the IP address of the server.
- 2224 used by PCSD for GUI and port to port communication.
- Click to add the existing cluster in GUI.
Creating a Pacemaker Linux cluster from GUI is similar by clicking on “Create New“.
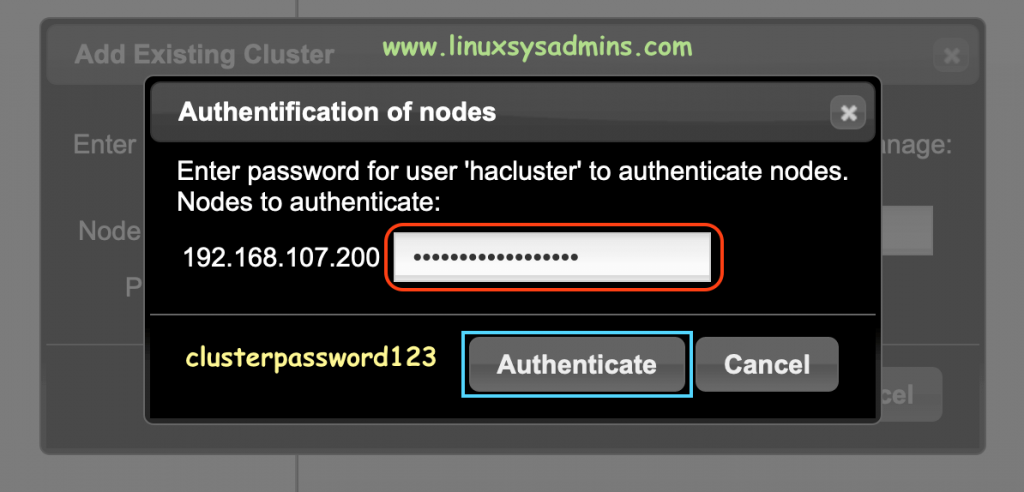
Authenticate using cluster user
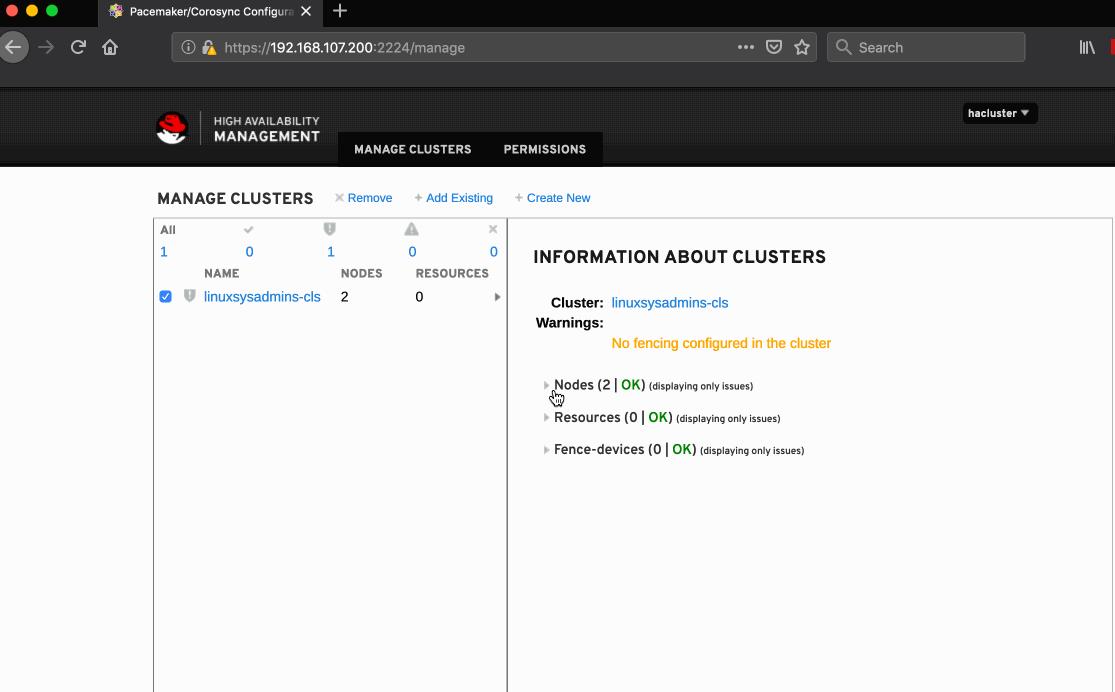
Listing the added Cluster
Once we click on “Authenticate” the cluster will be added in GUI. By clicking on the cluster name from left side pane we will get more information about it in the right-hand side pane.
We have created a basic cluster, in upcoming guides let see how to create a resource, fencing, etc. Refer the below figure for more options.
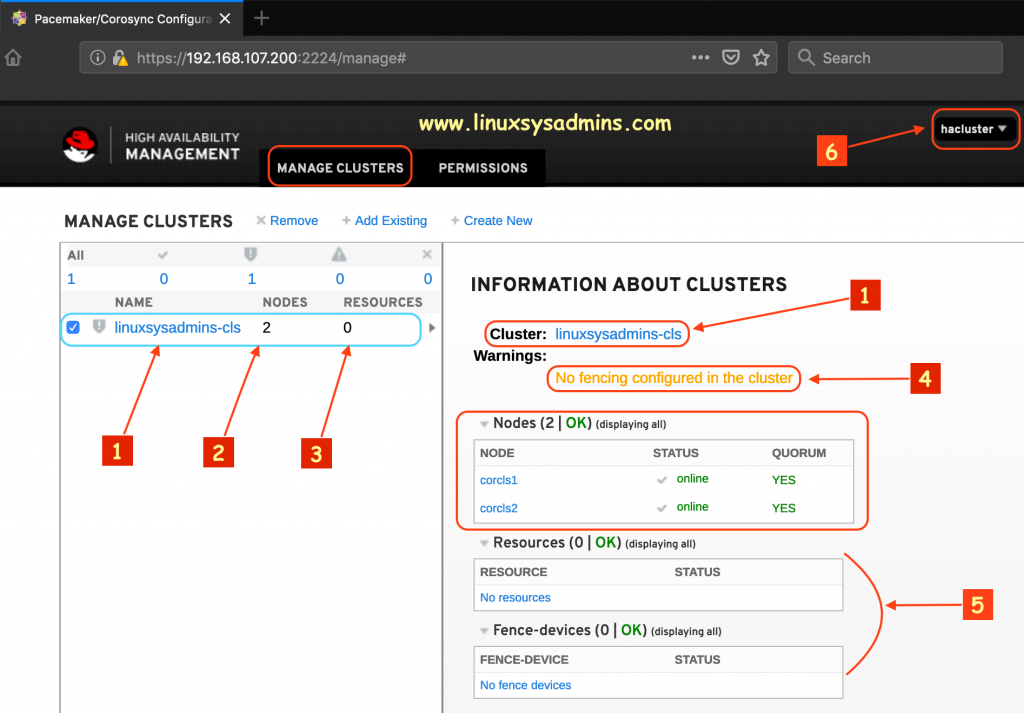
The status of the nodes in the cluster looks online. The quorum for those two nodes is in place.
- Name of the cluster, click on it for information.
- The number of nodes in the cluster.
- Numbers of resources configured, we have not yet configured one.
- Status of configured fencing.
- Configured resource/Fencing devices.
- Click to logout the session.
Get to know each Node
By clicking on the NODES tab from the top menu will list all the available nodes in the current cluster. We can manage the services and check the status of uptime and cluster services.
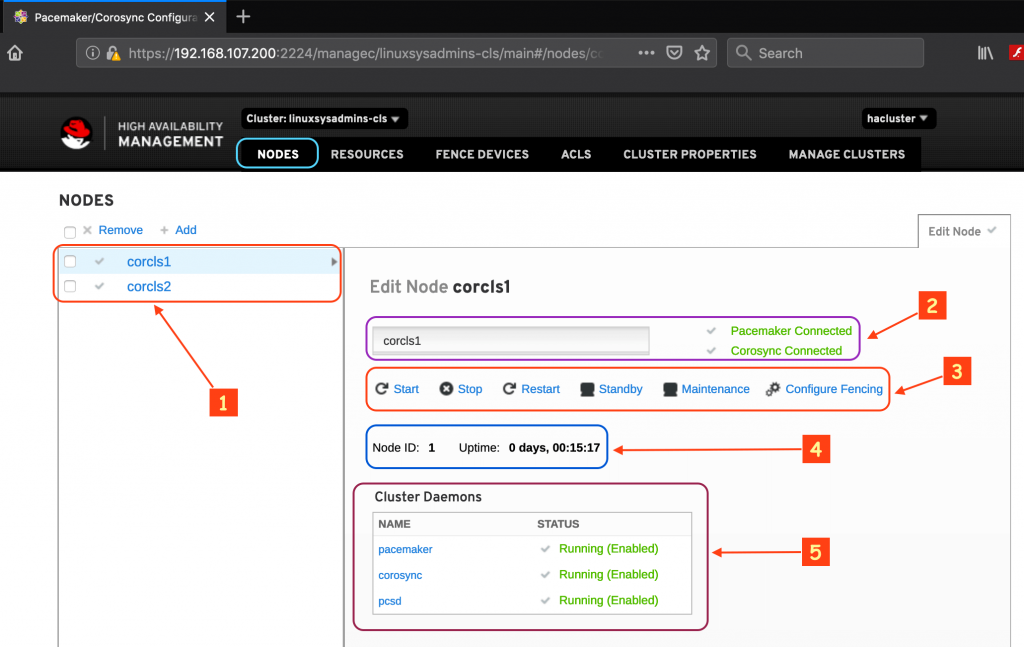
Click on “NODES” from the top menu to explore the available options for each node.
- List of available nodes in the cluster.
- Pacemaker & Corosync service status for the node.
- Service Management option available for the node.
- Uptime of the node since started.
- Cluster Daemons status.
Removing a Cluster
In case, if you need to remove a cluster from the GUI. Check the cluster we required to remove and click on remove from the top. By following confirm the cluster name and click on Remove Cluster(s) to remove.
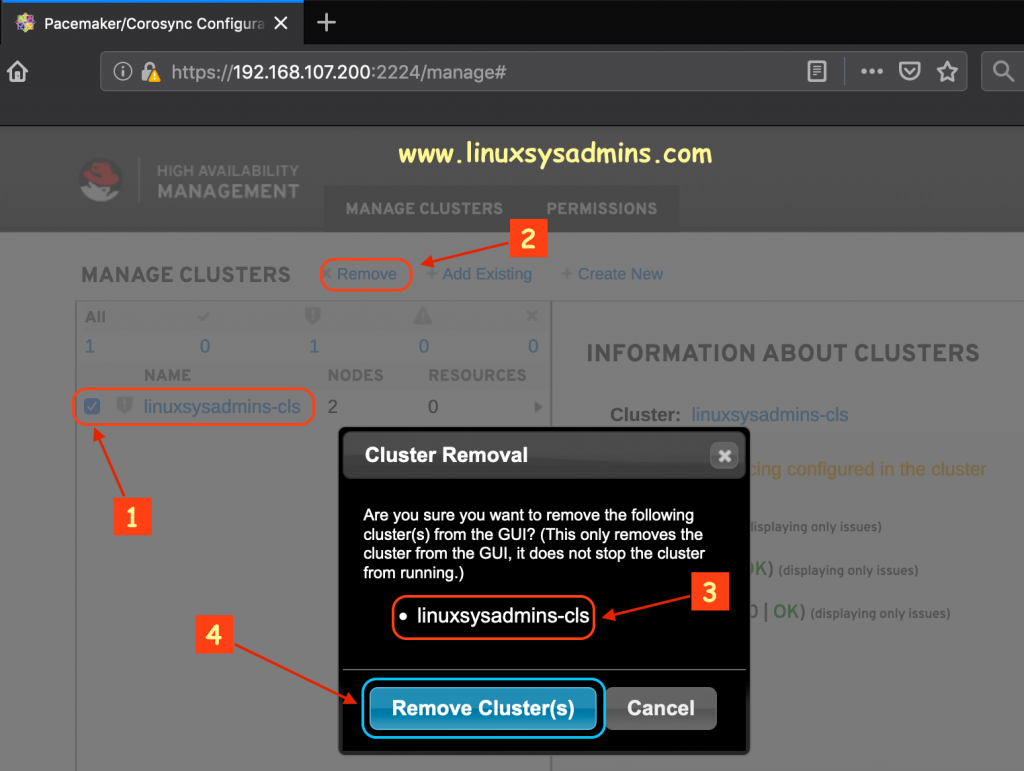
- Select the cluster needs to remove.
- Click “Remove”.
- The cluster you have decided to remove.
- Click to remove the Cluster.
Navigate to know more
Go through the TABS to explore the available options.
Will cover these in upcoming topics.
Just an overview
All the above steps are shown in gif format.
That’s it, we have successfully added the existing cluster in GUI.
Conclusion
We have seen how to add a cluster from GUI, the steps only shown how to add an existing cluster created from CLI. Will cover up how to create a new cluster from the graphical mode.