Introduction
In our previous guide, we have seen how to install and create Stratis layered storage pool and file systems. Now let us see how to manage Stratis by adding new disks to the existing pool and adding cache disk. By following will cover with removing pools and file system.
Read more about Stratis layered storage:
Adding an additional disk to the pool
It’s super easy to add a new block device to existing pool under Stratis management. In our setup we have 4 disks in “data01_pool”, now we required to extend the space in the pool by adding a new disk. Use the option “add-data” to add a new disk.
# stratis pool list
# stratis pool add-data data01_pool /dev/sdf
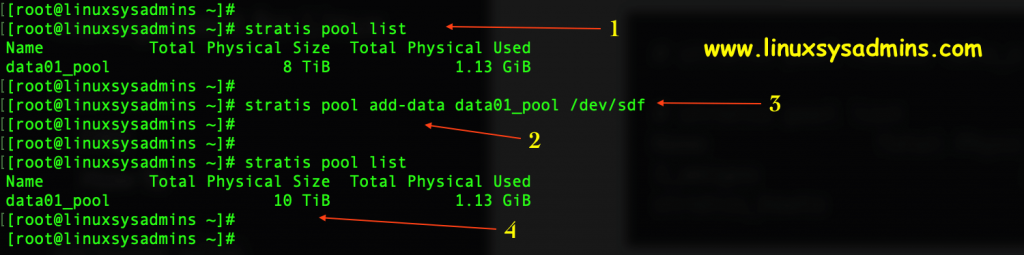
# stratis pool listIn the above figure we can notice before adding a disk its total physical size is “8 TB”, And after adding a “2 TB” disk the size has been extended to “10 TB”.
- Listing the existing Stratis pools.
- Adding an additional disk to the existing pool.
- The device we are about to add to the existing pool.
- The total size of the pool after adding a new disk.
Adding a Cache disk to Stratis pool
To improve the performance of storage Stratis provided with an option to add a cache disk. Caching can be configured for redundancy or non-redundancy, write-back and write-through modes. This step will be similar to adding an additional disk by replacing option “add-cache”.
# stratis blockdev list
# fdisk -l /dev/sdg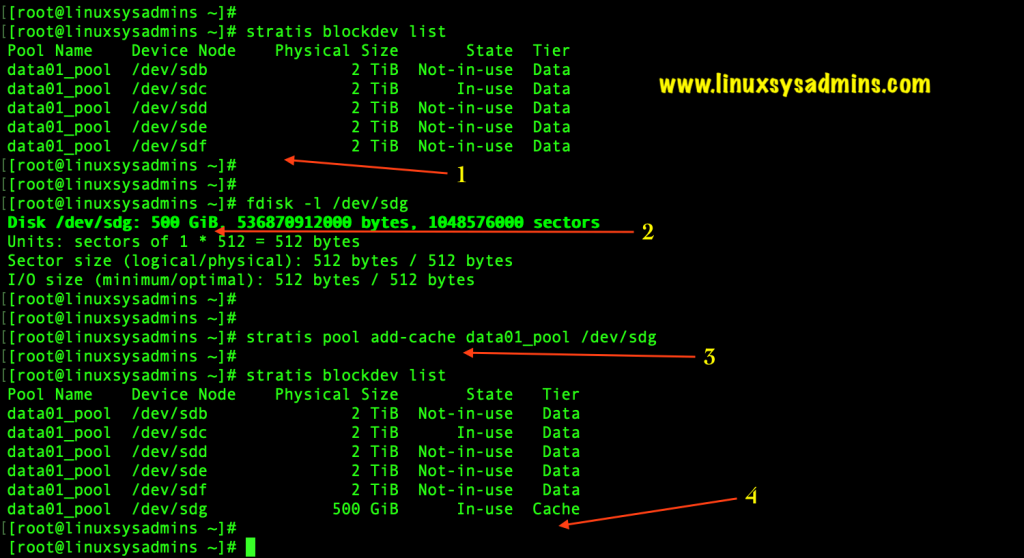
# stratis pool add-cache data01-pool /dev/sdg
# stratis blockdev list- The existing list of block devices under the pool.
- 500 GB Disk we are about to add in the pool.
- Adding a cache disk using option “add-cache”.
- Added cache disk in the data pool.
Renaming Pools and file systems
Stratis has the feature to rename a pool or filesystem on the fly without impacting any running setup. In case if we need to rename the pool it’s quite easy by running a single command with options and arguments.
Let us rename our current pool name “data01_pool” to “data01_pool_old”.
# stratis pool list
# stratis pool rename data01_pool data01_pool_old
# stratis pool list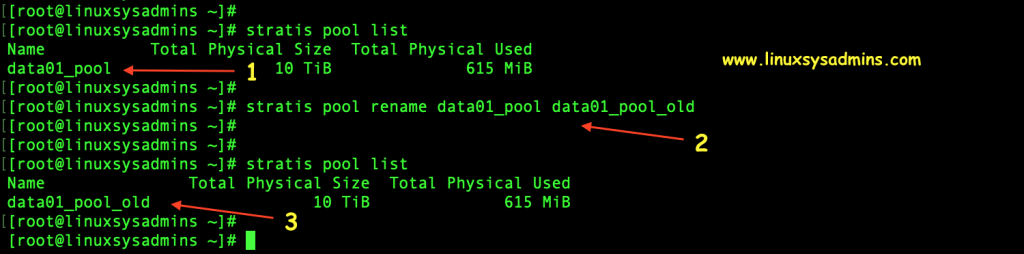
- Current Pool name needs to be renamed.
- The new name of the pool we are about to rename.
- Pool name after renamed.
Let us see how to rename the file System.
Renaming a file system is similar to renaming a pool. Only we need to replace the option “pool” and “filesystem” and make sure to use the correct names of pool and FS if you have multiple numbers in your server.

Removing a Stratis filesystem
Managing Stratis storage by removing a file system, Initially, we need to remove the fstab entry, by following un-mount the file system.
# vi /etc/fstab
# umount /user_data02
After unmounting the file system, we need to use the correct pool name with the file system which needs to be removed.
# stratis filesystem list
# stratis filesystem destroy data01_pool user_data02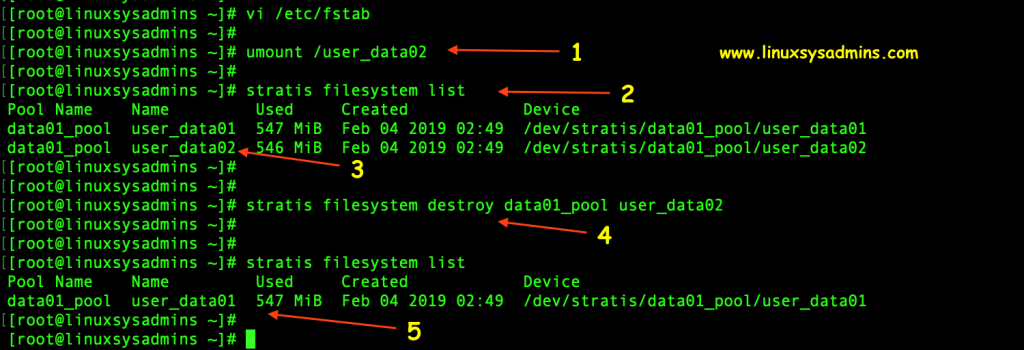
- Unmount the file system.
- List the file systems created using S
tratis . - Choose the file system we need to destroy.
- Use the “destroy” option with Stratis command.
- List to verify the destroyed file system.
Removing a Stratis Pool
To remove a Stratis pool we should remove the file system created under it. In case if we try to remove a pool without
[root@linuxsysadmins ~]# stratis pool destroy data01_pool_old
Execution failure caused by:
BUSY: filesystems remaining on pool
List the available pool and destroy it.
# stratis pool list
# stratis pool destroy data01_pool_old
# stratis pool list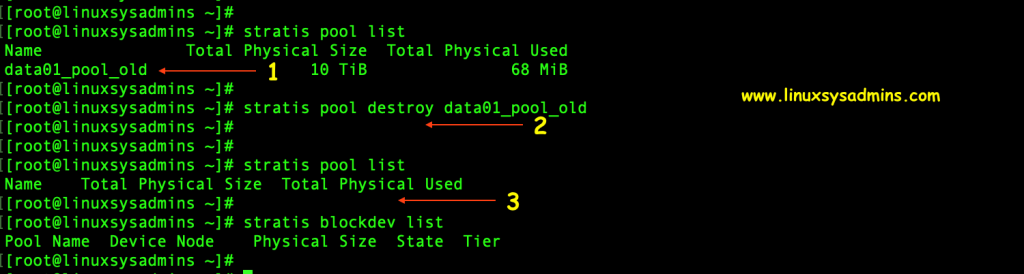
- List to verify.
- Destroy the pool.
- Again list to verify the status.
Create a Snapshot in Stratis
Stratis comes with a major required solution to take a snapshot of any file system. Let us take a snapshot of the existing file system in our server.
# stratis filesystem list
# stratis filesystem snapshot data01_pool_old user_data01 user_data01_snapshot
# stratis filesystem list data01_pool_old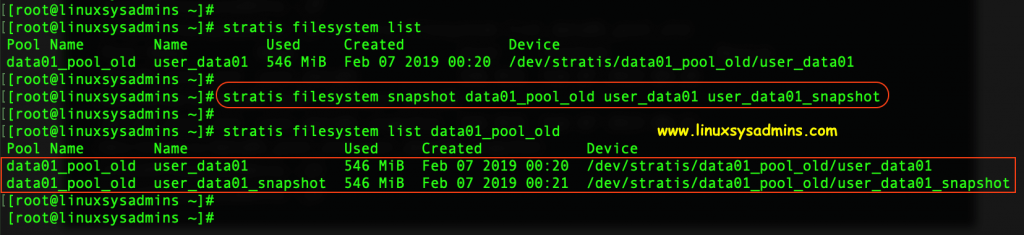
That’s it, Managing Stratis layered storage system is easy than any other storage management tools.
If you face any issue or interested to contribute to Startis you can reach GITHUB.
Conclusion
We have seen how to manage Stratis layered storage by adding disks and renaming them. In our future article will cover with more Stratis topics. Subscribe to our newsletter and give your feedback or query in below comment section.
Great article Babin.
You have a spelling mistake which you want to correct btw: destory
# stratis filesystem destory data01_pool user_data02
should be
# stratis filesystem destroy data01_pool user_data02
BTW, when you’re adding a Cache Disk, can you add a Mirrored Caching disks (like in ZFS)?
This would be important with writeback in case the cache disk dies… could result in dataloss
Cheers
@Zubin,
Thank you for pointing typo, It’s cleared.
Unfortunately, no the mirrored caching options is not available in current version, May be we can expect more features in up-coming releases.
Thanks & Regards,
Babin Lonston
How can I move data to another physical disks? For example, I need to migrate data to a new SAN.
Thank you very much.
@David, For time being Stratis not came up with those feature than listed above, Soon they will bring more added features. Will update the articles once we get one.
Thanks & Regards,
Babin Lonston