Introduction
CentOS Linux 8.0, It’s been last 4 months we are waiting for CentOS 8 Linux. By 2019-05-07 RHEL 8.0 has been released however we need to have a paid subscription for RHEL updates and support. CentOS provides everything similar to RHEL 8 free of cost.
CentOS 8 available under three architectures x86_64, ppc64le(Little Endian) and aarch64 (ARM64). The packaging format of CentOS 8 has been moved from yum to DNF/YUM4. As Yum App stream and modules available for RHEL 8 everything applied for CentOS 8 as well. Moreover, CentOS 8 out with kernel version 4.18. For package stream, it provides a separate ISO with 8 GB in size.
Downloading CentOS 8
Let’s start with downloading CentOS Linux 8 ISO file from the official website from any one of your nearest mirror.
https://www.centos.org/download/mirrors/
http://isoredirect.centos.org/centos/
http://isoredirect.centos.org/centos/8/isos/x86_64/
Stream ISO download
http://isoredirect.centos.org/centos/8-stream/isos/x86_64/CentOS-Stream-x86_64-dvd1.isoIf you are planning to install on any Virtual machines its fine to use with ISO file. In case, if you plan to install on Physical servers or Laptop prepare to burn the ISO on any DVD or USB device.
For a quick app deployment its good to play around with Docker CentOS 8 image. However, still, docker images are not yet available. It will be available under https://hub.docker.com/_/centos/ soon.
# docker pull centosHardware Requirement
1 vCPU
2 GB of Memory minimum, Recommended 4 GB RAM.
10 GB of disk space, Recommended 20 GB.
Major Changes in CentOS Linux 8
- CentOS Linux 8 out with kernel version 4.18.
- Contents are available through BaseOS and AppStream Repositories.
- Yum Package Manager with DNF support included with modular content.
- The default python version will be 3.6
- Database servers like MySQL, MariaDB, Redis, PostgreSQL 9.6 and 10.
- It comes with Web servers Apache 2.4 and nginx 1.14
- CentOS 8 comes with Git, Subversion and Mercurial.
- CentOS provides OpenJDK 11, OpenJDK 8 and great java tools like Ant, Maven.
- Luks1 has been replaced with Luks2.
- The installer Anaconda can use LUKS2 disk encryption on NVDIMM devices.
- IPtables has been replaced with nftables and firewalld use nftables in the backend.
- Creating and managing VM’s from Cockpit web console is possible under CentOS 8.
- The Maximum size of an XFS file system size has been increased from 500 TiB to 1 PB.
- GCC Compiler based on version 8.2 with more support for recent C++ standard versions.
- Pacemaker cluster resource manager upgraded to upstream version 2.0.0.
- PCS configuration fully supports Corosync 3 and Knet.
- Gnome session and Gnome display manager use Wayland as the default server. Additionally, existing X.org as well available.
- Comes with LibreOffice v6.0.6.1.
- The default browser of CentOS 8 is Firefox 60.5.1.
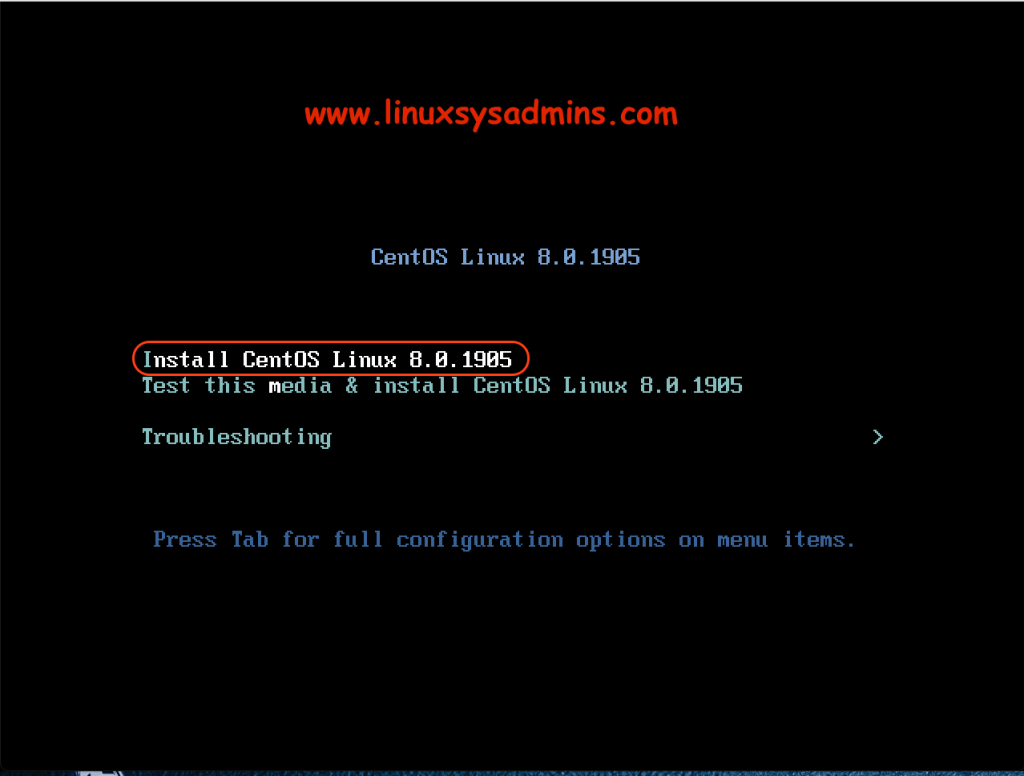
Booting from CentOS Linux 8 ISO
To start the CentOS Linux installation first we need to boot from ISO file or from the bootable USB device.
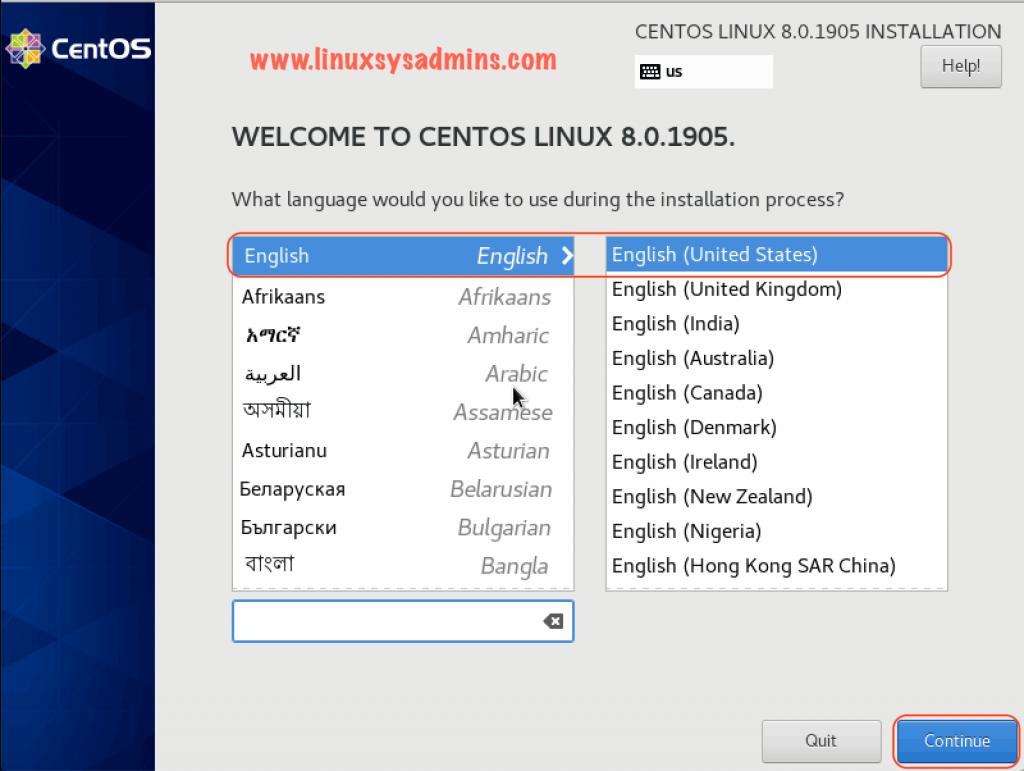
Selecting Installation Language
Choose your preferable language for the installation progress. This will be used for installation progress itself. Once the language selected click continue to proceed with the installation.
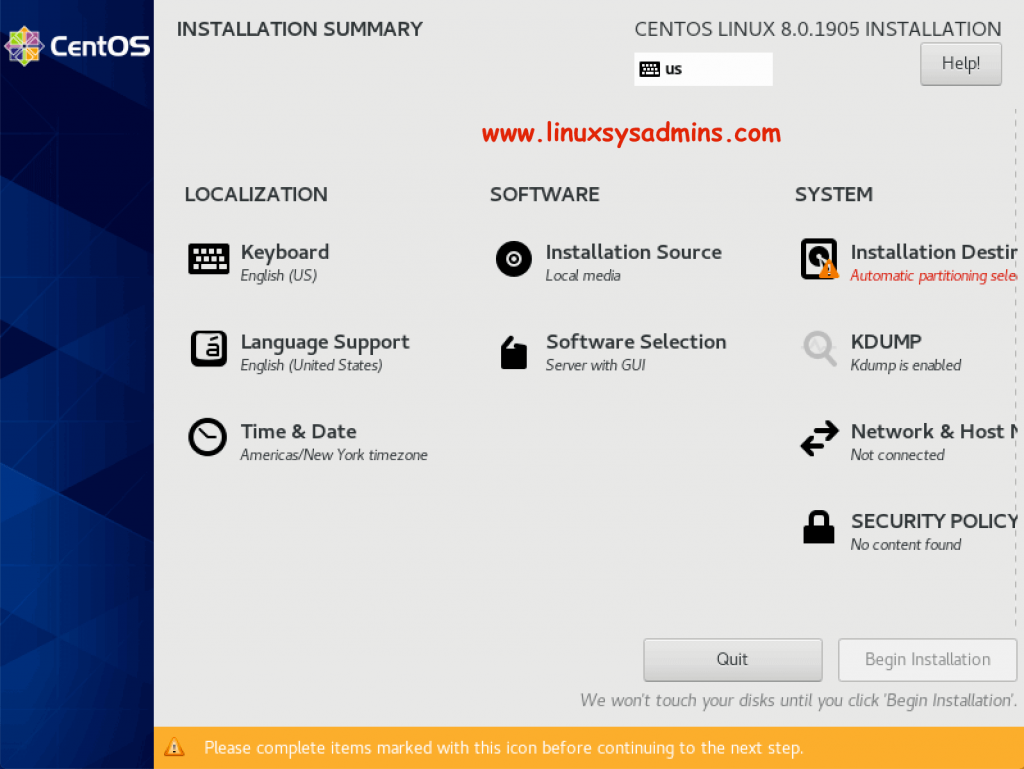
Installation Summary
Once after the language selection, we will be redirected to Installation summary windows as shown below.
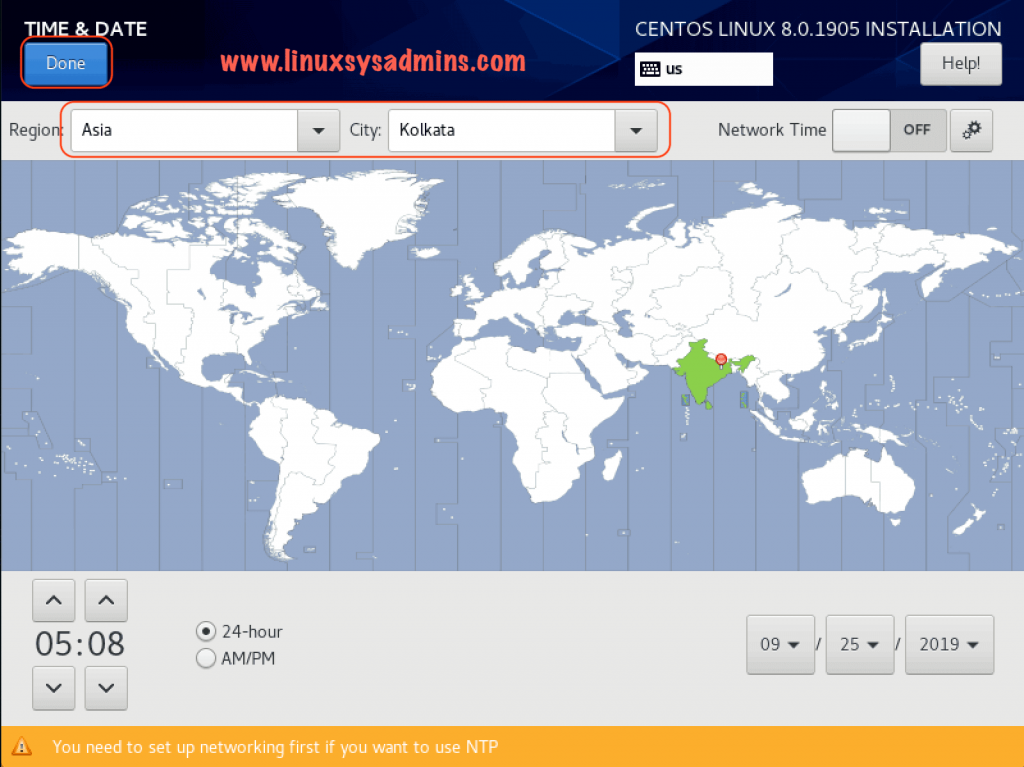
Choose TimeZone
You will be in Installation summary page, By next step select your location to configure the timezone, Click done to continue. Whenever we complete with all setup we will be redirected to Installation summary page.
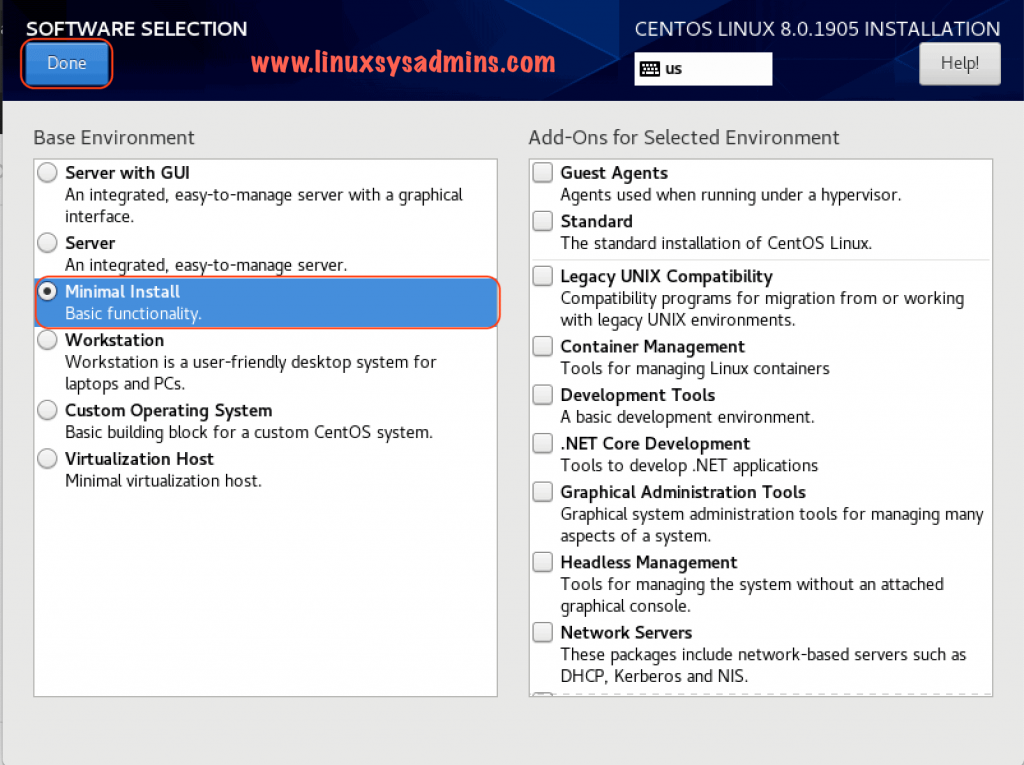
Software Selection for CentOS 8
Select the type of server we need to install. In our setup, we will proceed with a minimal operating system for demonstration purpose. However, in any environment, it’s better to start with a minimal OS setup.
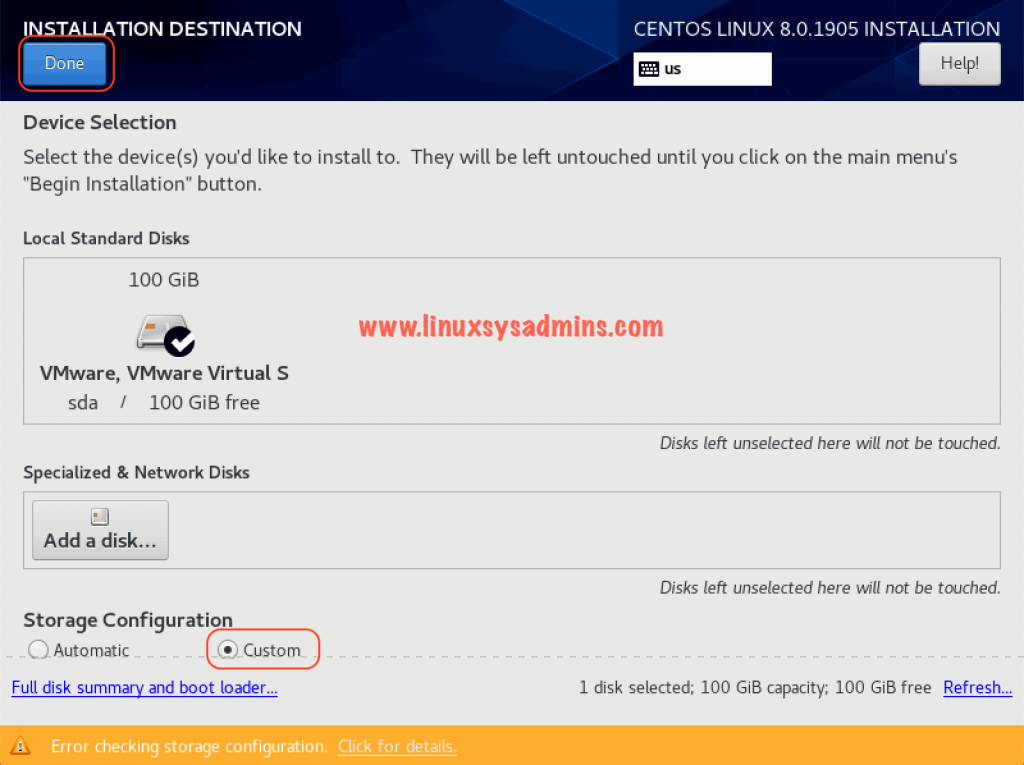
Create Partition Layout for CentOS Linux 8
To perform the installation create the required partition layouts. Let’s start with creating /boot partition. The list of partition we required to create is as follows.
| Partition | Minimum Size | FileSystem Type | Partition Type |
| /boot | 1 GB | XFS | Standard |
| / | 6 GB | XFS | LVM |
| /home | 10 GB | XFS | LVM |
| /var | 10 – 15 GB | XFS | LVM |
| swap | 2 GB | swap | LVM |
Select the disk and choose custom Partitioning.
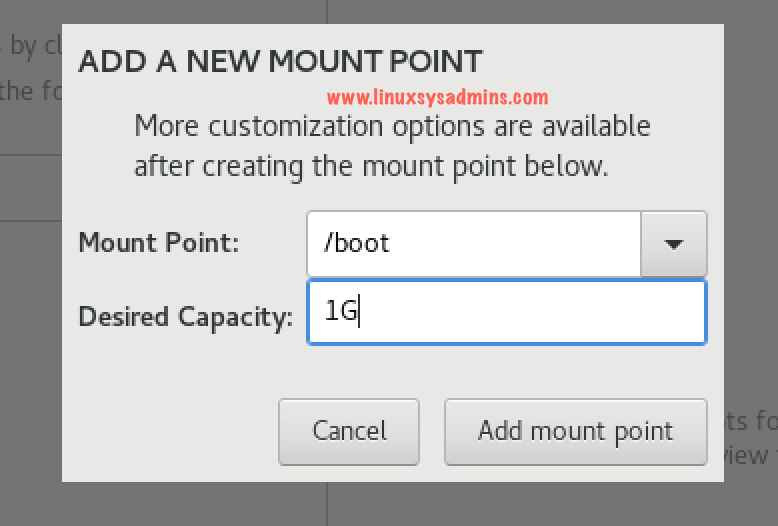
Create /boot Partition
Minimum 1 GB is fine for /boot partition. Make sure to choose the partition type as Standard and filesystem as XFS. Click the + symbol on the left side bottom corner to create the required Partitions and filesystems.
Enter the size and select the filesystem from the drop-down list.
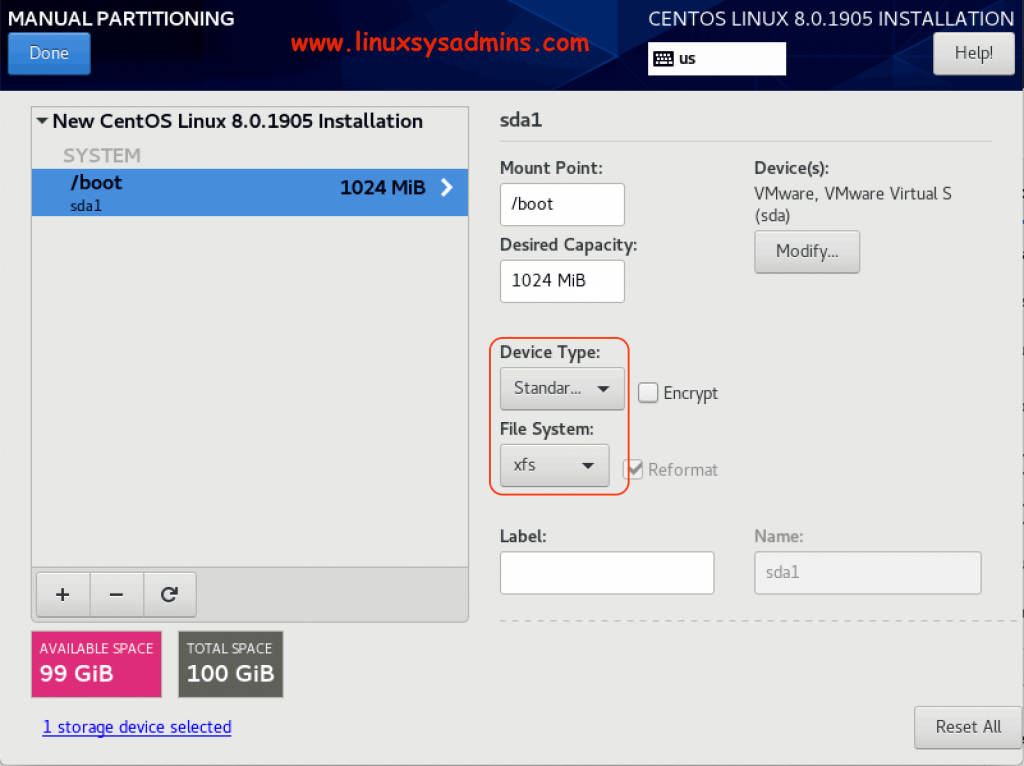
Once created we should see as shown below. Make-sure to choose the device type as standard for /boot filesystem.
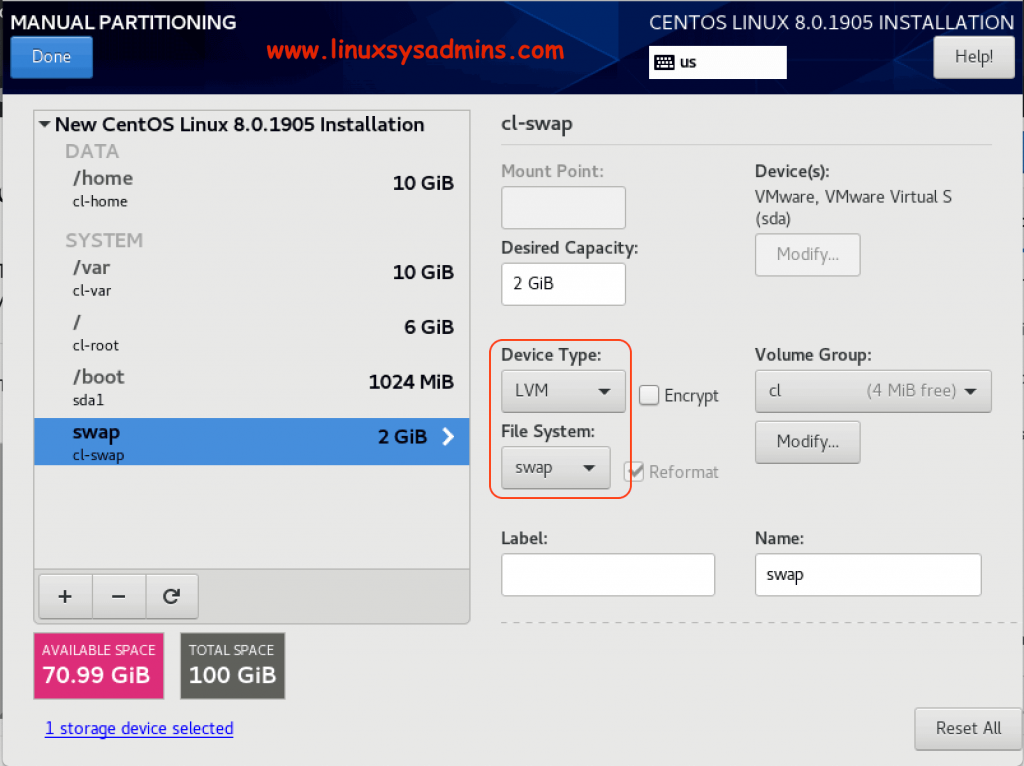
Creating Remaining Partitions
Remaining partitions are created as per above table with required Partition/filesystem type. Make sure to change the filesystem of the swap as swap.
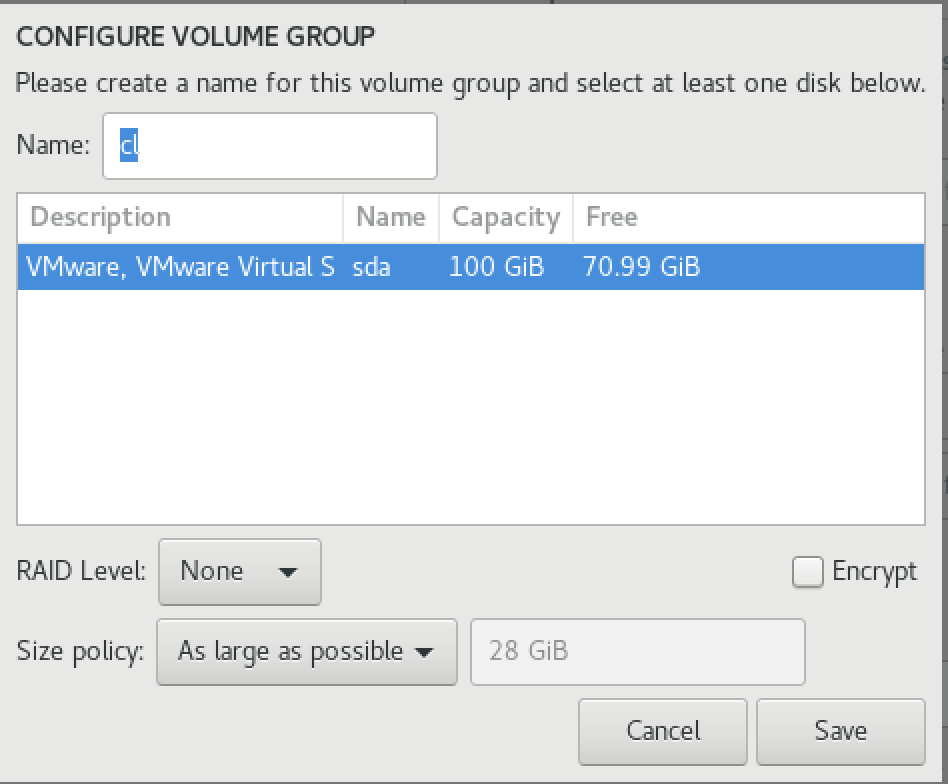
Leave Remaining space under the Volume Group
Once we create with the required filesystems leave the remaining space under the volume group for future use. Click on modify under the Volume Group.
We will get the below window. Here choose “As large as possible” from the drop-down list. If you wish to have a custom VG name other than the default “cl” you can change the same here. Once everything is done click Save to exit.
Now you should see the remaining space under Volume Group.
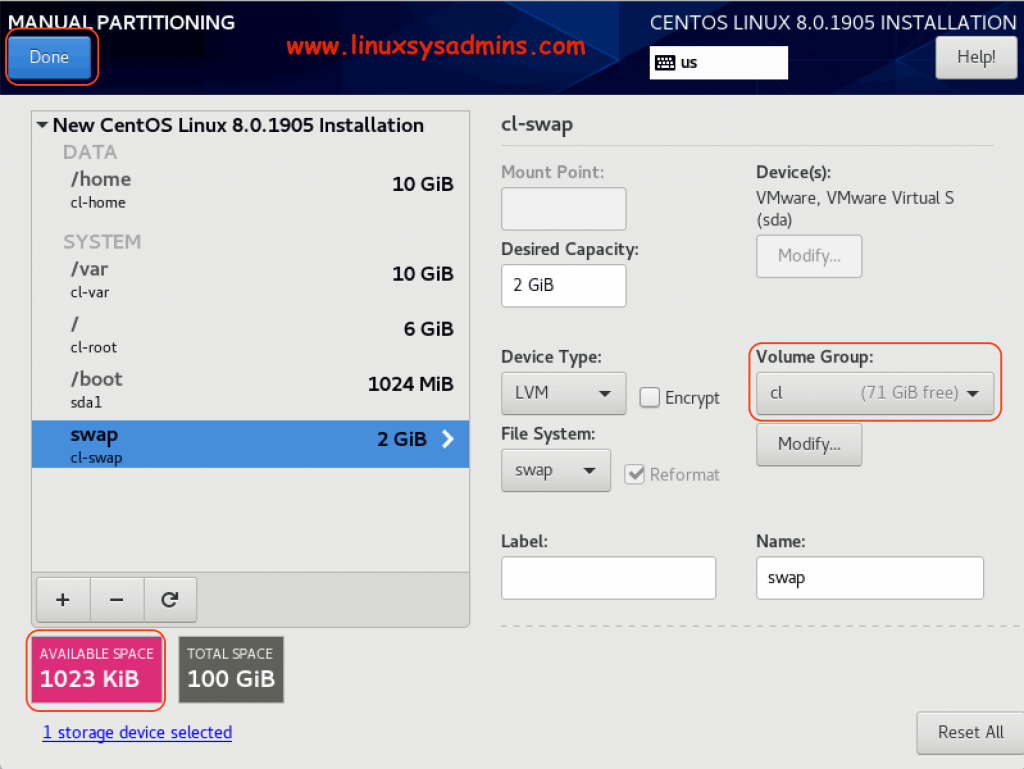
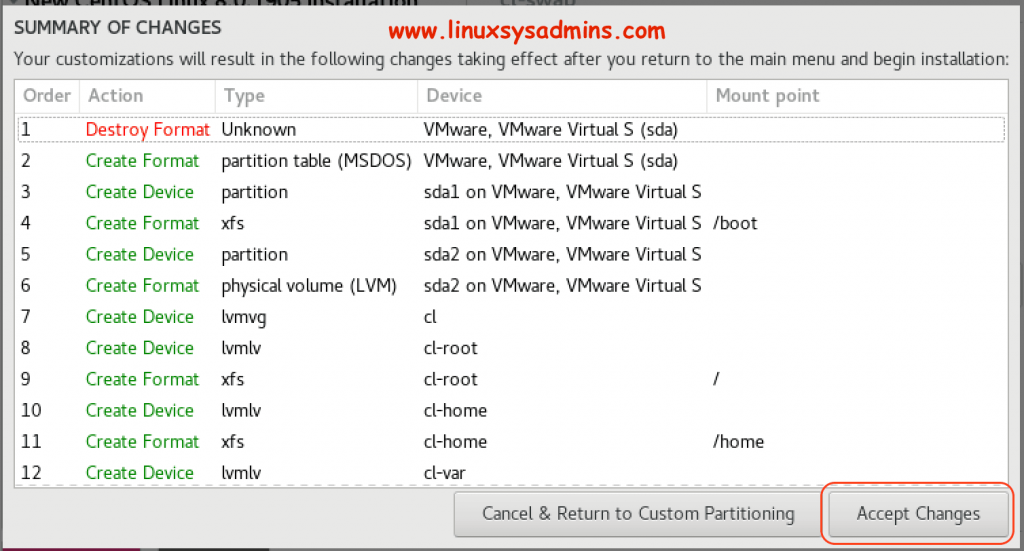
Finally, click Done to write the changes. By following it will prompt to create the partitions and filesystems, Click Accept Changes to proceed.
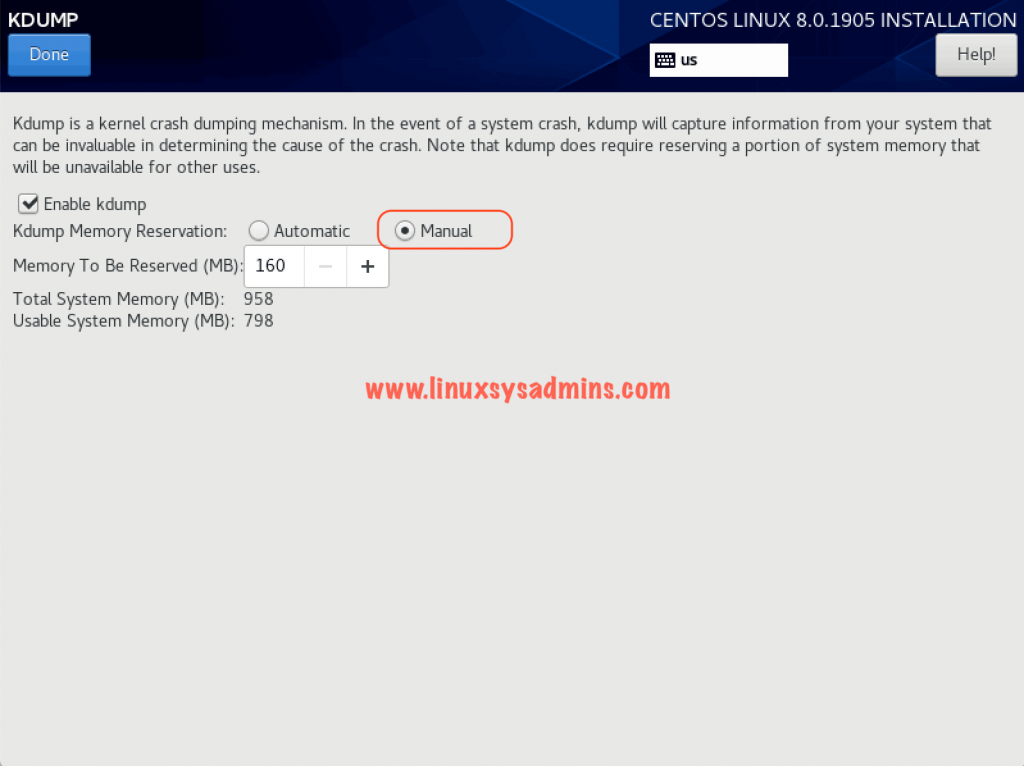
Configuring kdump
In an unexpected situation, the kernel dump will help us to pinpoint the issue. Start to configure the kdump by enabling an entering the manual memory reservation as shown below.
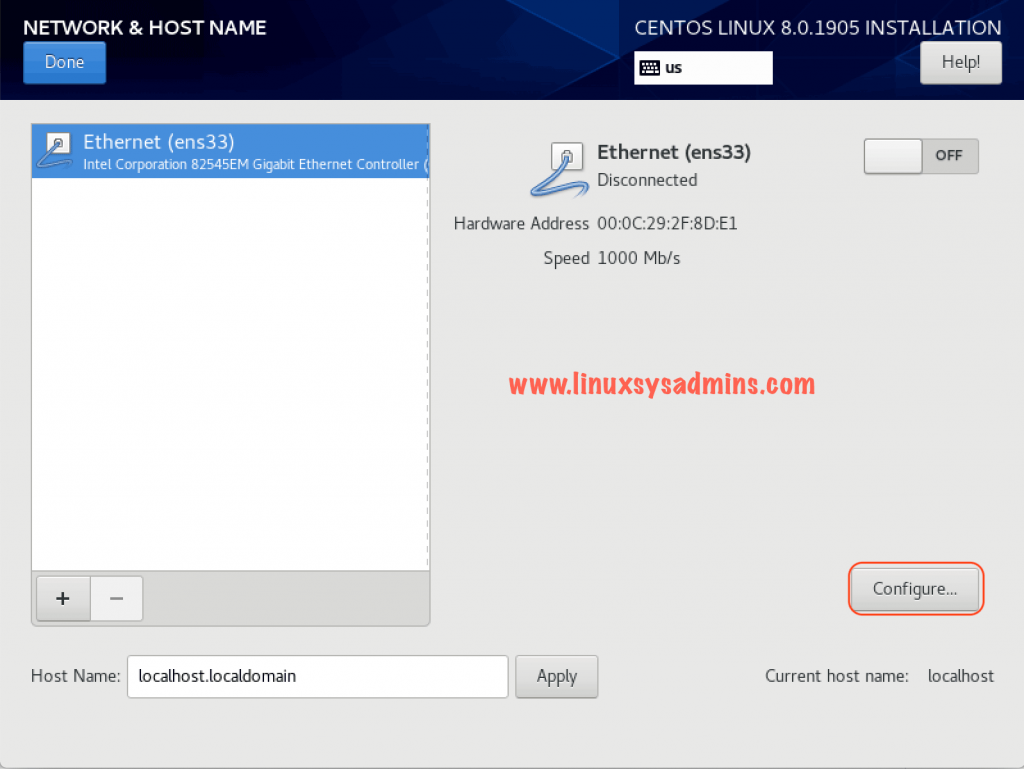
Setting up Network
Start the network configuration by configuring a static hostname and IP address. Click configure to enter the IP details for all required interfaces.
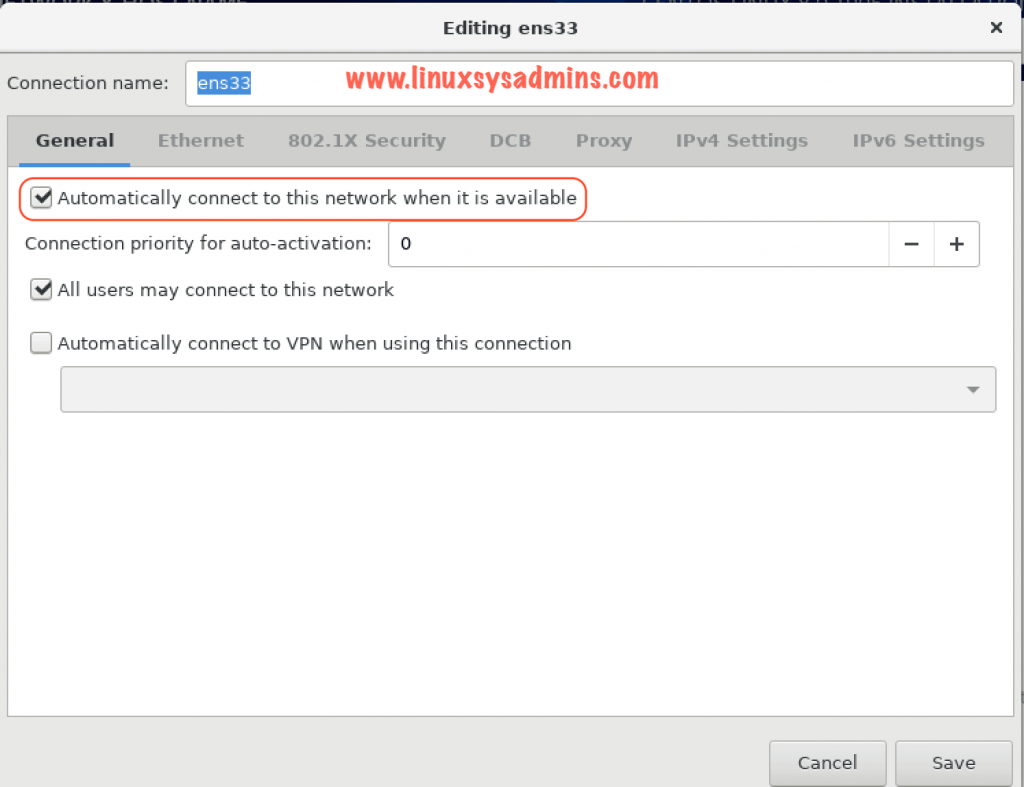
Under General tab check the option “Automatically connect to this network when it is available” to start the network automatically while server boots.
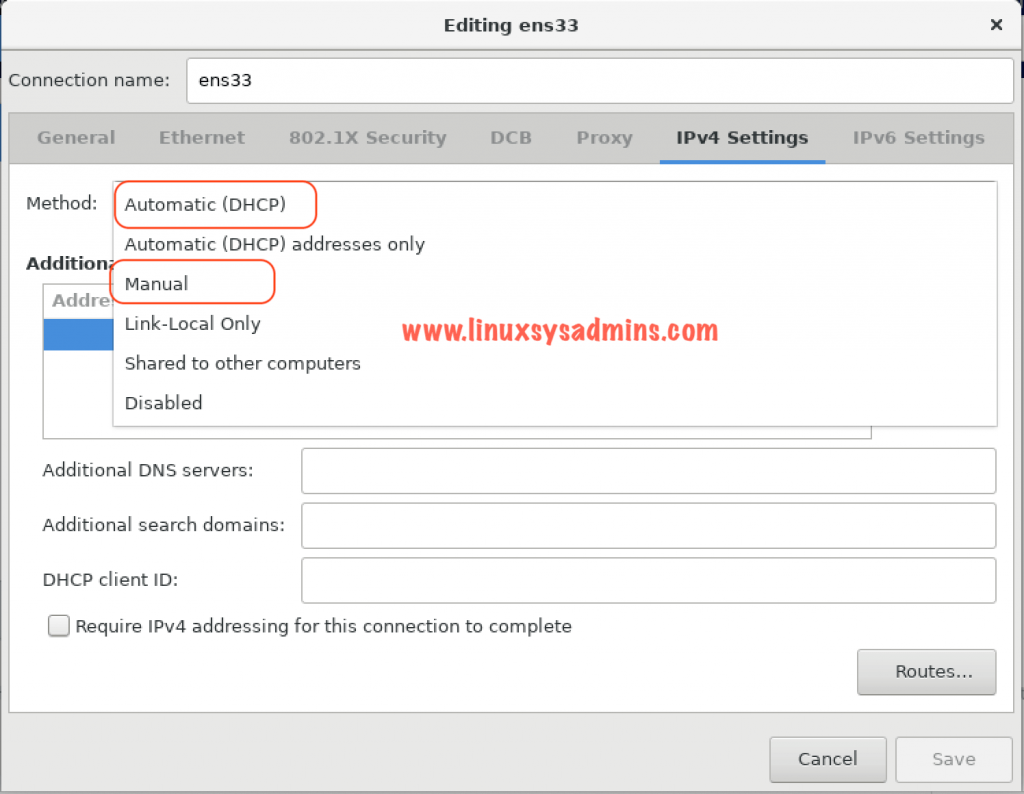
If you plan to configure Static IP address navigate to IPv4 Settings and configure the interface. In our setup, we are getting IP from DHCP.
Enter the hostname at the bottom of the window and click Apply.
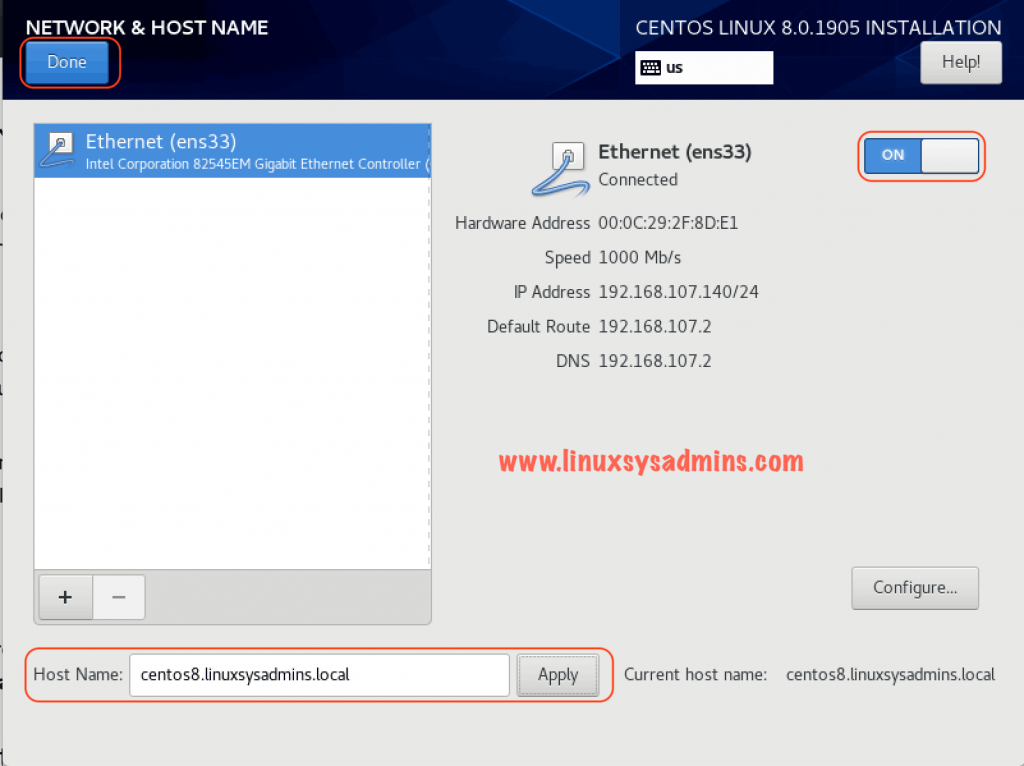
Click ON/OFF to see the changes. Finally, click the Done to make the changes and exit.
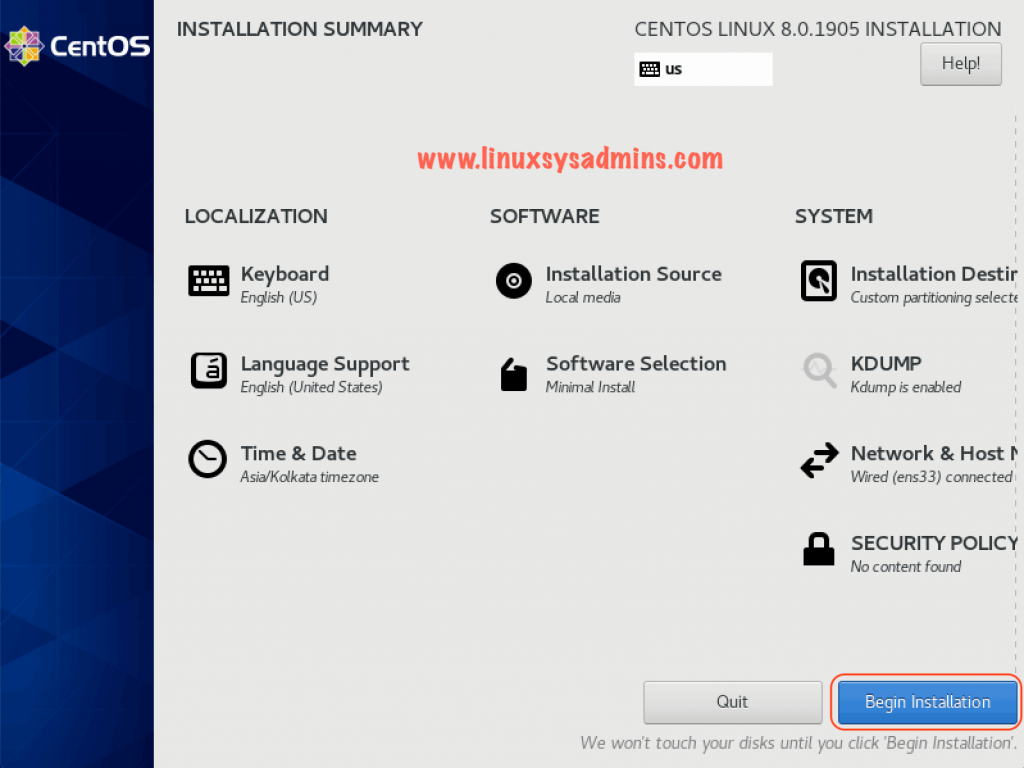
Installation Summary of CentOS Linux 8
After exiting from the setup we will be redirected to the Installation summary page. Click Begin Installation it will start to copy/install the installation files.
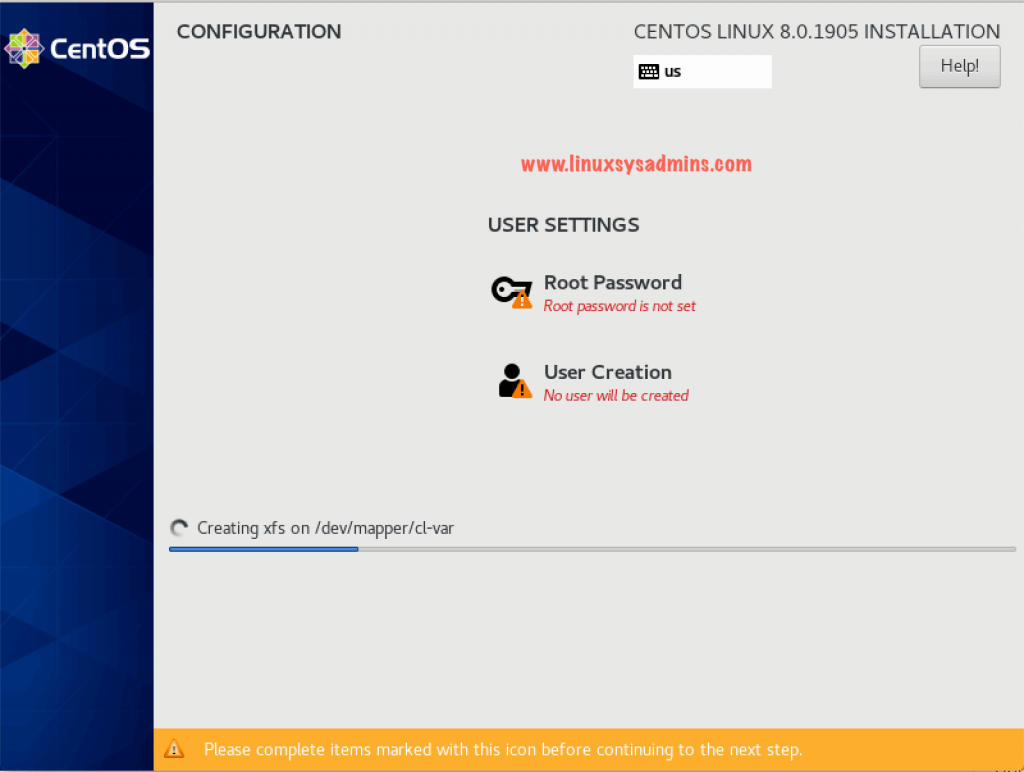
Create Root Password
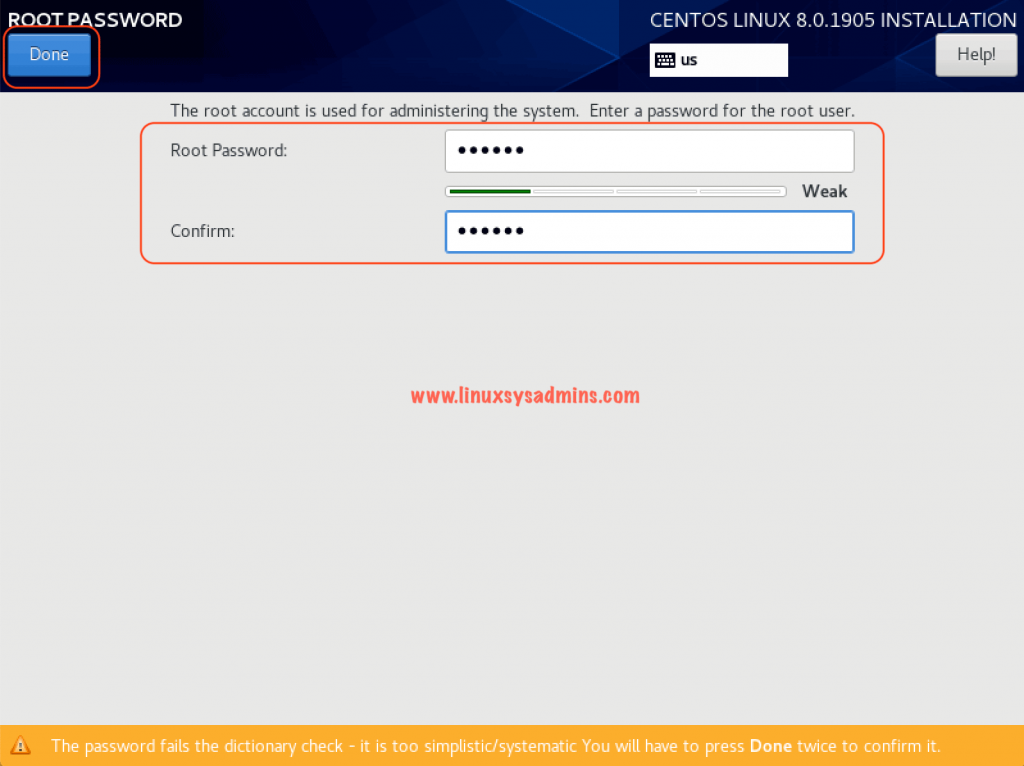
While installer copy and install the packages set the root password. Click on Root Password to set one.
Enter a strong password and confirm the same once again. Click Done to set the password.
Define an Administrative account
Other than root account the good to create an administrative account with Sudo privileges. Enter the full name, user name, and password. Check both boxes to make the account with sudo privilege.
Click Done to exit from the administrative user creation window.
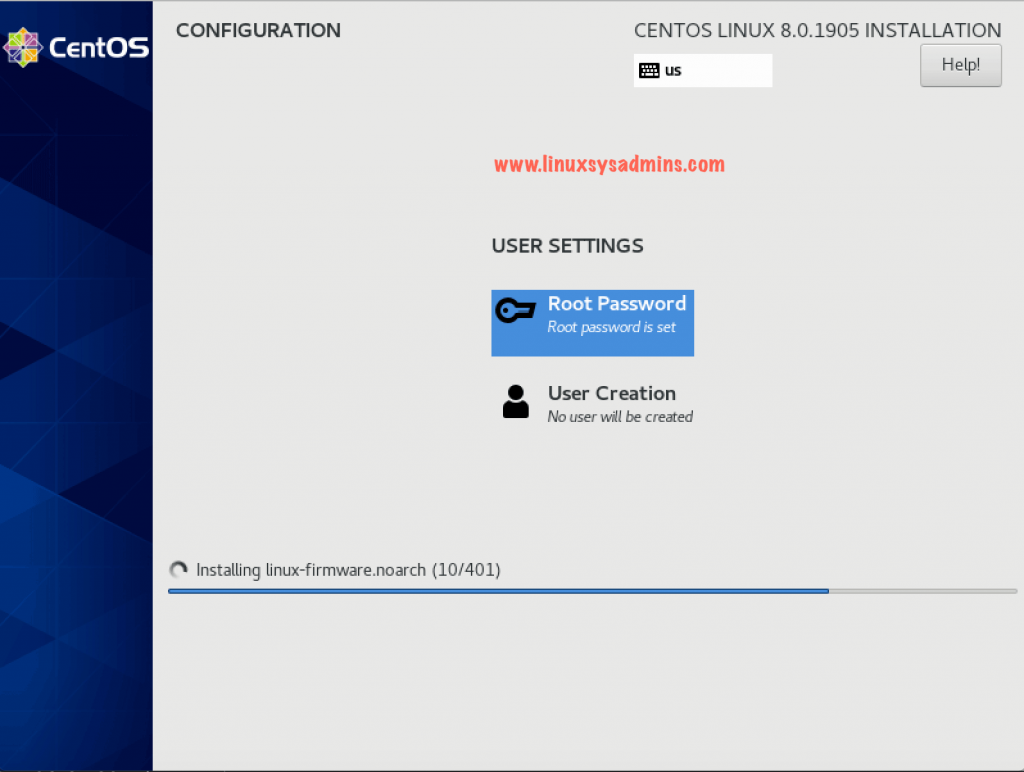
Progress of Installation
It will take a few minutes to complete the installation, If you have a good spec server it won’t take too much time.
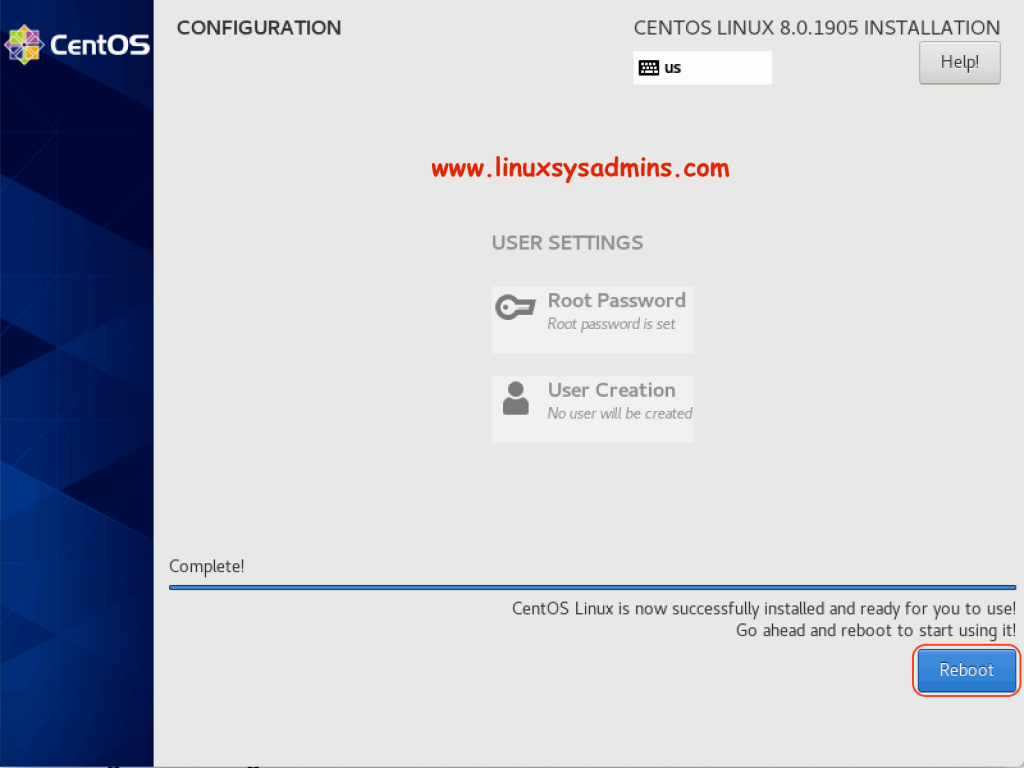
Reboot to complete
Once the server completed with installation we should get reboot option at the end of the installation at right side bottom corner. Click to Reboot. Eject the ISO/Media while the system reboots.
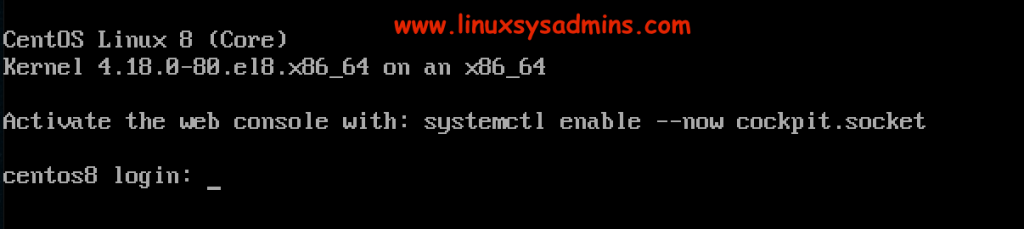
Post Installation
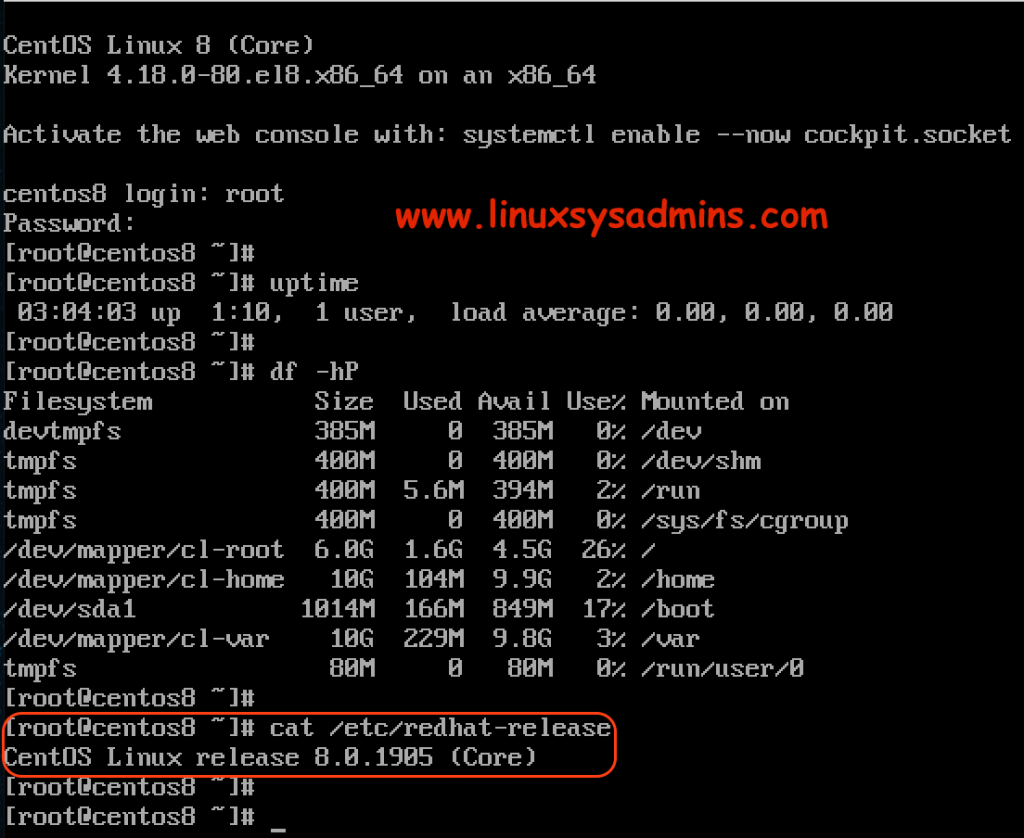
The server will take a few seconds to minutes to come up with a freshly installed CentOS Linux 8. Log in to the root to verify.
Let run with few commands to verify the uptime, OS version etc.
CentOS Linux 8 with GUI
For those who like to work on a Server with GUI choose the option “Server with GUI” during installation. It can be done during the software selection.
We have successfully completed with installing CentOS Linux 8. Performing installation on a virtual machine or physical machine above steps are fine.
Conclusion
More features available in the new CentOS operating System. In future articles, we will cover more with a how-to guide based on CentOS 8. Subscribe to our newsletters and stay tuned. Your feedbacks are most welcome through below comment section.
By Babin Lonston
Overall 14+ Years of experience in the IT field, currently working as a Senior Linux administration with Virtualization & Cloud. Being numismatist for a long time.
One thought on “Step by Step Installing CentOS Linux 8 with Screenshots”
Comments are closed.
Nice article.