Table of Contents
Introduction
In todays guide let us see how to set default kernel in case if we are installed with multiple kernel versions.
I have run the # yum update -y to upgrade all the packages which include kernel. Right after completing the upgrade, took a reboot. But, while trying to start the application it failed and the application team requested to rollback only the kernel version. In such a scenario, let see how to set the old kernel version as default one in RHEL 7 and 8 based operating system. This guide applies for RHEL, CentOS and Oracle Linux as well.
To perform upcoming actions, We are about to use the grubby tool. It helps to update and print the information about GRUB 2. Moreover, to make any persistent changes it’s super easy and safe.
List the Installed Kernels
Let me list the installed kernel versions using yum command. We can see two (4.18.0-240.el8 and 4.18.0-240.1.1.el8_3) versions are installed.
[root@prod-srv-01 ~]# yum list installed | grep kernel
kernel.x86_64                                 4.18.0-240.el8                           @anaconda
kernel.x86_64                                 4.18.0-240.1.1.el8_3                     @kernel
kernel-core.x86_64                            4.18.0-240.el8                           @anaconda
kernel-core.x86_64                            4.18.0-240.1.1.el8_3                     @kernel
kernel-modules.x86_64                         4.18.0-240.el8                           @anaconda
kernel-modules.x86_64                         4.18.0-240.1.1.el8_3                     @kernel
kernel-tools.x86_64                           4.18.0-240.1.1.el8_3                     @kernel
kernel-tools-libs.x86_64                      4.18.0-240.1.1.el8_3                     @kernel
[root@prod-srv-01 ~]#
After reboot, This is the current kernel version we are running with. But, our goal it to go back to the previous version.
[root@prod-srv-01 ~]# uname -r
4.18.0-240.1.1.el8_3.x86_64
[root@prod-srv-01 ~]#
Using Grubby to Verify
Verifying the default kernel version using grubby.
# grubby --default-kernel
We are able to see the default kernel version is latest one same as uname -r gives.
[root@prod-srv-01 ~]# grubby --default-kernel
/boot/vmlinuz-4.18.0-240.1.1.el8_3.x86_64
[root@prod-srv-01 ~]#
To get to know the index number of current kernel we can use
[root@prod-srv-01 ~]# grubby --default-index
0
[root@prod-srv-01 ~]#
List the vmlinuz file under /boot partition.
[root@prod-srv-01 ~]# ls -lthr /boot/vmlinuz-*
-rwxr-xr-x. 1 root root 9.1M Sep 23 13:31 /boot/vmlinuz-4.18.0-240.el8.x86_64
-rwxr-xr-x. 1 root root 9.1M Oct 16 21:52 /boot/vmlinuz-4.18.0-240.1.1.el8_3.x86_64
-rwxr-xr-x. 1 root root 9.1M Dec 12 00:24 /boot/vmlinuz-0-rescue-9cadf8d3a8ce4efcae3f028610e0e89f
[root@prod-srv-01 ~]#
If you are keen to extract more information about any specific available kernel version use --info option with the grubby command.
[root@prod-srv-01 ~]# grubby --info /boot/vmlinuz-4.18.0-240.el8.x86_64
 index=1
 kernel="/boot/vmlinuz-4.18.0-240.el8.x86_64"
 args="$kernelopts $tuned_params"
 initrd="/boot/initramfs-4.18.0-240.el8.x86_64.img $tuned_initrd"
 title="Red Hat Enterprise Linux (4.18.0-240.el8.x86_64) 8.3 (Ootpa)"
 id="9cadf8d3a8ce4efcae3f028610e0e89f-4.18.0-240.el8.x86_64"
 [root@prod-srv-01 ~]
Set default Kernel
Let’s set the old kernel version as default one.
# grubby --set-default=/boot/vmlinuz-4.18.0-240.el8.x86_64
[root@prod-srv-01 ~]# grubby --set-default=/boot/vmlinuz-4.18.0-240.el8.x86_64
 The default is /boot/loader/entries/9cadf8d3a8ce4efcae3f028610e0e89f-4.18.0-240.el8.x86_64.conf with index 1 and kernel /boot/vmlinuz-4.18.0-240.el8.x86_64
 [root@prod-srv-01 ~]#
It’s possible to change the default kernel boot entry using kernel entry-index, to do so try with
# grubby --set-default-index=1Finally, let’s reboot to make it effective.
# reboot

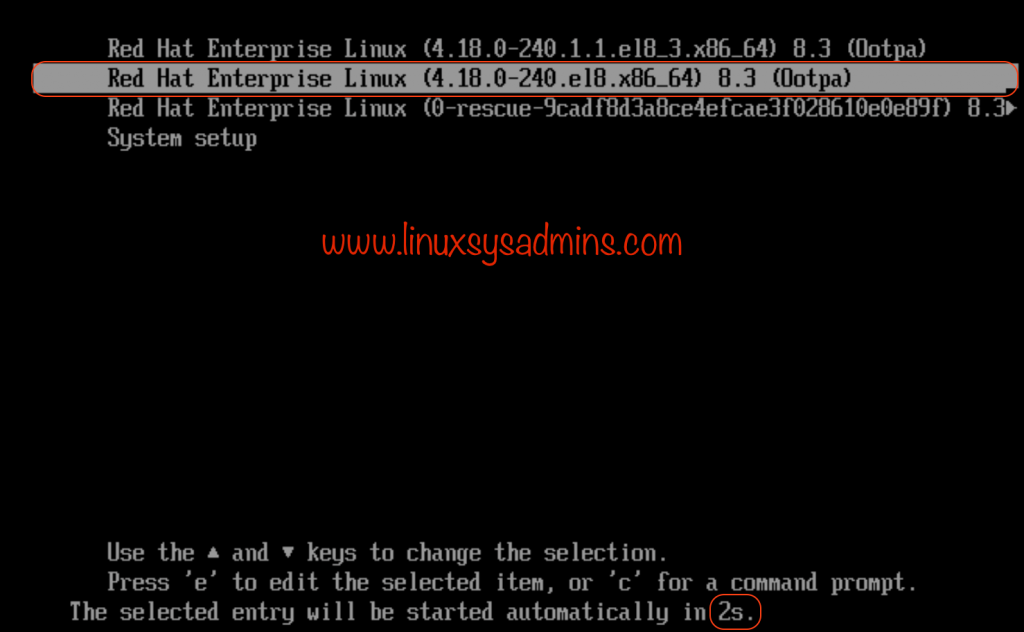
We could see it’s booted into old kernel version automatically without any manual interventions.
Verify the Changes
Let’s verify using grubby
[root@prod-srv-01 ~]# uname -r
4.18.0-240.el8.x86_64
[root@prod-srv-01 ~]#
[root@prod-srv-01 ~]# grubby --default-index
1
[root@prod-srv-01 ~]#
[root@prod-srv-01 ~]# grubby --default-kernel
/boot/vmlinuz-4.18.0-240.el8.x86_64
[root@prod-srv-01 ~]#
That’s it, we have completed with setting a different kernel version as default one persistently.
Conclusion
Setting a default kernel may be required when we are installed with multiple kernel versions in our Linux servers. Once they are set take a reboot and verify. Subscribe to our newsletter for more nix related guides in future.