Introduction
Docker Network: This is our third article in this series. Today’s guide is about how to access Docker containers after creating it, And how to expose the network of a container.
Once we launch a container from an image sure next our thought will be how can we SSH into the container or how to access the SHELL of it. Let first see how to login by following will check the docker network.
Articles related to Docker Series:
- How to install Docker on Red Hat Enterprise Linux and CentOS Linux 7
- How to search for docker images and launch a container
- How to connect Docker containers and expose the network
- How to manage Docker containers
Step 1: Accessing the container SHELL
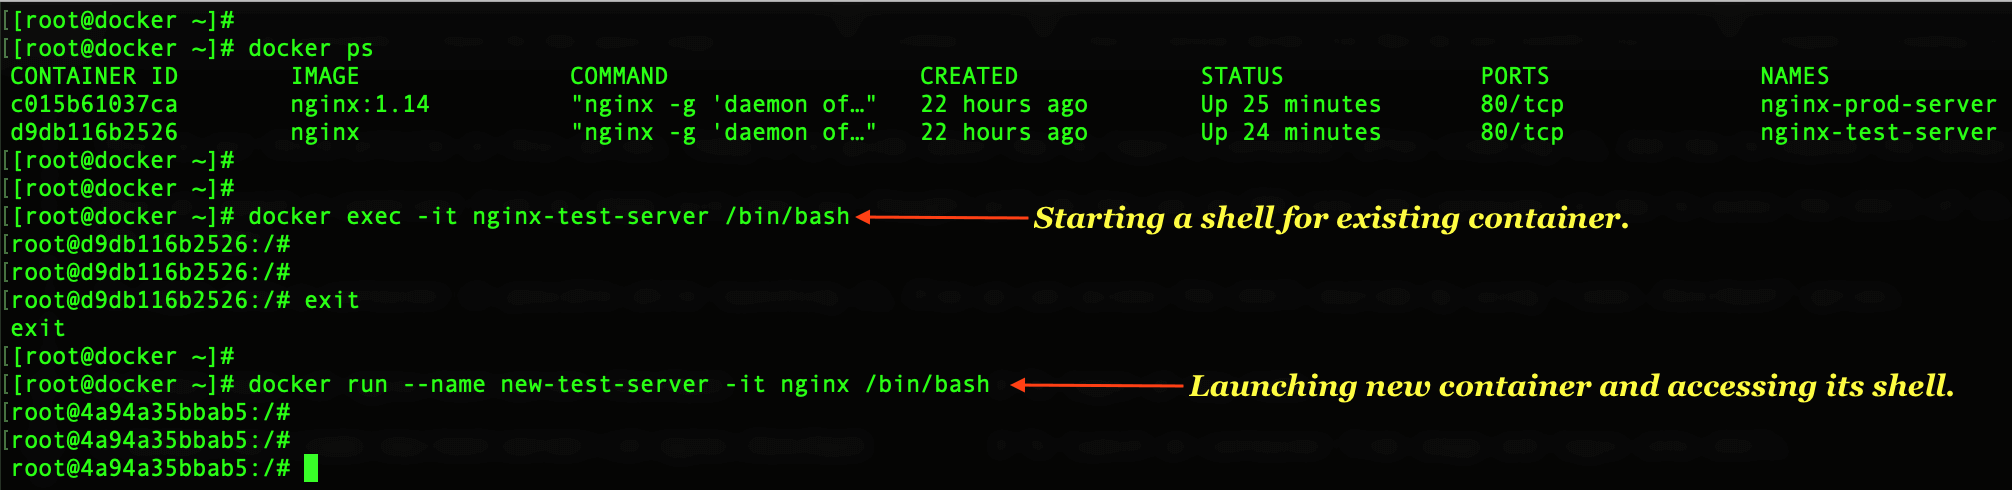
To login into a container it possible while launching it, Else we can access the shell anytime by using “exec -it /bin/bash” option.
# docker exec -it nginx-test-server /bin/bash # To access the SHELL after launching a container.
- -i To take an interactive shell
- -t To acquire a TTY
- -exec To run a command in running container.
Type “exit” to come out of the container and try with creating a new container, Moreover, access its shell in a single go.
# docker run --name new-test-server -it nginx /bin/bash # To launch a container and accessing the shell.
Step 2: Inspect the network port of a running container
When a docker container launched we cannot access it from outside, But same time container can communicate to the outside world without any restriction. To access from the outside world we need to bind ports while starting a container so that it will create an IPtables masquerading rule which allows the outside world to access the container.
Now let us bind the port (8080) from Docker host to container port (80), By doing a bind we can reach the webserver running on the container. While launching one it possible to assign with forwarding a port as shown in below figure.
# docker run --name newIP-test-server -p 8080:80 -d -it nginx

- –name Name of the container about to create
- -p To specify the forwarding port from source to destination
- -d Running a container in Detached mode
- -i To take an interactive shell
- -t To acquire a TTY
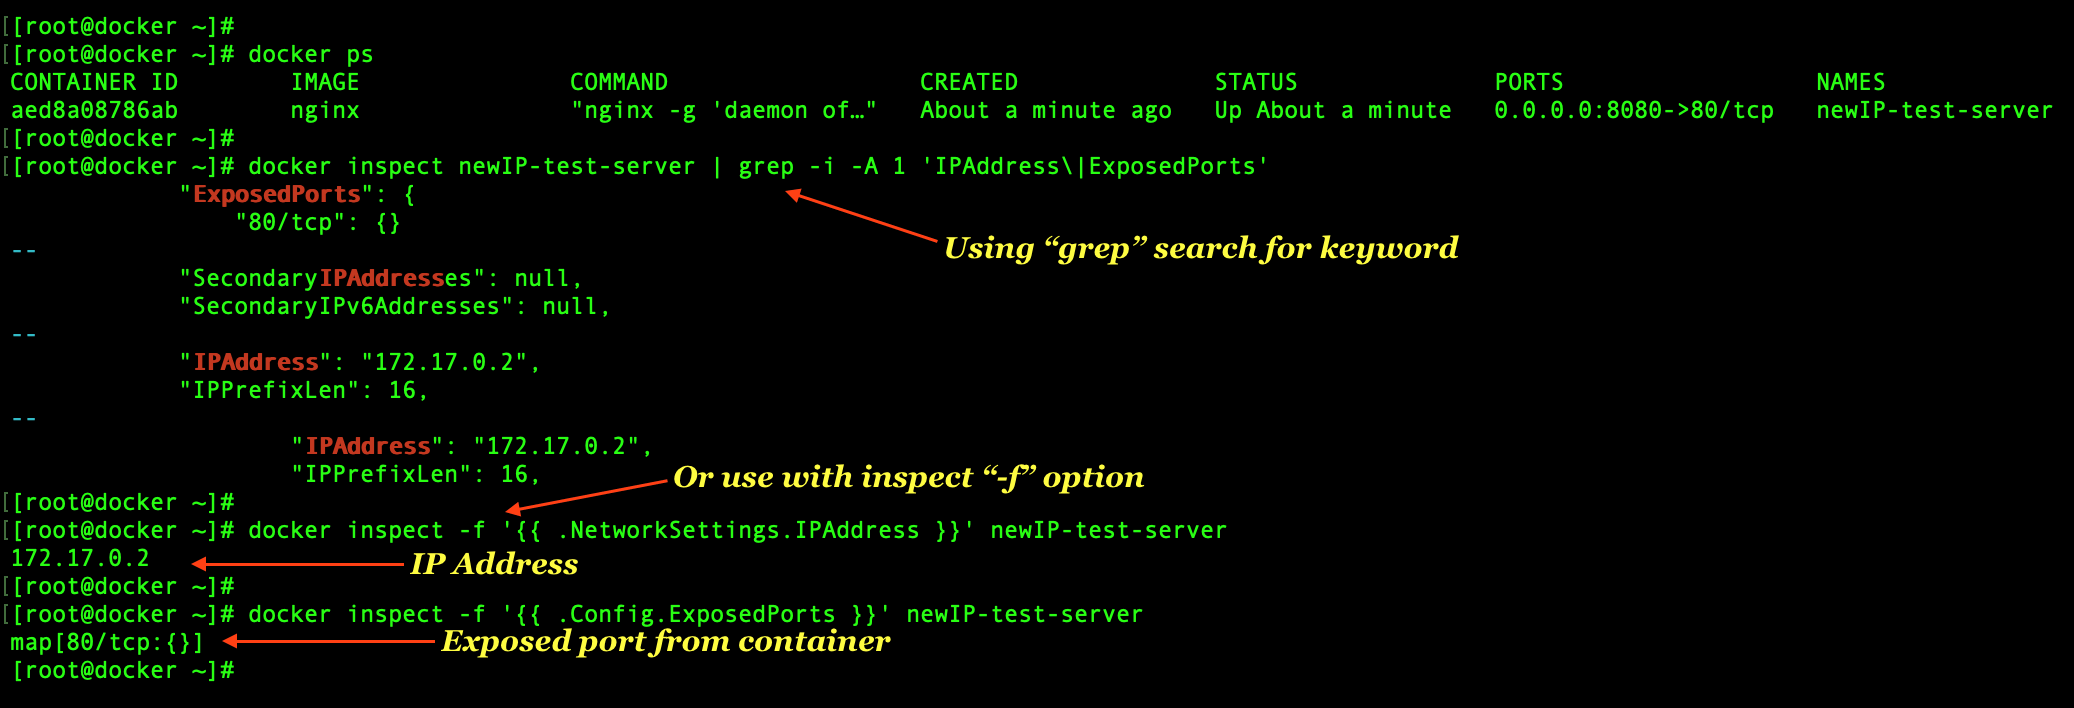
To know the IP address of running container and it exposed port we can use “inspect” option.
By running inspect on a container it will print all the information about the container.
# docker inspect newIP-test-server
To know the IPAddress and ports exposed from container use a grep.
# docker inspect newIP-test-server | grep -i -A 1 'IPAddress\|ExposedPorts'
In case only need to know the “IPAddress” use with inspect “-f” option and argument.
# docker inspect -f '{{ .NetworkSettings.IPAddress }}' newIP-test-server
Or to know the only “Exposed port” from a container.
# docker inspect -f '{{ .Config.ExposedPorts }}' newIP-test-server
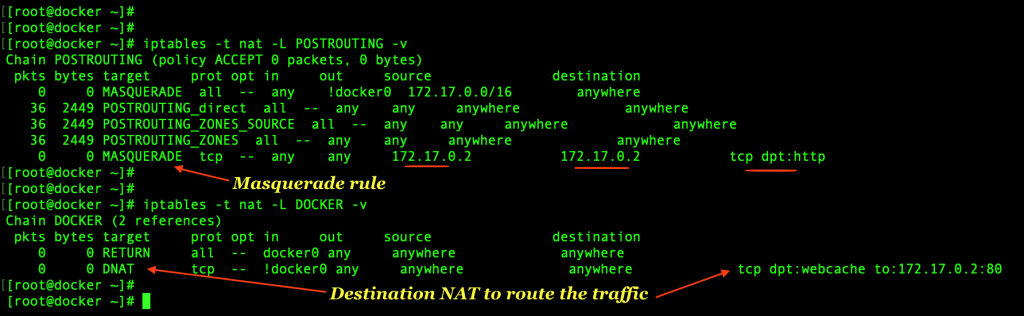
Let’s verify the iptables rules in the host, We can notice it added with two rules.
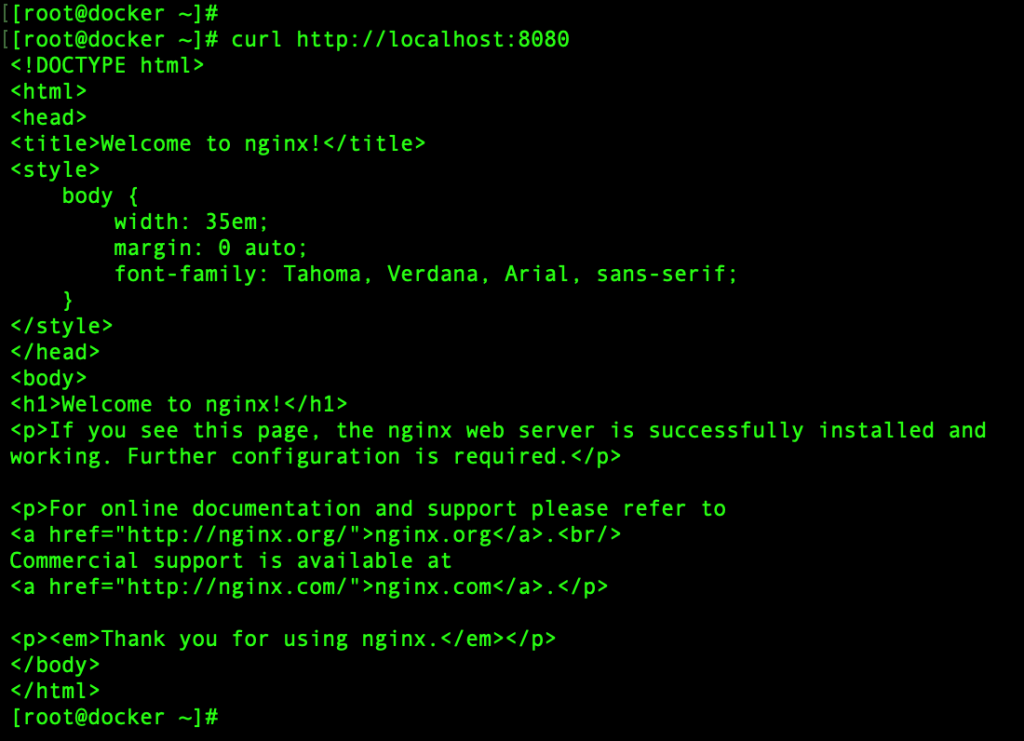
Now we come to know the IPAddress and port of Nginx container. Its time to verify, let us try to reach the web server using curl. If we get “Nginx welcome page” we are good with all the above steps.
# curl http://localhost:8080
Even we can specify an IP address for the port forwarding as follows.
# docker run -d --name web_server_with_ip -p 192.168.107.107:8080:80 nginx

That’s it, we have launched a Docker container and inspected the IP/Port of it. Then we have exposed the docker network to access from anywhere.
Conclusion
After launching a container we have accessed its shell, by following we have exposed the docker network to reach the webserver. In the upcoming articles, we will cover more topic related to Docker. Till then subscribe to our newsletter and stay to receive the updates.