Introduction to RedHat Enterprise Linux 8.0
RedHat has released RedHat Enterprise Linux 8.0 yesterday, 7th May 2019. Back in 14th November 2018 its released the beat version. We have gone through few of RHEL 8 guides using the beta version and they are still valid. We can start downloading RHEL 8 ISO file by clicking here. The size of the ISO will be 7.1 GB.
Changes in RHEL 8.0
The new version focus on Hybrid cloud and extremely support for Developers in all factor. An outstanding operating system from RedHat for Containers, Artificial Intelligence and much more support for current and upcoming technologies. It comes with Kernel version 4.18 and there was a major version change of GCC compiler from 4.8.x to 8.2.1. Moreover, the Graphics will come with Wayland. The One and only default web browser Firefox for a long time now come with 60.5.11 version in RedHat Enterprise Linux 8.0.
Minimum & Maximum Supports
- Minimum require memory will be 1.5GB
- Maximum supported logical CPU’s x86_64 768/8192
- Maximum memory support for x86_64 system will be 24TB
In filesystem limitation except for XFS nothing was changed, XFS maximum file size increased to 1 PetaByte. Maximum boot LUN size of UEFI will support 8Exabyte.
RedHat Enterprise Linux Lifecycle Support
In the Support perspective, the earlier version support is 10 years in 4 phases, With first 5.5 years full support by following 6th year it will be in Phase 2 as maintenance support 1 and rest of 3.5 years under maintenance support 2. In case if you require more support beyond 10 years we can purchase extended life support.
But in Red Hat Enterprise 8 reduced from four phases to 3 phases as follows, First 5 years of full support by following 5 years of maintenance support and additional we can take an addon for extended life support beyond 10 years. As usual, Minor release will be out every six months. By the end of 2019, we can expect to get RHEL 8.1.
Added Features
- AppStream for Yum
- Cockpit with full GUI control
- Recording session with Video Support
- Startis Storage Pool
- Made life easier with NFTables.
- Massive support for Hybrid clouds, Containers & AI
RHEL 8 Based Certification Program
RedHat has introduced its certification program based on RHEL 8 as follows. Those who new to Linux required to take below path to become an RHCE certified Engineer. RH294 completely based on automation by using Ansible and Shell scripting.
- RH124 Red Hat System Administration I
- RH134 Red Hat System Administration II
- RH294 Red Hat System Administration III: Linux Automation
If you are familiar with Unix/Linux operating system you can go ahead to take below Rapid course.
- RH199 RHCSA Rapid Track
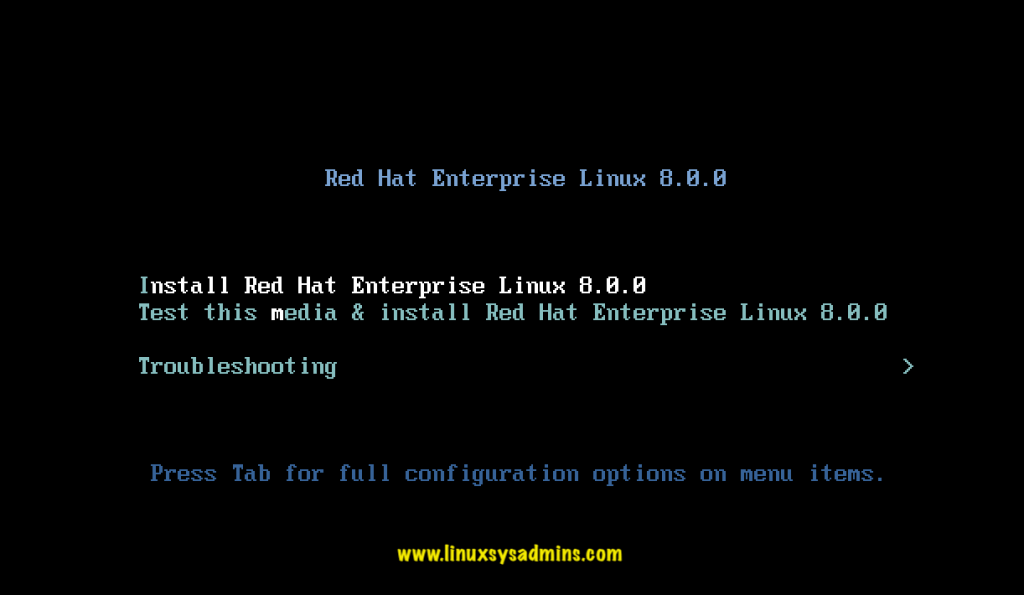
Installation Begin
Boot from ISO or burn the ISO in any media to start the installation.
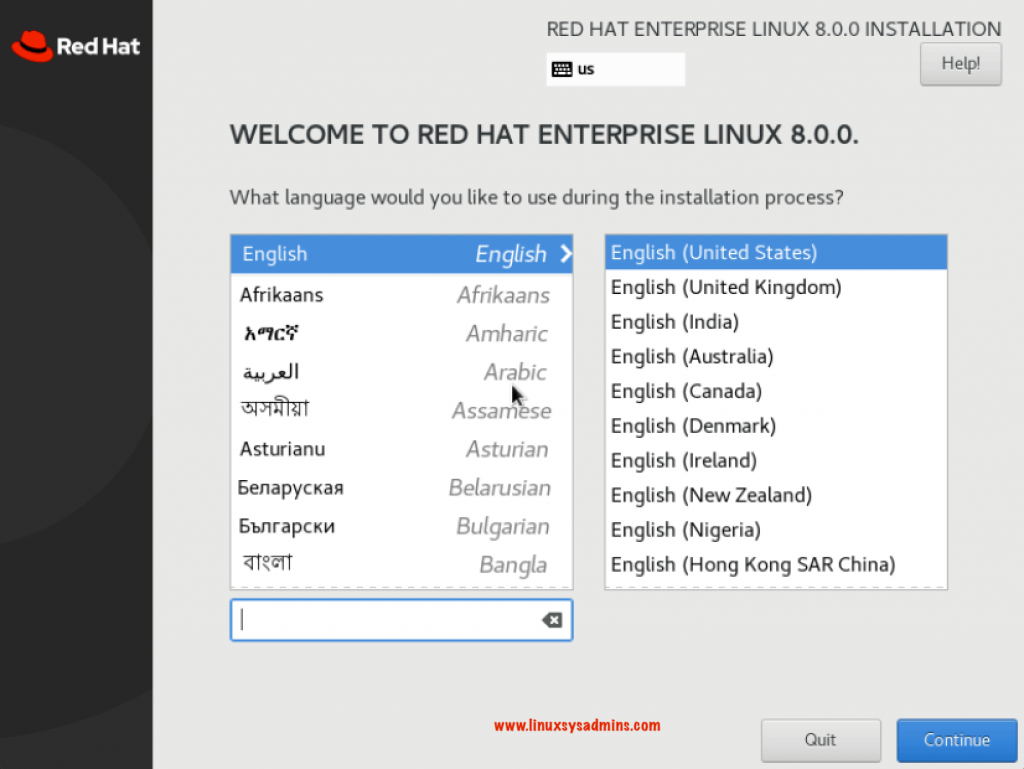
Installation process Language
Choose your preferred language during the installation
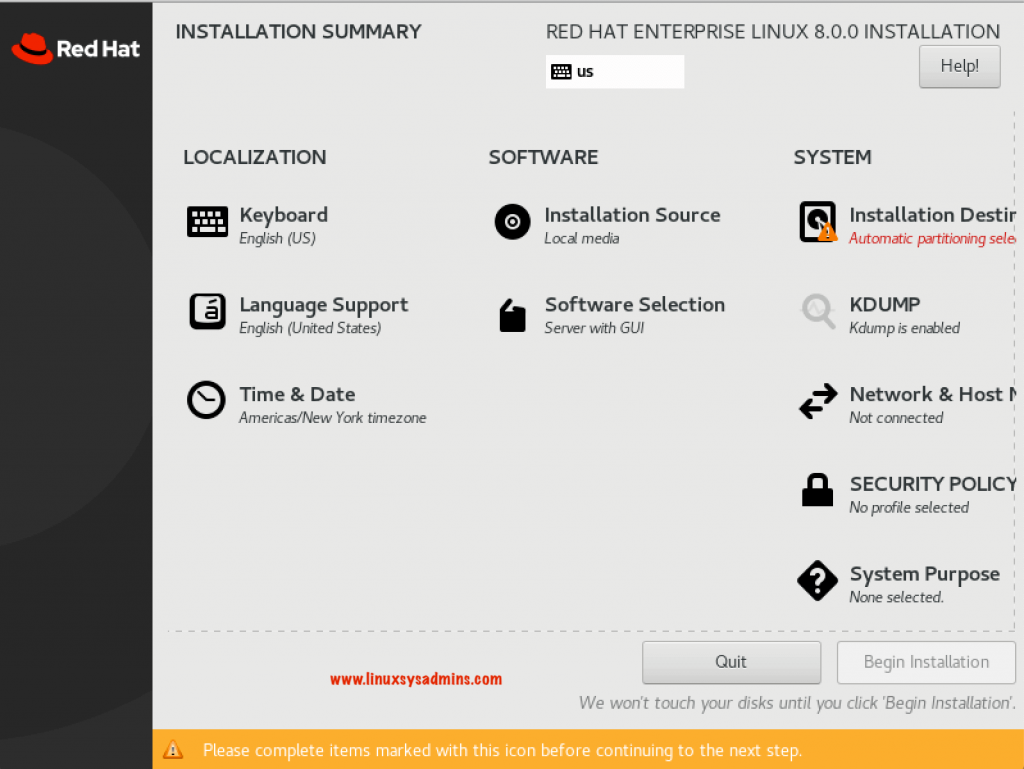
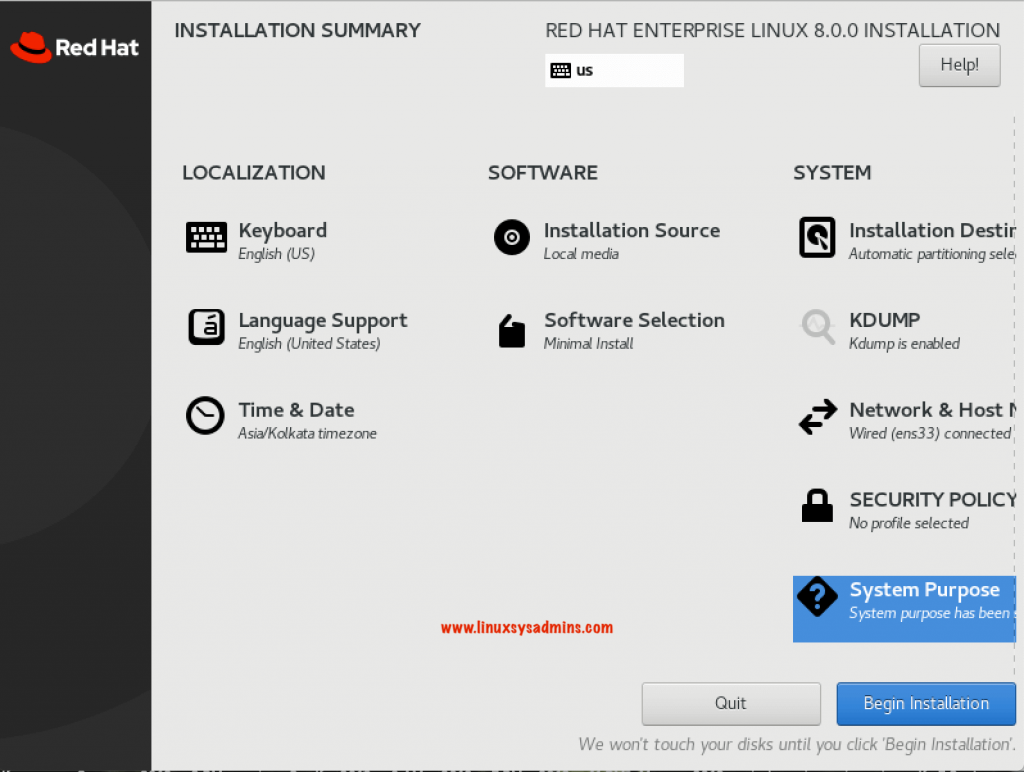
Installation Summary
Before starting with installation summary screen will look as below.
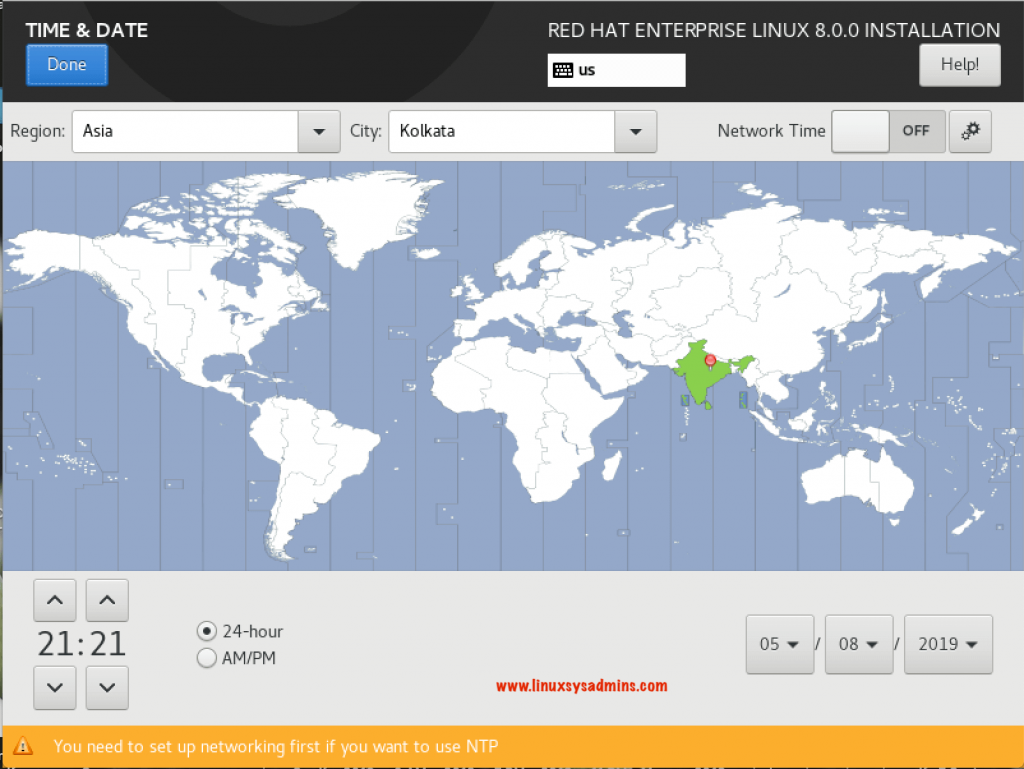
Selecting TimeZone
Change the timezone by choosing appropriate timezone related to you. Click Done to come back to the Installation Summary window.
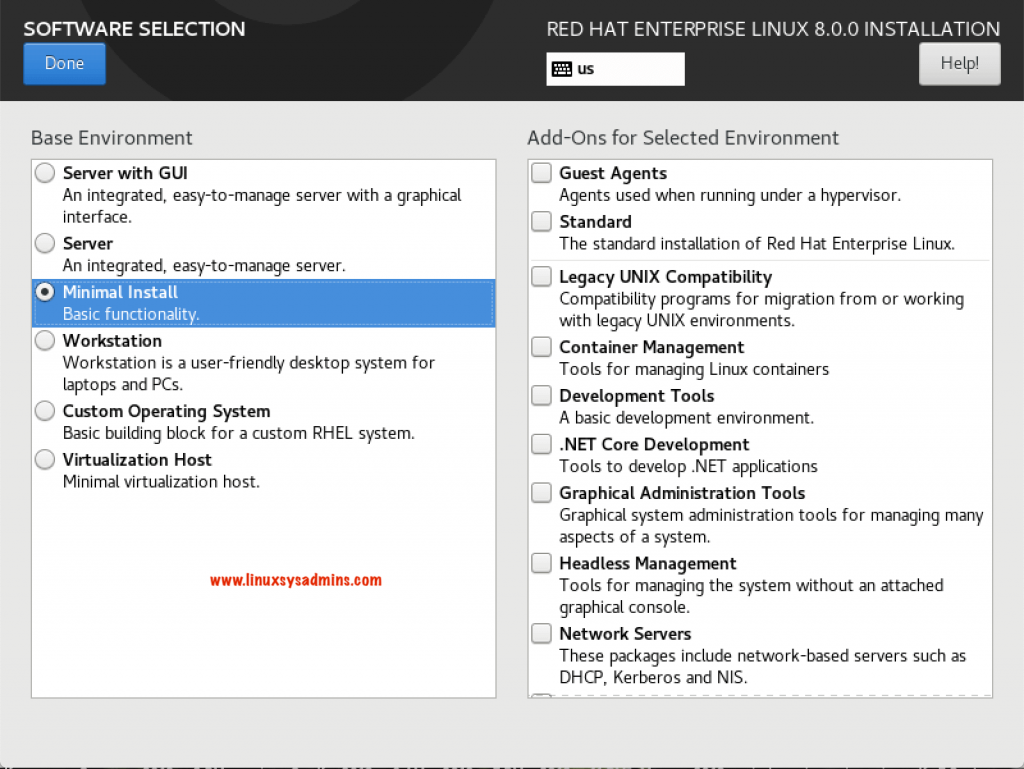
What type of server need to setup (Software selection)
Click on Software selection to choose the required server build type. By default “Server with GUI” will be selected. I’m choosing “Minimal Install” to install with RedHat Enterprise Linux 8.0. Once selected click Done and back to Installation summary window.
Installation Destination (Choosing Disk)
Back to Installation Summary window to continue the installation by choosing the destination where we need to install the operating system. Choose the right disk and if required use the custom partition. Once completed click Done to go back Installation Summary window.

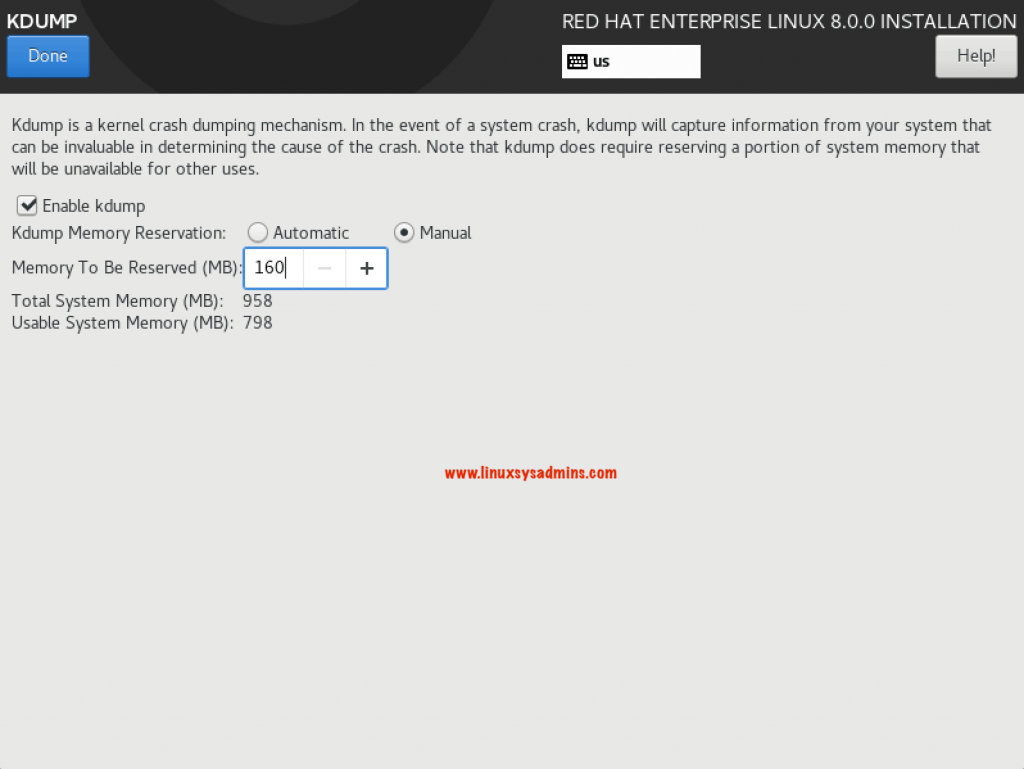
Kump Configuration
Back in Summary window click on KDUMP to configure the kdump by reserving memory. If the memory size in your server 1 to 64 GB it should be minimum 160 MB in size, in case your memory more than 64 GB it should reserve more than 256 MB. Click on Done and exit to Summary.
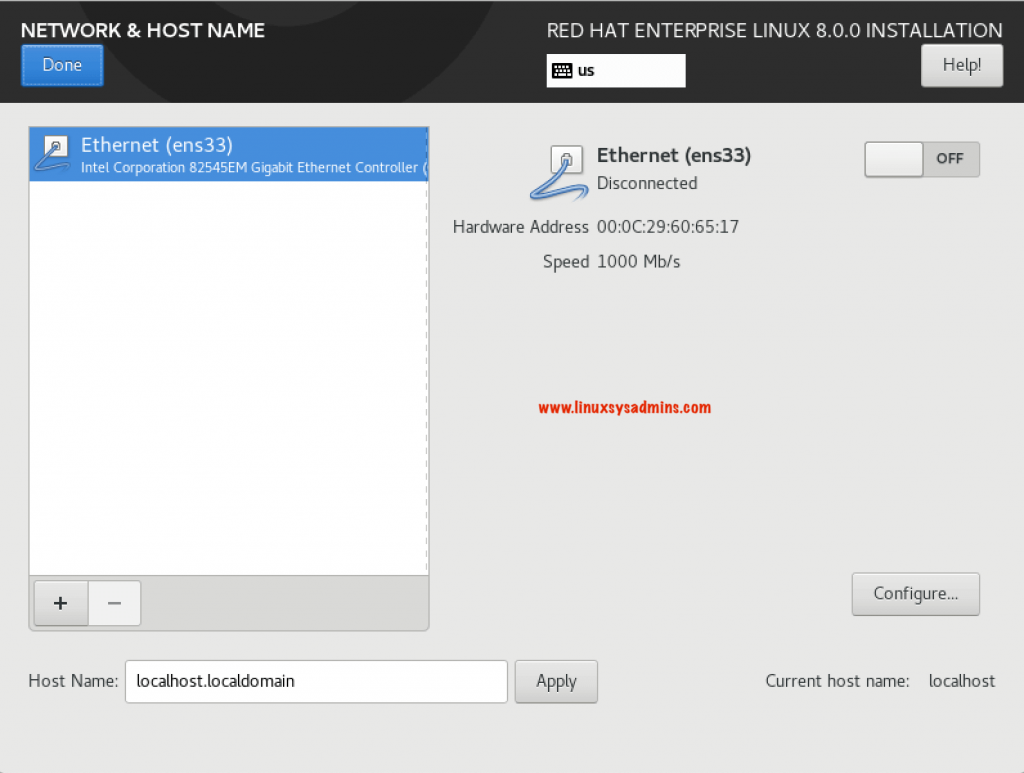
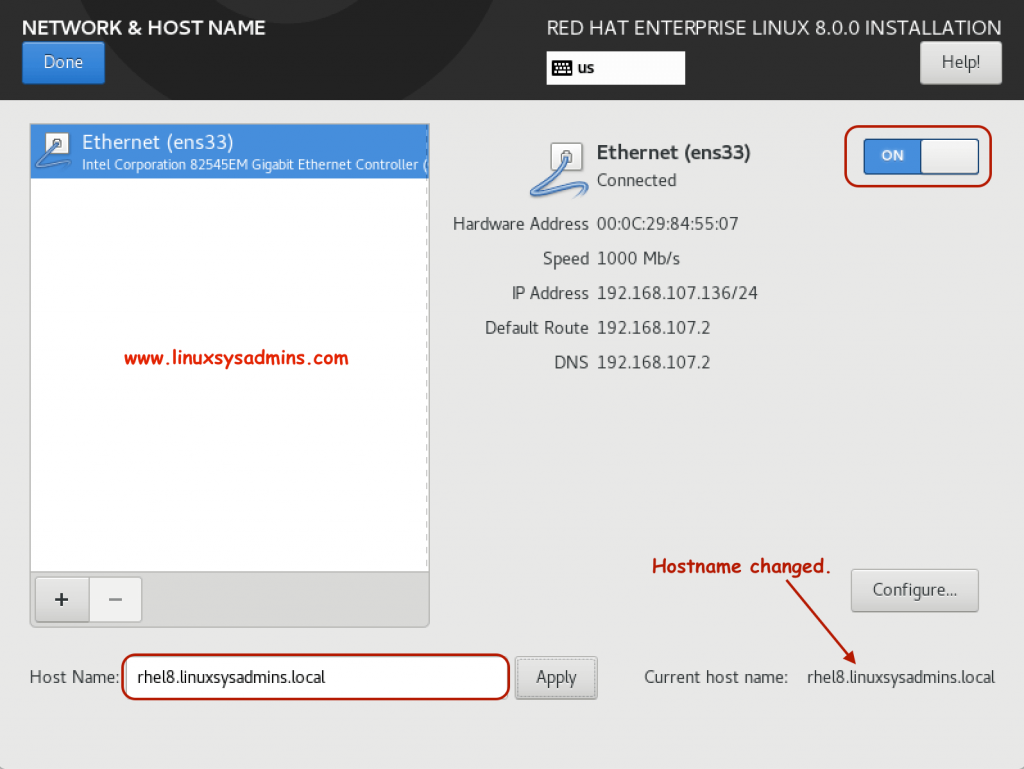
Configure Network and Hostname
From Summary window click on Network & Hostname to configure the network and hostname for our server. To configure the Interface click on “Configure” on right side bottom.
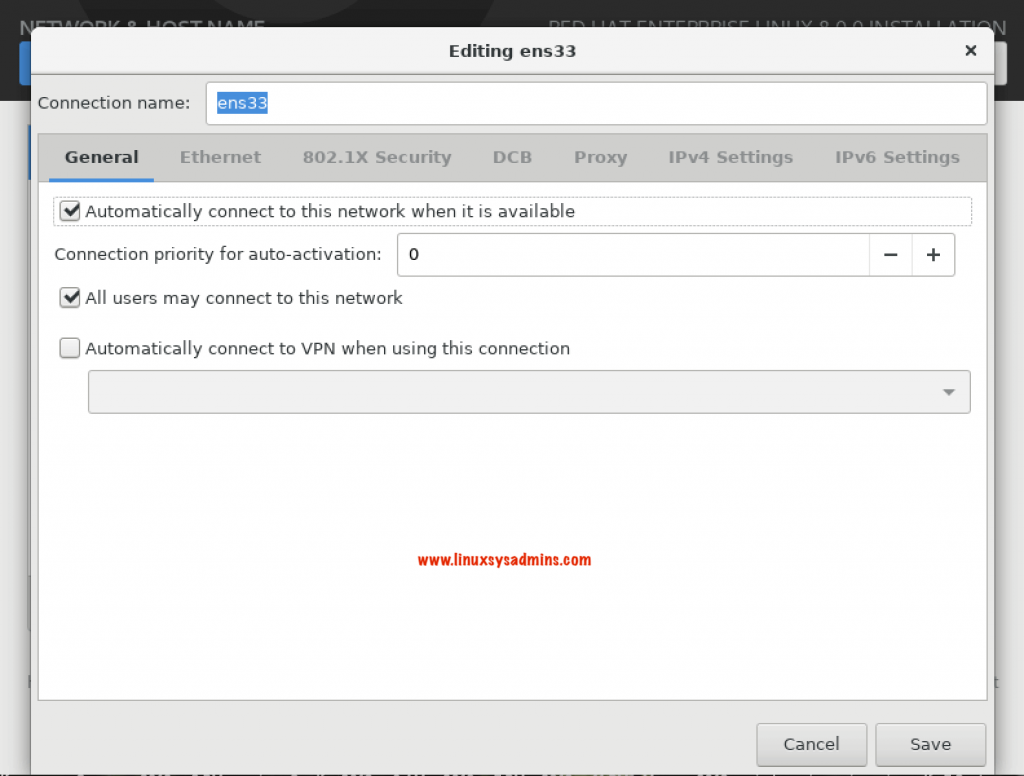
Marking Interface to start persistently
We will get the below window to configure the interface, Make sure to tick the “Automatically connect to this network when it available” if you required to configure a static IP we can configure the same by clicking on “IPv4 Setting” Tab. Once done click save and exit to Network window.
Setting Hostname
Configure the Hostname in the bottom and click Apply. We can verify the changed hostname on the right side bottom of the current window. By default, the interface will be enabled in case if it not enabled clock on On/OFF at the right side top corner. Once everything completed click Done to exit from Network & Hostname window.
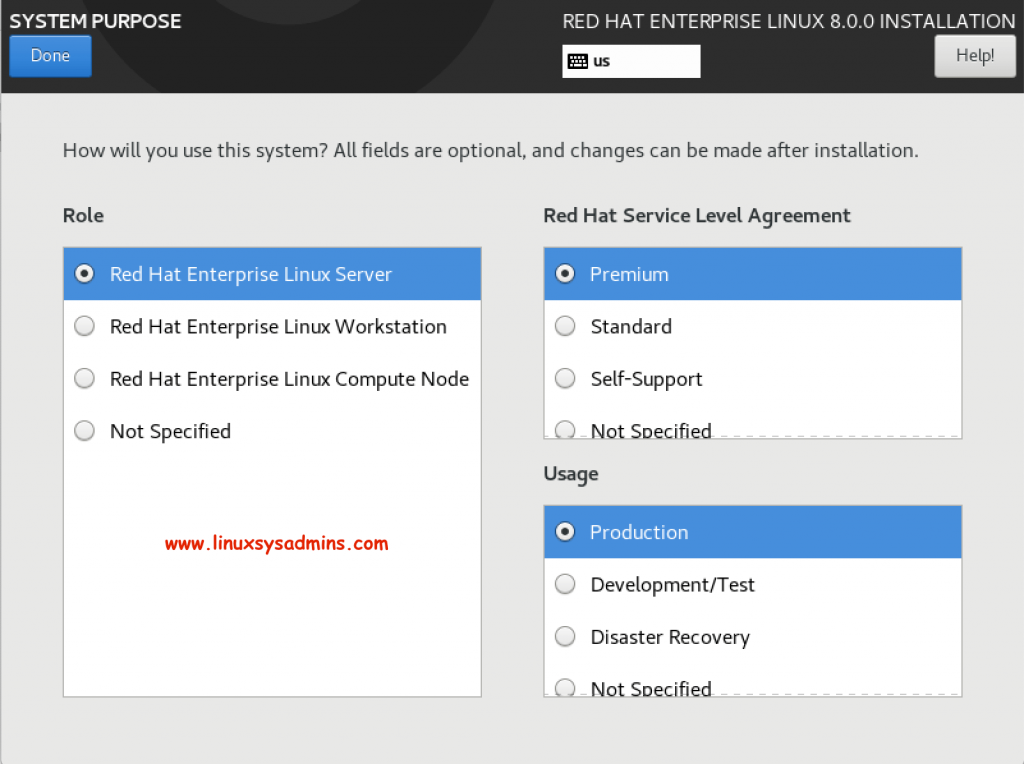
System Support and Service Level Agreement
Choose the purpose of the server and support subscription we have.
Start the Installation
Once completed with choosing required setting now the Installation summary window will look similar to below. Click on “Begin Installation” to start the RHEL 8 Installation.
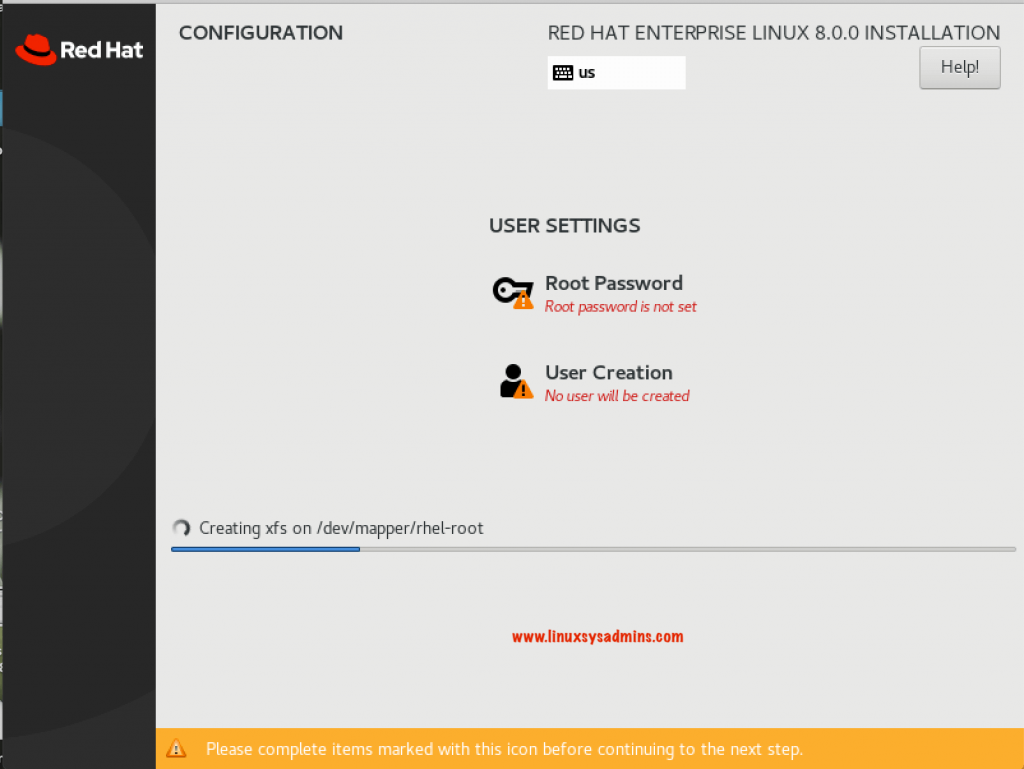
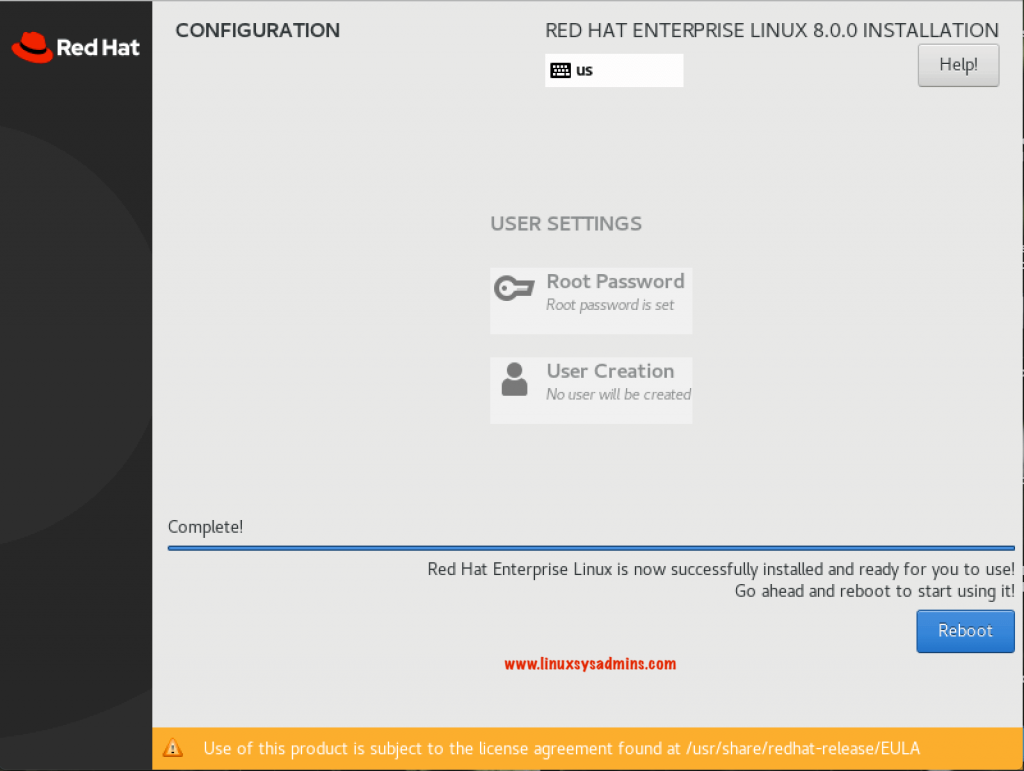
Setting Root Password
In the next window, it will prompt to create a root password for our server. In the same window in case if we required an additional administrative privilege or unprivileged account it can be created.
Reboot to complete setup
It will take 30 to 45 minutes to complete the installation depends on the software package we have selected.
Click Reboot to complete the RHEL 8 Installation.
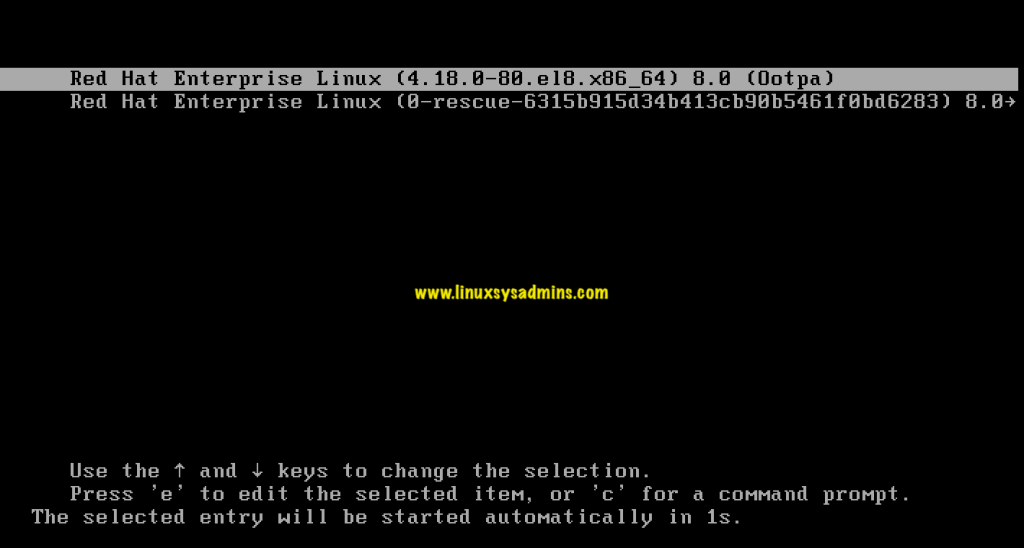
Server Grub menu during boot
After rebooting system will boot into the newly installed RHEL 8 Operating System.
Few basic checks
The freshly installed RHEL 8 Up and running, Run a few commands to verify the version of Installed Operating System.
# uptime
# cat /etc/redhat-release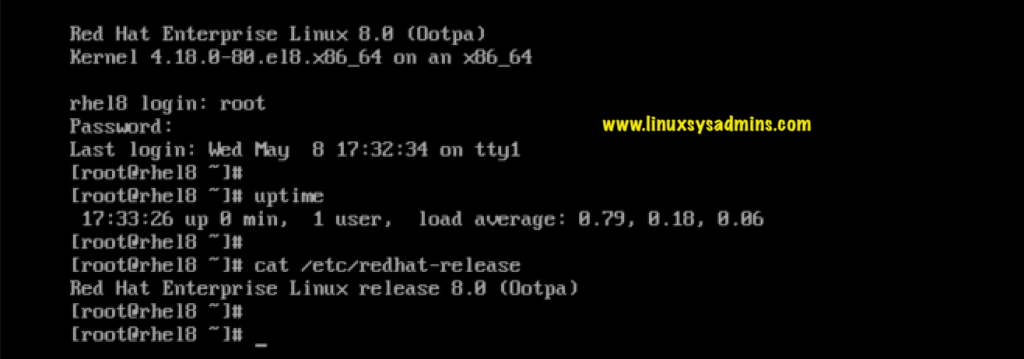
That’s it, we have successfully completed with installing RedHat Enterprise Linux 8.
Conclusion
We have seen what the features and how-to guide for RHEL 8 installation, will continue with other upcoming articles related to RHEL 8. Subscribe to the newsletter and stay tuned. Feel free to provide your comment in below comment section.