
What is Splunk Enterprise?
Splunk is an IT tool which helps to collect logs, analyze, visualize, audit and create reports on any devices. In simple word, it will convert “Machine generated data into Human readable data”.
How will it work?
Splunk Enterprise installed machine will act as a server (Receiver), All other servers or devices will be forwarders. We need to install with a client package called Splunk Forwarder on all the client machines.
Splunk Related Topics.
- Step by step guide to install with Splunk Enterprise 7.0.2
- Step by step guide to install with Splunk Forwarder 7.0.2
- Splunk forwarder installation using Ansible
- How to forward the logs from clients to Splunk Master using the forwarder
- How to run a simple query from Splunk Search & Reporting
| Universal Forwarder (Clients) |
| Load Balancer |
| Heavy Forwarder |
| Indexer |
| Splunk Web UI |
- Universal Forwarders are client machines it can be a Server, Storage, Switch, Mobile, Printer, Router, GPS devices etc. They will just forward there logs to Splunk server using “Splunk Forwarder”.
- Load Balancer which running in “Splunk Server” will receive the logs and forward to “Heavy Forwarder” this is just balancing the load.
- The heavy forwarder will filter the logs and sent the only required information to Indexer.
- The indexer will store the records of all collected information.
- Splunk Web UI where we used to type for a Query to get the report.
Basic Configuration
Now let us start to set up the basic configuration of the server before starting with the installation.
Setup hostname for the Splunk server, In this setup my Splunk server resolving from a valid local DNS server. By the following assign with a static IP address.
We are carrying out this installation in a Red Hat Enterprise Linux 7.3 server the same steps can be followed in Centos 7.x, Oracle Linux 7.x, Scientific Linux and Fedora.
[root@splunk ~]# hostname
splunk.oel7.local
[root@splunk ~]
# ifconfig | grep inet | awk '{ print $2 }' | head -n 1
192.168.107.235
Open the Required Ports
Splunk needs to open a few ports which are required by web interface, Splunk web port, Splunk Management port.
Port 9997 is the one opening for receiving it can be defined as any port which is not in use.
| S:NO: | PORT NO’s | USE OF PORT |
|---|---|---|
| 1. | 8000 | Splunk Web Port |
| 2. | 8089 | Splunk Manage-t Port |
| 3. | 8191 | Splunk KV Port |
| 4. | 8065 | HSplunk App Srv Port |
| 5. | 9997 | Splunk Receiver Port |
Add the firewalld rules for all required ports.
[root@splunk ~]# firewall-cmd --add-port=8000/tcp --add-port=8089/tcp --add-port=8191/tcp --add-port=8065/tcp --add-port=9997/tcp
success
[root@splunk ~]
[root@splunk ~]# firewall-cmd --reload
[root@splunk ~]
List out the allowed ports.
[root@splunk ~]# firewall-cmd --list-all
   public (active)
   target: default
   icmp-block-inversion: no
   interfaces: ens33
   sources:
   services: dhcpv6-client ssh
   ports: 8000/tcp 8089/tcp 8191/tcp 8065/tcp 9997/tcp
   protocols:
   masquerade: no
   forward-ports:
   sourceports:
   icmp-blocks:
   rich rules:
[root@splunk ~]
If you have the plan to accept the logs from clients into the Splunk server make sure to allow the incoming ports of Syslog and encrypted Syslog.
# firewall-cmd --zone=public --add-service=syslog --add-service=syslog-tls –permanent
# firewall-cmd --reload
Downloading Splunk Enterprise
Once we have done with basic setup let us start to download the “Splunk Enterprise” package from the official website.
To start the download we need to create an account, we will get 60 days trial version. Splunk defines the licencing by how much data’s we need to do indexing.
Splunk Enterprise Download URL
Here we have downloaded “Splunk Enterprise” and “Splunk Forwarder” for client side.
[root@splunk ~]# ls -lthr
total 252M
-rw-------. 1 root root 1.6K Mar 9 00:00 anaconda-ks.cfg
-rw-r--r--. 1 root root 87 Mar 9 08:35 splunk-7.0.2-03bbabbd5c0f-linux-2.6-x86_64.rpm.md5
-rw-r--r--. 1 root root 21M Mar 9 08:35 splunkforwarder-7.0.2-03bbabbd5c0f-linux-2.6-x86_64.rpm
-rw-r--r--. 1 root root 232M Mar 9 08:35 splunk-7.0.2-03bbabbd5c0f-linux-2.6-x86_64.rpm
[root@splunk ~]
Verify the Download
Verify whether the downloaded package looks fine.
[root@splunk ~]# md5sum --check splunk-7.0.2-03bbabbd5c0f-linux-2.6-x86_64.rpm.md5 splunk-7.0.2-03bbabbd5c0f-linux-2.6-x86_64.rpm
splunk-7.0.2-03bbabbd5c0f-linux-2.6-x86_64.rpm: OK
md5sum: splunk-7.0.2-03bbabbd5c0f-linux-2.6-x86_64.rpm: no properly formatted MD5 checksum lines found
[root@splunk ~]
If the md5sum matches by comparing from the download page we are good with the downloaded package.
Starting the Installation
Start the installation of “Splunk Enterprise” package using “RPM” command.
[root@splunk ~]# rpm -ivh splunk-7.0.2-03bbabbd5c0f-linux-2.6-x86_64.rpm
warning: splunk-7.0.2-03bbabbd5c0f-linux-2.6-x86_64.rpm: Header V4 DSA/SHA1 Signature, key ID 653fb112: NOKEY
Preparing... ################################# [100%]
useradd: cannot create directory /opt/splunk
Updating / installing...
1:splunk-7.0.2-03bbabbd5c0f ################################# [100%]
complete
By default installation will be done under “/opt/splunk”. If we required installing under any other location it can be achieved by using –prefix as follows.
[root@splunk ~]# ls -lthr /opt/splunk/
total 2.2M
-r--r--r--. 1 splunk splunk 63K Jan 26 01:12 license-eula.txt
-r--r--r--. 1 splunk splunk 57 Jan 26 01:12 copyright.txt
-r--r--r--. 1 splunk splunk 844 Jan 26 01:15 README-splunk.txt
-r--r--r--. 1 splunk splunk 2.1M Jan 26 02:08 splunk-7.0.2-03bbabbd5c0f-linux-2.6-x86_64-manifest
drwxr-xr-x. 4 splunk splunk 4.0K Mar 9 09:03 bin
drwxr-xr-x. 3 splunk splunk 44 Mar 9 09:03 include
drwxr-xr-x. 6 splunk splunk 4.0K Mar 9 09:03 lib
drwxr-xr-x. 3 splunk splunk 58 Mar 9 09:03 openssl
drwxr-xr-x. 3 splunk splunk 86 Mar 9 09:03 share
drwxr-xr-x. 15 splunk splunk 4.0K Mar 9 09:03 etc
-rw-r--r--. 1 splunk splunk 437 Mar 9 09:03 ftr
[root@splunk ~]
Starting the Splunk Service
Once done with the installation start the service. It will prompt to accept the Licence & Agreement when we start for the first time and it will configure it with the required certificate and URL setups.
[root@splunk ~]# /opt/splunk/bin/splunk start
SPLUNK SOFTWARE LICENSE AGREEMENT
THIS SPLUNK SOFTWARE LICENSE AGREEMENT ("AGREEMENT") GOVERNS THE LICENSING,
INSTALLATION AND USE OF SPLUNK SOFTWARE. BY DOWNLOADING AND/OR INSTALLING
SPLUNK SOFTWARE: (A) YOU ARE INDICATING THAT YOU HAVE READ AND UNDERSTAND THIS
Splunk Software License Agreement 09.26.2017 1

Do you agree with this license? [y/n]: y

This appears to be your first time running this version of Splunk.
Copying '/opt/splunk/etc/openldap/ldap.conf.default' to '/opt/splunk/etc/openldap/ldap.conf'.
Generating RSA private key, 2048 bit long modulus
.......................+++
e is 65537 (0x10001)
writing RSA key
Generating RSA private key, 2048 bit long modulus
.............................................................+++
e is 65537 (0x10001)
writing RSA key
Moving '/opt/splunk/share/splunk/search_mrsparkle/modules.new' to '/opt/splunk/share/splunk/search_mrsparkle/modules'.
Splunk> CSI: Logfiles.

Checking prerequisites...
Checking http port [8000]: open
Checking mgmt port [8089]: open
Checking appserver port [127.0.0.1:8065]: open
Checking kvstore port [8191]: open
Checking configuration... Done.
Creating: /opt/splunk/var/lib/splunk
Creating: /opt/splunk/var/run/splunk
Creating: /opt/splunk/var/run/splunk/appserver/i18n
Creating: /opt/splunk/var/run/splunk/appserver/modules/static/css
Creating: /opt/splunk/var/run/splunk/upload
Creating: /opt/splunk/var/spool/splunk
Creating: /opt/splunk/var/spool/dirmoncache
Creating: /opt/splunk/var/lib/splunk/authDb
Creating: /opt/splunk/var/lib/splunk/hashDb
New certs have been generated in '/opt/splunk/etc/auth'.
Checking critical directories... Done
Checking indexes...
Validated: _audit _internal _introspection _telemetry _thefishbucket history main summary
Done
Checking filesystem compatibility... Done
Checking conf files for problems...
Done
Checking default conf files for edits...
Validating installed files against hashes from '/opt/splunk/splunk-7.0.2-03bbabbd5c0f-linux-2.6-x86_64-manifest'
All installed files intact.
Done
All preliminary checks passed.
Starting splunk server daemon (splunkd)...
Generating a 2048 bit RSA private key
......+++
.......+++
writing new private key to 'privKeySecure.pem'
-----
Signature ok
subject=/CN=splunk.oel7.local/O=SplunkUser
Getting CA Private Key
writing RSA key
Done
[ OK ]
Waiting for web server at http://127.0.0.1:8000 to be available.... Done
If you get stuck, we're here to help.
Look for answers here: http://docs.splunk.com
The Splunk web interface is at http://splunk.oel7.local:8000
[root@splunk ~]
Verify service up and running.
[root@splunk ~]# /opt/splunk/bin/splunk status
splunkd is running (PID: 9843).
splunk helpers are running (PIDs: 9846 9867 9920 9943).
[root@splunk ~]
Enable the Splunk Service Persistently
By running boot-start it will create a required init script to bring up the service persistently during the reboot.
[root@splunk ~]# /opt/splunk/bin/splunk enable boot-start
Accessing Splunk UI
Now time to access the Web interface of Splunk enterprise.
Navigate to URL http://192.168.107.235:8000
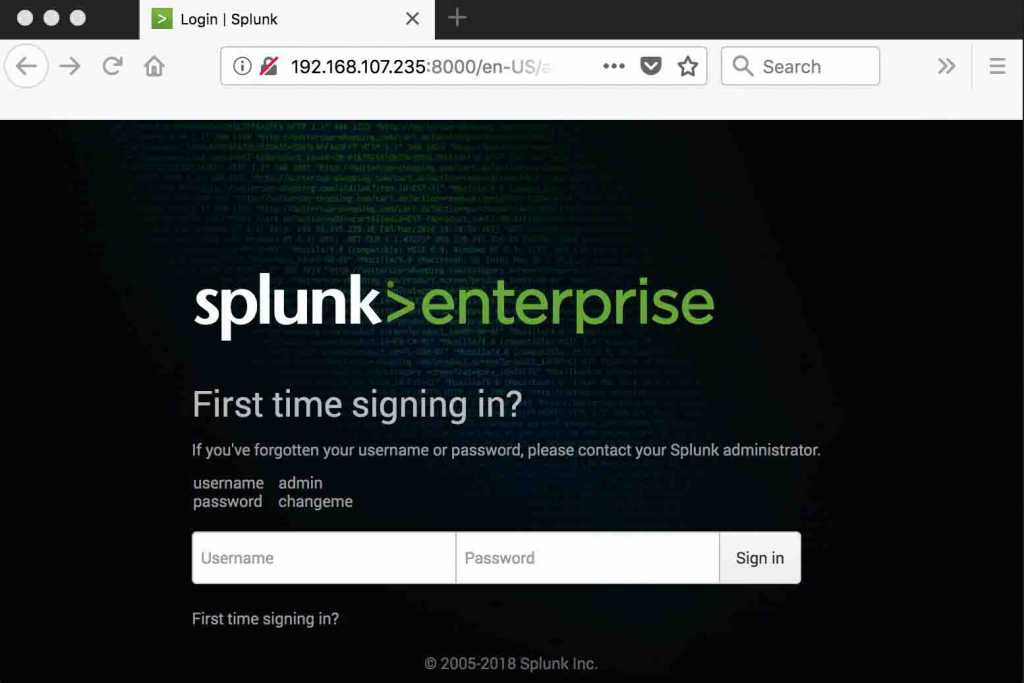
The default username and password for Splunk is “admin/changeme”, it will prompt to change the default username/password in next window.

Once we login we are able to see the Splunk UI dashboard.

In the upcoming guide let us see how to set up the clients, and what are the basic settings we need to be done after the installation.
That’s it we have successfully installed with a Splunk Enterprise which is more than a log analyzer.
Conclusion
We have been gone through a guide which is trending nowadays, Splunk helps any level of IT persons to get what he/she needs. From a Splunk dashboard, you can find an audit, analyze and sophisticated report to prepare for our solution in a short time. Feel free to comment in below comment section we are happy to revert back.
2 thoughts on “Step by step guide to install with Splunk Enterprise 7.0.2”
Comments are closed.
Hi, liked the write-up.
Maybe add the following to the firewall to allow syslog in to splunk:
firewall-cmd –zone=public –add-service=syslog –add-service=syslog-tls –permanent
Also change the firewall-cmd to open the specific TCP Ports to have –permanent so it writes these to the config files and makes sure they’re open after a reboot.
Then perform firewall-cmd –reload
Also, running $SPLUNK_HOME/bin/splunk enable boot-start so splunk will start automatically after a reboot
Hi Steve,
Thanks for your additional inputs, We have added your suggestions.
Thanks & Regards,
Babin Lonston