
In our last guides, we have covered with how to install RHEL 7.x, CentOS 7.x, Oracle Linux 7.x. In this guide, we are about to look into the similar OS from the same family called Scientific Linux.
All the steps for RHEL installation are applied for Scientific 7.5 as well. Below are the minimum requirements for performing a graphical mode installation. Kindly note this guide focused on Linux newbies.
Minimum requirements:
1 GB of Memory
1 CPU or vCPU
1 NIC
6 GB of minimum disk space
Download URL:
To obtain a Scientific Linux ISO it’s free to get from the official website.
Click Here for downloading Scientific Linux
Once the download completed, let us start to prepare the disk for installation.
To start with installation in a physical server first we need to download the ISO and burn it to a DVD, or we can create with a USB bootable media to start the installation. Here in our virtual server, we are about to use the ISO for installation.
Starting with Installation:
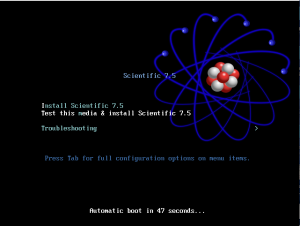
Once the ISO started to boot by default the selected option will be highlighted in second line “Test this media & install Scientific Linux 7.5” as shown below.
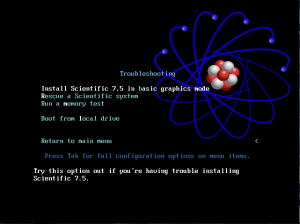
To familiar with available options in the installation screen navigate to all menus by choosing troubleshooting which will bring to know about available rescue, memory check. If the existing installation exists in our disk it can be booted from local disk.
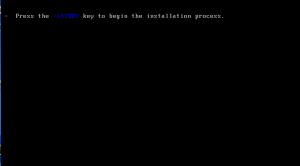
Press the return (Enter) key to start with the installation or wait for 5 seconds to start with the installation automatically.
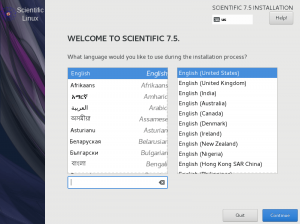
In the next window, we will get the list of available languages to choose which need to be used during the installation process. By default, United States English will be selected. This will be mostly used as the US, If you prefer to change your require language selected from the available list and click continue.
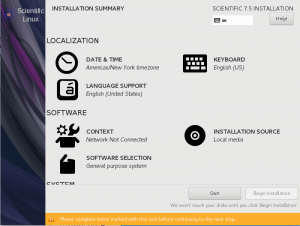
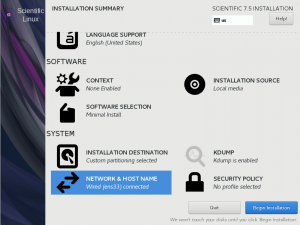
By following in the next window, we will get an overview of the installation summary. Here we required to choose Date/Time, Keyboard layout, which language needs to be used in system level, Installation source this can be Local media, HTTP, FTP. By following which software selection (What type of server need to be installed. Example few of servers like FTP only server, File transfer server, Virtualization Host, Print Server etc.), Installation destination, Kdump configuration, network configuration and security settings.
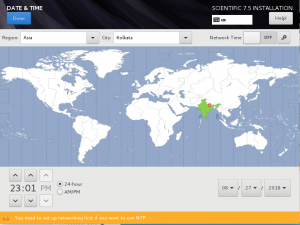
By clicking on Date & Time from installation summary page we will get Date & Time window to choose the required timezone and time. I’m residing in India so choosing with the timezone as Asia/Kolkata, By following change the time and date at the bottom. Once all changes are done click “Done” to make the changes permanent.
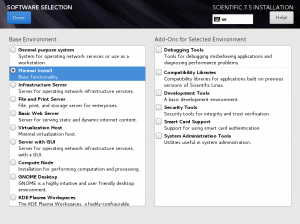
Continue to choose what type of server needs to be built. Click on “Software selection” and choose “Minimal Install” under base environment to install with minimal installation, at last click on “Done” at the left top corner to make the changes and bring back to the summary window. In this step only “minimal installation” option available under “Software selection” because we are using a minimal installation disk from Scientific.
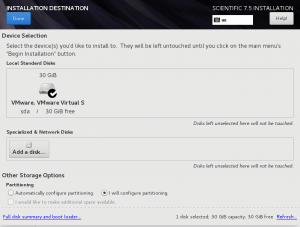
Choosing the installation destination and customizing the required size of the file system is very important. Click on “Installation destination” to choose under which disk the operating system needs to be installed.
Select the first disk and choose “I will configure partitioning” then click on “Done”. By following we will get manual partitioning window.
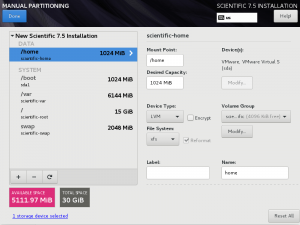
Click “+” symbol to add required partitions and create with filesystems.
The first step we need to add with /boot partition, Make it 1 GB in size. Under mount point choose /boot and Under desired capacity provides the size of 1G. When we provide with “G” it will take it as GB. Click add the mount point to add with new boot filesystem. If you have a SAN disk (LUN) for boot volume we can use one till 2TB in size.
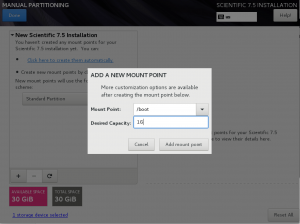
Select the added partition and choose device type as “Standard” for boot mount point. Remaining filesystems will be underlying in logical volume management.
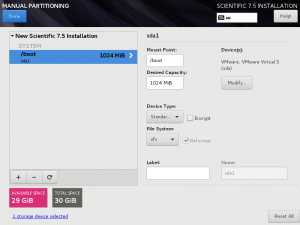
By following add / with 10G and device type as “logical volume”.
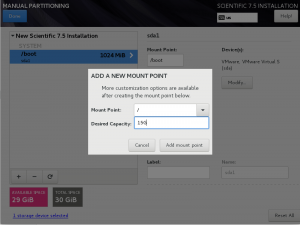
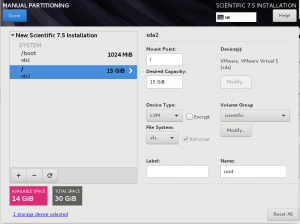
/ Partition with 10GB, Here we need to make sure by choosing / Partition under the Logical volume management. By following add /home with 2G, /var with 6G and Swap 2 GB. Make sure to choose the right size of Swap by double the size of available physical memory.
After creating with required mount points it will appear as shown in below figure.
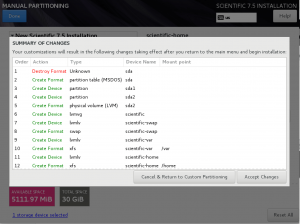
Click “Accept Changes” to create with partition and filesystems.
Back to Summary window click “Network & Hostname” to configure with manual IP configurations.
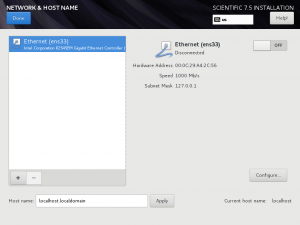
Click configure to continue with configuring interfaces.
Under “General” tab click “Automatically connect to this network when it is available”.
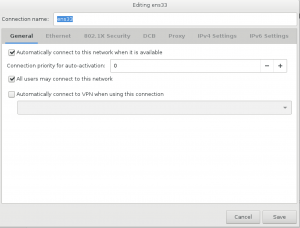
To configure the manual IP select “IPv4 settings”. Select manual under method to configure with IP information.
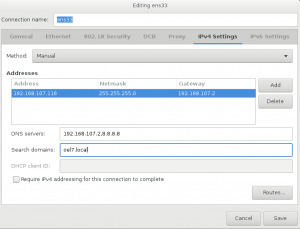
Slide the ON at the right top corner to activate the interface after configuring with required IP information.
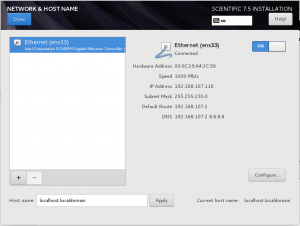
After configuring the required settings Installation summary window looks like below.
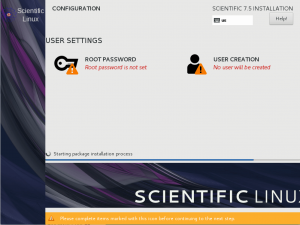
Click “Begin Installation” which will bring to next window and ask to create with the root password.
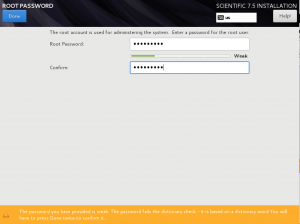
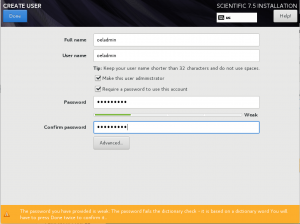
If we required with the privileged account we can create one with SUDO.
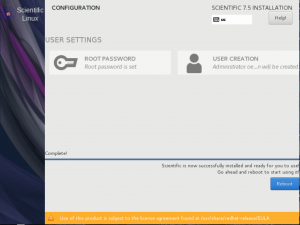
It will take a few minutes to complete with the installation, Once installation completed click “Reboot”.
Step 2:
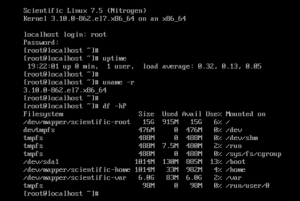
A freshly installed Scientific Linux 7.5 box will look like below which prompt for a login.
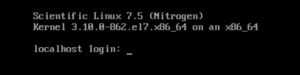
Let us log in and check with few commands.
Official website URL
Click Here for Contributing to the Scientific project
Click Here to get support from the community
Click Here for downloading Scientific
We have completed with a basic installation of Scientific Linux 7.5 server. While any minor release version available in future, above same steps, can be carried out to perform a fresh OS installation, Or if you need to upgrade to any latest release a simple command “yum update -y” will upgrade the current version to latest available one. Kindly provide your feedback by commenting in below comment section.