Introduction
Katello Patch Management or Foreman with Katello is one of the components of the upstream version of Red Hat Satellite. Katello is a life cycle management plugin for Foreman. Katello allows managing thousands of machines in a single click. It pulls content from remote repositories into an isolated environment and makes the subscription’s management easy for us.
The Red Hat Satellite version 5 based on Spacewalk, the current version of Satellite 6 is based on foreman with katello plugins. The most important core components are pulp, candlepin, qpid, puppet and much more.
If you work on Red Hat satellite every day and need a similar environment in your home lab then go-head with Foreman with katello. It provides a decent web interface exactly the same as Red Hat Satellite to manage the physical and virtual servers (Content hosts) by provisioning, managing, patching etc.
Foreman/Katello related articles
- Install Foreman Katello Patch Management on CentOS 7
- Register a Linux client with Foreman
- Provisioning Bare Metal and VM from Foreman in 6 easy steps
Basic OS setup
Before starting with foreman installation let us set up our server with basic configurations by assigning hostname, language settings and much more.
Setting Locale
Set the locale before starting with the installation. Once completed with setting system locale to en_US.utf8 check the status.
# localectl set-locale LC_CTYPE=en_US.utf8[root@foreman ~]# localectl status
System Locale: LC_CTYPE=en_US.utf8
VC Keymap: us
X11 Layout: us
[root@foreman ~]#Setting Hostname
The hostname has been assigned from our DNS server.
# hostnamectl status
# dnsdomainname -f
[root@foreman ~]# hostnamectl status
Static hostname: localhost.localdomain
Transient hostname: foreman.linuxsysadmins.local
Icon name: computer-vm
Chassis: vm
Machine ID: 36618758588646fb9bd7e5ceb0e73a70
Boot ID: d88e0660940f45aaa4aed99d0ceec6d9
Virtualization: kvm
Operating System: CentOS Linux 7 (Core)
CPE OS Name: cpe:/o:centos:centos:7
Kernel: Linux 3.10.0-1062.el7.x86_64
Architecture: x86-64
[root@foreman ~]#
[root@foreman ~]# dnsdomainname -f
foreman.linuxsysadmins.local
[root@foreman ~]#The time Synchronization for a foreman with katello is the most important part. Install with chrony, by following enable and start the service.
# yum install chrony
# systemctl enable chronyd
# systemctl start chronyd
# chronyc sources
Enable NTP synchronization.
# timedatectl set-ntp true[root@foreman ~]# timedatectl status
Local time: Sat 2020-03-21 02:07:45 +04
Universal time: Fri 2020-03-20 22:07:45 UTC
RTC time: Fri 2020-03-20 22:07:44
Time zone: Asia/Dubai (+04, +0400)
NTP enabled: yes
NTP synchronized: yes
RTC in local TZ: no
DST active: n/a
[root@foreman ~]#Starting with Foreman Prerequisites
Firewall Requirement
The ports required to open from foreman side are listed below. If we plan to setup DNS in the same server it’s required to open 53/UDP and TCP.
| Port | Protocol | Required for |
| 53 | TCP/UDP | DNS Server |
| 80,443 | TCP | HTTP & HTTPS access to foreman web UI |
| 67,68 | UDP | DHCP Server |
| 69 | UDP | TFTP Server |
| 5647 | TCP | HTTP access to foreman web UI using standalone WEBrick service |
| 9090 | TCP | Used for communication with the Smart Proxy |
Let’s start with adding the ports for katello patch management.
# firewall-cmd --add-port={53,80,443,5647,9090}/tcp --permanent
# firewall-cmd --add-port="67-69,53/udp" --permanent
# firewall-cmd --add-port="53/udp" --permanent
# firewall-cmd --reload
# firewall-cmd --list-all
Once added with required ports let’s follow to set up the storage requirement.
Storage Requirement for Katello Patch Management
The content which we are going to sync from the internet will be stored under /var/lib/pulp. Instead of using default “/” disk it’s advised to use dedicated large size of the mount point. The recommended minimum size should be 30GB for each Operating system we are about to Sync.
We have added with a new 100 GB disk.
[root@foreman ~]# lsblk
 NAME            MAJ:MIN RM  SIZE RO TYPE MOUNTPOINT
 sda               8:0    0   15G  0 disk
 ├─sda1            8:1    0    1G  0 part /boot
 └─sda2            8:2    0   14G  0 part
   ├─centos-root 253:0    0 12.5G  0 lvm  /
   └─centos-swap 253:1    0  1.5G  0 lvm  [SWAP]
 sdb               8:16   0  100G  0 disk
 sr0              11:0    1 1024M  0 rom
[root@foreman ~]#
In case, if we have any future plan to sync multiple OS/Repositories it’s good to start with setting up a Logical Volume (LVM).
[root@foreman ~]# pvcreate /dev/sdb
   Physical volume "/dev/sdb" successfully created.
[root@foreman ~]#
[root@foreman ~]# vgcreate vg_pulp /dev/sdb
   Volume group "vg_pulp" successfully created
[root@foreman ~]#
[root@foreman ~]# lvcreate -l 100%FREE -n lv_pulp vg_pulp
   Logical volume "lv_pulp" created.
[root@foreman ~]#
Create a filesystem on newly created LVM.
[root@foreman ~]# mkfs.xfs /dev/mapper/vg_pulp-lv_pulp
 meta-data=/dev/mapper/vg_pulp-lv_pulp isize=512    agcount=4, agsize=6553344 blks
          =                       sectsz=512   attr=2, projid32bit=1
          =                       crc=1        finobt=0, sparse=0
 data     =                       bsize=4096   blocks=26213376, imaxpct=25
          =                       sunit=0      swidth=0 blks
 naming   =version 2              bsize=4096   ascii-ci=0 ftype=1
 log      =internal log           bsize=4096   blocks=12799, version=2
          =                       sectsz=512   sunit=0 blks, lazy-count=1
 realtime =none                   extsz=4096   blocks=0, rtextents=0
[root@foreman ~]#
Mount the filesystem and make it persistent, restore the SELinux label for newly mounted mount point by running restorecon recursively.
[root@foreman ~]# mkdir /var/lib/pulp
[root@foreman ~]#
[root@foreman ~]# mount /dev/mapper/vg_pulp-lv_pulp /var/lib/pulp/
[root@foreman ~]#
[root@foreman ~]# echo "/dev/mapper/vg_pulp-lv_pulp /var/lib/pulp/ xfs defaults 0 0" >> /etc/fstab
[root@foreman ~]#
[root@foreman ~]# tail -n1 /etc/fstab
 /dev/mapper/vg_pulp-lv_pulp /var/lib/pulp/ xfs defaults 0 0
[root@foreman ~]#
[root@foreman ~]# restorecon -Rv /var/lib/pulp/
 restorecon reset /var/lib/pulp context system_u:object_r:unlabeled_t:s0->system_u:object_r:var_lib_t:s0
[root@foreman ~]#
List the created fileSystem and we are good with a storage requirement.
[root@foreman ~]# df -hP /var/lib/pulp/
 Filesystem                   Size  Used Avail Use% Mounted on
 /dev/mapper/vg_pulp-lv_pulp  100G   33M  100G   1% /var/lib/pulp
[root@foreman ~]#
Installing Foreman with Katello
Before running with katelllo installation make sure to update the existing packages by running
# yum update -yAdd the required Repositories using yum.
# yum -y localinstall https://yum.theforeman.org/releases/1.24/el7/x86_64/foreman-release.rpm
# yum -y localinstall https://fedorapeople.org/groups/katello/releases/yum/3.14/katello/el7/x86_64/katello-repos-latest.rpm
# yum -y localinstall https://yum.puppet.com/puppet6-release-el-7.noarch.rpm
# yum -y localinstall https://dl.fedoraproject.org/pub/epel/epel-release-latest-7.noarch.rpm
# yum install foreman-release-scl -y
Right after installing the repositories use yum to install the katello.
# yum install katello -yOutput for your reference, The long output has been truncated.
Installed:
   katello.noarch 0:3.14.1-1.el7
 Dependency Installed:
   SOAPpy.noarch 0:0.11.6-17.el7                              apache-commons-codec.noarch 0:1.8-7.el7
   apache-commons-collections.noarch 0:3.2.1-22.el7_2         apache-commons-daemon.x86_64 0:1.0.13-7.el7
   apache-commons-dbcp.noarch 0:1.4-17.el7                    apache-commons-lang.noarch 0:2.6-15.el7
   apache-commons-logging.noarch 0:1.1.2-7.el7                apache-commons-pool.noarch 0:1.6-9.el7
   apr.x86_64 0:1.4.8-5.el7                                   apr-util.x86_64 0:1.5.2-6.el7
Start to setup Katello by running foreman-installer. While running foreman-installer we can use multiple options to set the admin User/Password. If the option --scenario katello not used, it will set up with the puppet.
# foreman-installer --scenario katello --foreman-initial-admin-username admin --foreman-initial-admin-password 'xxxxxxx'To set up with more modules it possible to add them by editing below YAML file. This should be done before starting with running foreman-installer.
# vim /etc/foreman-installer/scenarios.d/katello.yamlIn my setup, I have appended with QPID, TFTP, DHCP, apt.
---
 :name: Katello
 :description: Install Foreman with Katello
 :enabled: true
 :log_dir: /var/log/foreman-installer
 :store_dir: ''
 :log_name: katello.log
 :log_level: DEBUG
 :no_prefix: false
 :mapping: {}
 :answer_file: /etc/foreman-installer/scenarios.d/katello-answers.yaml
 :installer_dir: /usr/share/foreman-installer/katello
 :module_dirs: /usr/share/foreman-installer/modules
 :colors: true
 :color_of_background: :dark
 :hook_dirs: []
 :custom: {}
 :facts:
   tuning: default
 :low_priority_modules: []
 :verbose_log_level: info
 :skip_puppet_version_check: false
 :parser_cache_path: /usr/share/foreman-installer/parser_cache/katello.yaml
 :hiera_config: /usr/share/foreman-installer/config/foreman-hiera.yaml
 :order:
 certs
 foreman
 katello
 foreman_proxy
 foreman_proxy::plugin::pulp
 foreman_proxy_content
 puppet
 postgresql
 pulp
 candlepin
 qpid
 tftp
 dhcp
 apt
Enable true for required plugins by editing the below answer file. For instance, to enable the ansible plugin, replace “false” with “true” foreman::plugin::ansible: true
If you need to create your custom organization it can be done by replacing initial_organization: Default Organization to initial_organization: something else. However, we are sticking to default one in our setup.
# vim /etc/foreman-installer/scenarios.d/katello-answers.yamlStart the foreman installer to set up the katello.
[root@foreman ~]# foreman-installer --scenario katello --foreman-initial-admin-username admin --foreman-initial-admin-password 'xxxxxxxx'
 Preparing installation Done
   Success!
 Katello is running at https://foreman.linuxsysadmins.local
   Initial credentials are admin / xxxxxxxxx
 To install an additional Foreman proxy on separate machine continue by running:
 foreman-proxy-certs-generate --foreman-proxy-fqdn "$FOREMAN_PROXY" --certs-tar "/root/$FOREMAN_PROXY-certs.tar"
 The full log is at /var/log/foreman-installer/katello.log
[root@foreman ~]#
To monitor the installation progress run tail on below log file.
# tail -f /var/log/foreman-installer/katello.logIt took 45 minutes to complete our katello patch management installation.
 [DEBUG 2020-03-21T04:22:43 main]  Finishing transaction 49518980
 [DEBUG 2020-03-21T04:22:43 main]  Received report to process from foreman.linuxsysadmins.local
 [ INFO 2020-03-21T04:22:44 main] Puppet has finished, bye
 [ INFO 2020-03-21T04:22:44 main] Executing hooks in group post
 [ INFO 2020-03-21T04:22:45 main] rh-mongodb34-syspaths not present, installing.
 [DEBUG 2020-03-21T04:22:49 main] Hook /usr/share/foreman-installer/katello/hooks/post/09-mongo_syspath.rb returned ""
 [DEBUG 2020-03-21T04:22:50 main] Hook /usr/share/foreman-installer/katello/hooks/post/10-post_install.rb returned nil
 [DEBUG 2020-03-21T04:22:50 main] Hook /usr/share/foreman-installer/katello/hooks/post/30-upgrade.rb returned nil
 [DEBUG 2020-03-21T04:22:50 main] Hook /usr/share/foreman-installer/katello/hooks/post/99-version_locking.rb returned nil
 [ INFO 2020-03-21T04:22:50 main] All hooks in group post finished
 [DEBUG 2020-03-21T04:22:50 main] Exit with status code: 2 (signal was 2)
 [DEBUG 2020-03-21T04:22:50 main] Cleaning /tmp/kafo_installation20200321-2078-zh2bhx
 [DEBUG 2020-03-21T04:22:50 main] Cleaning /tmp/kafo_installation20200321-2078-12llodg
 [DEBUG 2020-03-21T04:22:50 main] Cleaning /tmp/default_values.yaml
 [ INFO 2020-03-21T04:22:50 main] Installer finished in 2656.897177603 seconds
Once completed with the installation verify the service status.
[root@foreman ~]# katello-service status | grep -i "Active"
    Active: active (running) since Sat 2020-03-21 03:38:56 +04; 13h ago
    Active: active (running) since Sat 2020-03-21 03:44:42 +04; 13h ago
    Active: active (running) since Sat 2020-03-21 03:48:39 +04; 13h ago
    Active: active (running) since Sat 2020-03-21 03:48:31 +04; 13h ago
    Active: active (running) since Sat 2020-03-21 03:41:57 +04; 13h ago
    Active: active (running) since Sat 2020-03-21 03:48:36 +04; 13h ago
    Active: active (running) since Sat 2020-03-21 03:48:37 +04; 13h ago
    Active: active (running) since Sat 2020-03-21 03:48:37 +04; 13h ago
    Active: active (exited) since Sat 2020-03-21 03:48:36 +04; 13h ago
    Active: active (running) since Sat 2020-03-21 03:49:48 +04; 13h ago
    Active: active (running) since Sat 2020-03-21 04:21:06 +04; 12h ago
    Active: active (running) since Sat 2020-03-21 03:51:08 +04; 13h ago
    Active: active (running) since Sat 2020-03-21 04:21:43 +04; 12h ago
    Active: active (running) since Sat 2020-03-21 04:22:05 +04; 12h ago
[root@foreman ~]#
We have successfully completed the installation.
Accessing Foreman GUI
Access the foreman GUI using FQDN https://foreman.linuxsysadmins.localUse the Initial credentials which displayed on our screen while completed with the installation.
Right after login to foreman, we will be taken to the overview dashboard.
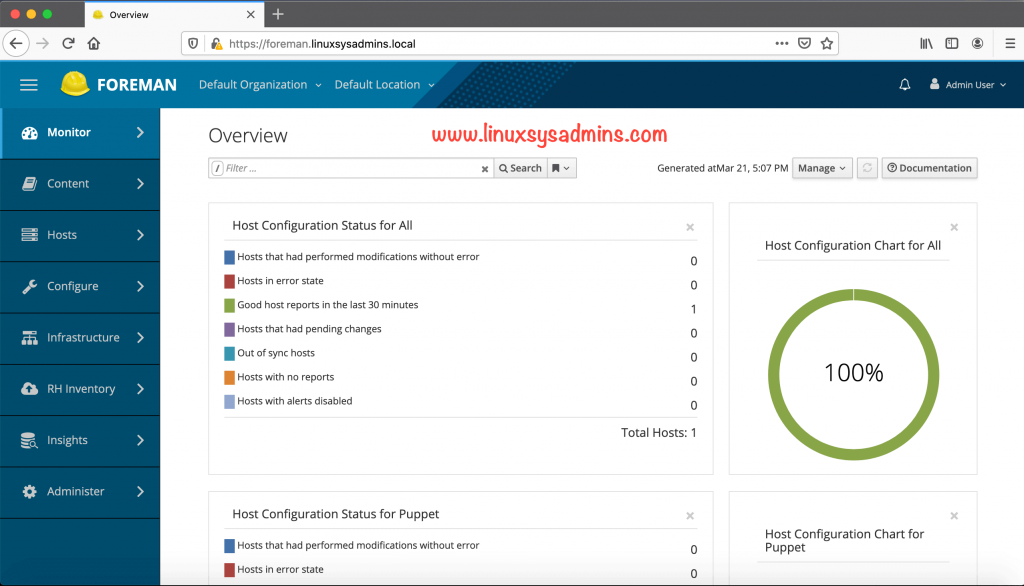
Moving forward, we will perform all actions from the default user “admin” account.
[root@foreman ~]# hammer user list
---|-------|------------|---------------------------|-------|---------------------|--------------
ID | LOGIN | NAME       | EMAIL                     | ADMIN | LAST LOGIN          | AUTHORIZED BY
---|-------|------------|---------------------------|-------|---------------------|--------------
4  | admin | Admin User | root@linuxsysadmins.local | yes   | 2020/03/21 11:51:00 | Internal
---|-------|------------|---------------------------|-------|---------------------|--------------
[root@foreman ~]#
Post Installation configuration
Creating Product
After installation, we can create additional organization and locations. However, we are going to use all default org and Location.
If we have a valid subscription from RedHat, log in to Red hat customer portal and download the manifest. By following navigate to Content –> Subscriptions from right-hand side click on “Manage Manifest” then browse the downloaded manifest. This will bring your available subscriptions/Repositories into foreman.
In our case, we are going to set up with CentOS repositories.
Our first step is to create the product. To create the product, we need to know the organization associated with our account. By default, we have one organization with ID 1. List using hammer CLI.
[root@foreman ~]# hammer organization list
---|----------------------|----------------------|-------------|---------------------
ID | TITLE                | NAME                 | DESCRIPTION | LABEL
---|----------------------|----------------------|-------------|---------------------
1  | Default Organization | Default Organization |             | Default_Organization
---|----------------------|----------------------|-------------|---------------------
[root@foreman ~]#
Creating Product from foreman GUI
Content –> Products
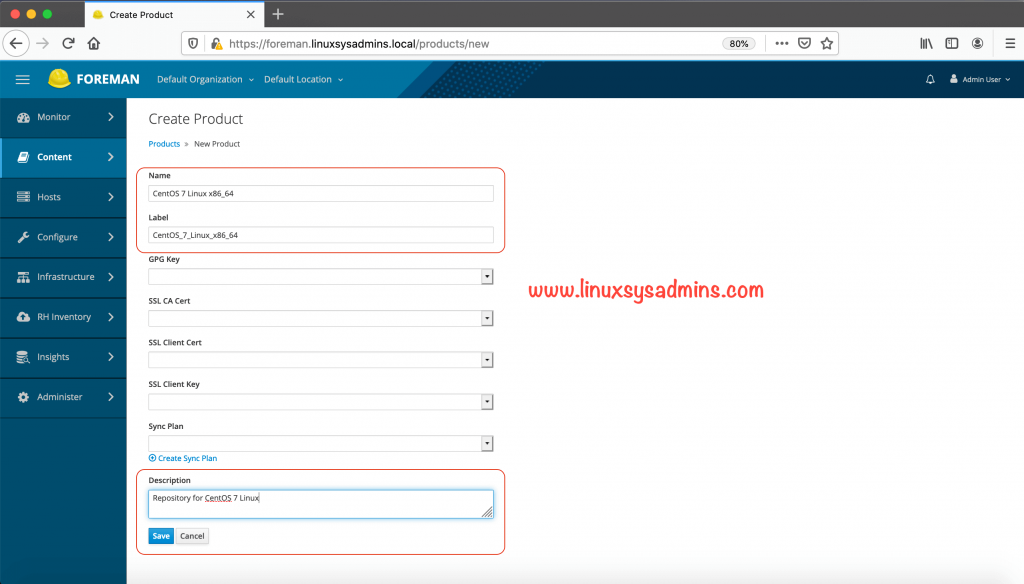
Creating Product from CLI using the hammer.
[root@foreman ~]# hammer product create --organization-id 1 --name "CentOS 7 Linux x86_64" --description "Repository for CentOS 7 Linux"
Product created.
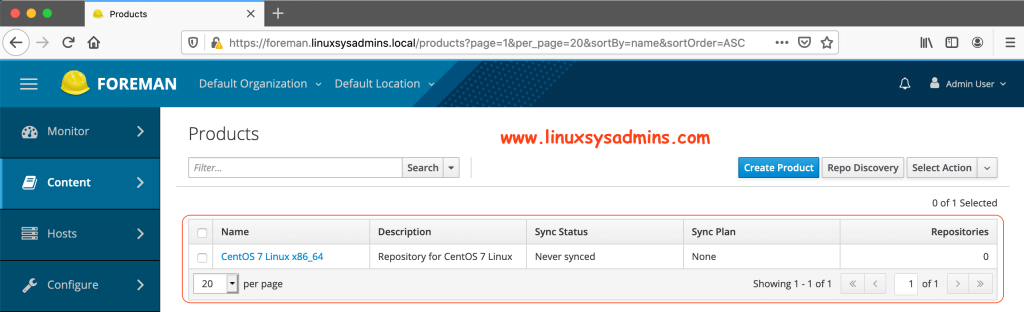
[root@foreman ~]#Once the product created it will be listed as shown below.
Importing GPG Key for OS Repo
After creating a product we need to import the GPG key for it. Follow below steps to import the key from CLI
# mkdir -p /etc/pki/rpm-gpg/import
# wget -P /etc/pki/rpm-gpg/import/ http://mirror.centos.org/centos-7/7/os/x86_64/RPM-GPG-KEY-CentOS-7
To know all GPG keys navigate to
https://www.centos.org/keys/To import the key for our organization, Run this command from the location where we have downloaded the GPG key.
# hammer gpg create --organization-id 1 --key "RPM-GPG-KEY-CentOS-7" --name "RPM-GPG-KEY-CentOS-7"To perform the import from GUI follow as shown below.
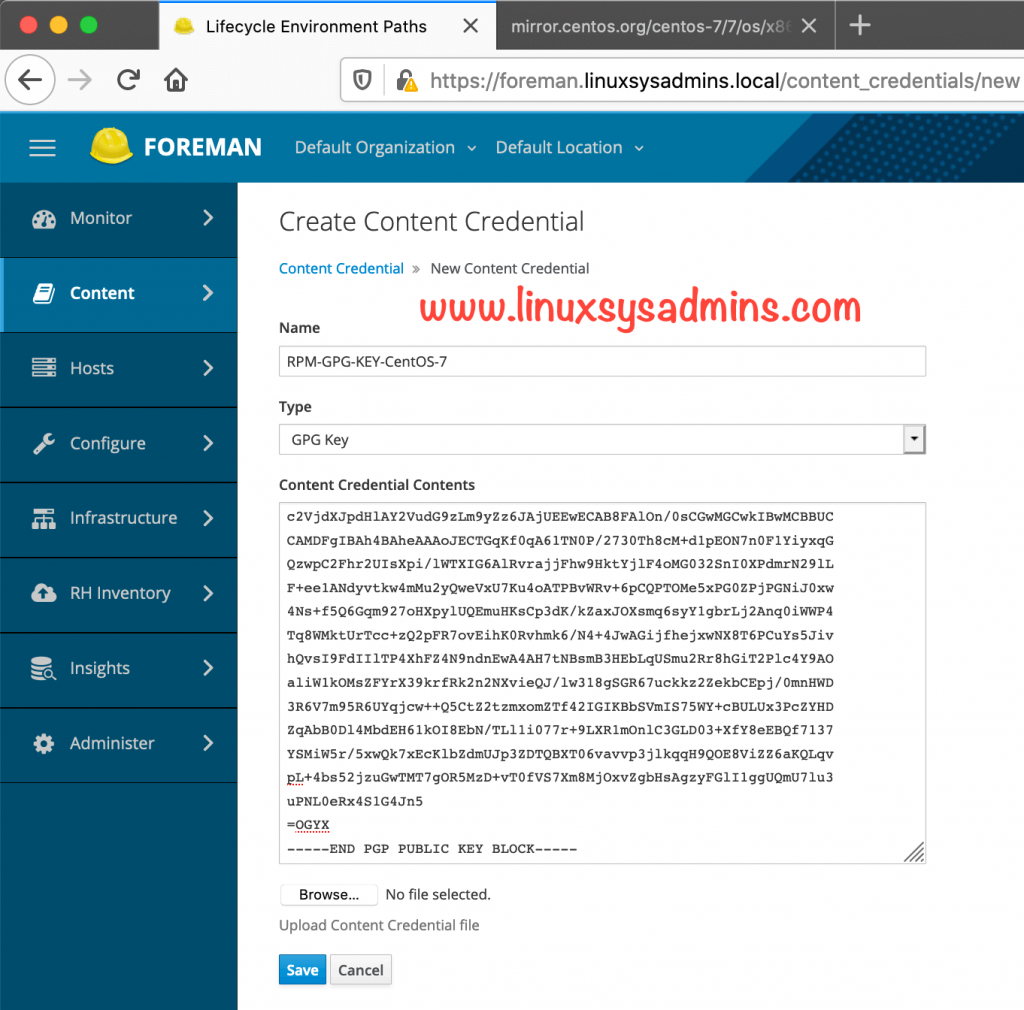
Navigate to Content –> Content Credentials
To get the GPG key access the URL http://mirror.centos.org/centos-7/7/os/x86_64/RPM-GPG-KEY-CentOS-7 and copy the content to paste under “New Credential contents”.
GPG Key for Storage Repo
Storage repositories required separate GPG key, By following let’s create the Content Credentials for storage repository.
Content –> Content Credentials –> Create Content Credential
In the name use any name “RPM-GPG-KEY-CentOS-SIG-Storage“, Type as “GPG key” and Paste the content from below URL
https://www.centos.org/keys/RPM-GPG-KEY-CentOS-SIG-StorageClick Save.
After creating the storage repository in following steps we can assign the storage key to the storage repository.
Creating Repositories
It’s easy to create a Repository from GUI by navigating to Content –> Products –> CentOS 7 Linux x86_64 –> New Repository
However, Let’s use the hammer to create the repository from the CLI.
Creating the Repository from CLI
Add the CentOS 7 main OS Repository
# hammer repository create --organization-id 1 \
   --product "CentOS 7 Linux x86_64" \
   --name "CentOS 7 OS x86_64" \
   --label "CentOS_7_OS_x86_64" \
   --content-type "yum" \
   --download-policy "on_demand" \
   --gpg-key "RPM-GPG-KEY-CentOS-7" \
   --url "http://mirror.centos.org/centos-7/7/os/x86_64/" \
   --mirror-on-sync "no"
Understanding the options.
- –organization-id – Organization ID to create the repository
- –product – For which product repository needs to be created
- –name – Name of the repository
- –label – Just a label to make the repository
- –content-type – what type of content, it can be yum, deb, file, puppet and docker.
- –download-policy – On-demand, if we choose this option the packages will be downloaded when clients try to get the package from katello/Satellite.
- –gpg-key – GPG key to be used for repository
- –url – The URL of the repository from where the content about to download.
- –mirror-on-sync – True if this repository when synced has to be mirrored from the source and Stale RPMs removed.
Additionally, add Extra repository
# hammer repository create --organization-id 1 \
   --product "CentOS 7 Linux x86_64" \
   --name "CentOS 7 Extra x86_64" \
   --label "CentOS_7_Extra_x86_64" \
   --content-type "yum" \
   --download-policy "on_demand" \
   --gpg-key "RPM-GPG-KEY-CentOS-7" \
   --url "http://mirror.centos.org/centos-7/7/extras/x86_64/" \
   --mirror-on-sync "no"
To receive the updates create the Update Repo
# hammer repository create --organization-id 1 \
   --product "CentOS 7 Linux x86_64" \
   --name "CentOS 7 Updates x86_64" \
   --label "CentOS_7_Updates_x86_64" \
   --content-type "yum" \
   --download-policy "on_demand" \
   --gpg-key "RPM-GPG-KEY-CentOS-7" \
   --url "http://mirror.centos.org/centos-7/7/updates/x86_64/" \
   --mirror-on-sync "no"
In future we require configuration management packages, Let’s add the Ansible repo.
# hammer repository create --organization-id 1 \
    --product "CentOS 7 Linux x86_64" \
    --name "Ansible x86_64" \
    --label "Ansible_x86_64" \
    --content-type "yum" \
    --download-policy "on_demand" \
    --gpg-key "RPM-GPG-KEY-CentOS-7" \
    --url "http://mirror.centos.org/centos-7/7/configmanagement/x86_64/ansible29/" \
    --mirror-on-sync "no"
Finally, I need a storage repository to setup Ceph.
# hammer repository create --organization-id 1 \
 --product "CentOS 7 Linux x86_64" \
    --name "Storage x86_64" \
    --label "Storage_x86_64" \
    --content-type "yum" \
    --download-policy "on_demand" \
    --gpg-key "RPM-GPG-KEY-CentOS-7" \
    --url "http://mirror.centos.org/centos-7/7/storage/x86_64/ceph-nautilus/" \
    --mirror-on-sync "no"
Now navigate to content –> Products –> click on “CentOS 7 Linux x86_64” under repositories click on “Storage x86_64” scroll down to GPG Key and select the “RPM-GPG-KEY-CentOS-SIG-Storage from the drop-down list and click save.
Here all created repositories can be found under Content –> CentOS 7 Linux x86_64in Repositories Tab.
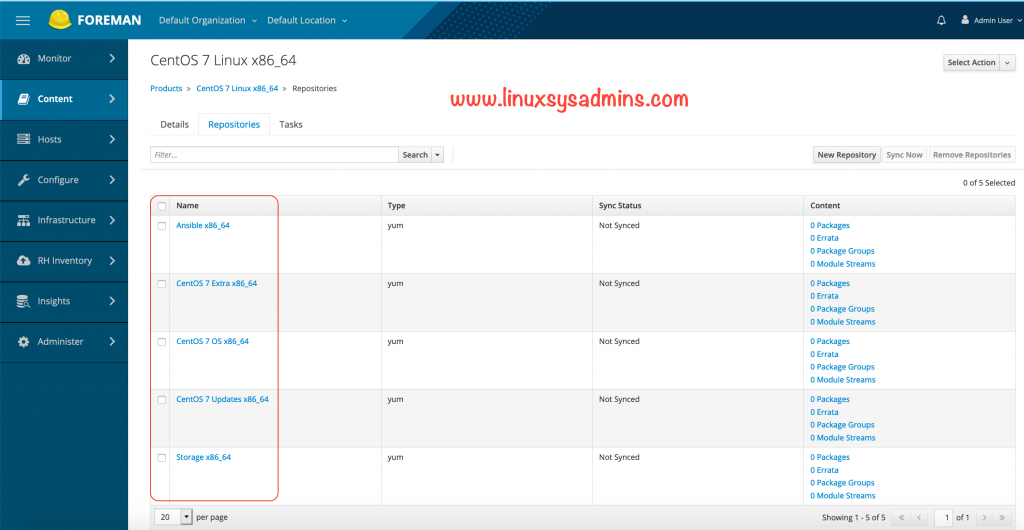
List the same from the command line using the hammer.
# [root@foreman ~]# hammer repository list --organization-id 1 --product "CentOS 7 Linux x86_64"
---|-------------------------|-----------------------|--------------|-----------------------------------------------------------------------
ID | NAME                    | PRODUCT               | CONTENT TYPE | URL
---|-------------------------|-----------------------|--------------|-----------------------------------------------------------------------
8  | Ansible x86_64          | CentOS 7 Linux x86_64 | yum          | http://mirror.centos.org/centos-7/7/configmanagement/x86_64/ansible29/
3  | CentOS 7 Extra x86_64   | CentOS 7 Linux x86_64 | yum          | http://mirror.centos.org/centos-7/7/extras/x86_64/
2  | CentOS 7 OS x86_64      | CentOS 7 Linux x86_64 | yum          | http://mirror.centos.org/centos-7/7/os/x86_64/
4  | CentOS 7 Updates x86_64 | CentOS 7 Linux x86_64 | yum          | http://mirror.centos.org/centos-7/7/updates/x86_64/
9  | Storage x86_64          | CentOS 7 Linux x86_64 | yum          | http://mirror.centos.org/centos-7/7/storage/x86_64/ceph-nautilus/
---|-------------------------|-----------------------|--------------|-----------------------------------------------------------------------
[root@foreman ~]#
Creating Sync Plan
Right after creating the repositories let us create a sync plan to download the contents periodically every day or weekly or monthly.
Content –> Sync Plan –> Create Sync Plan
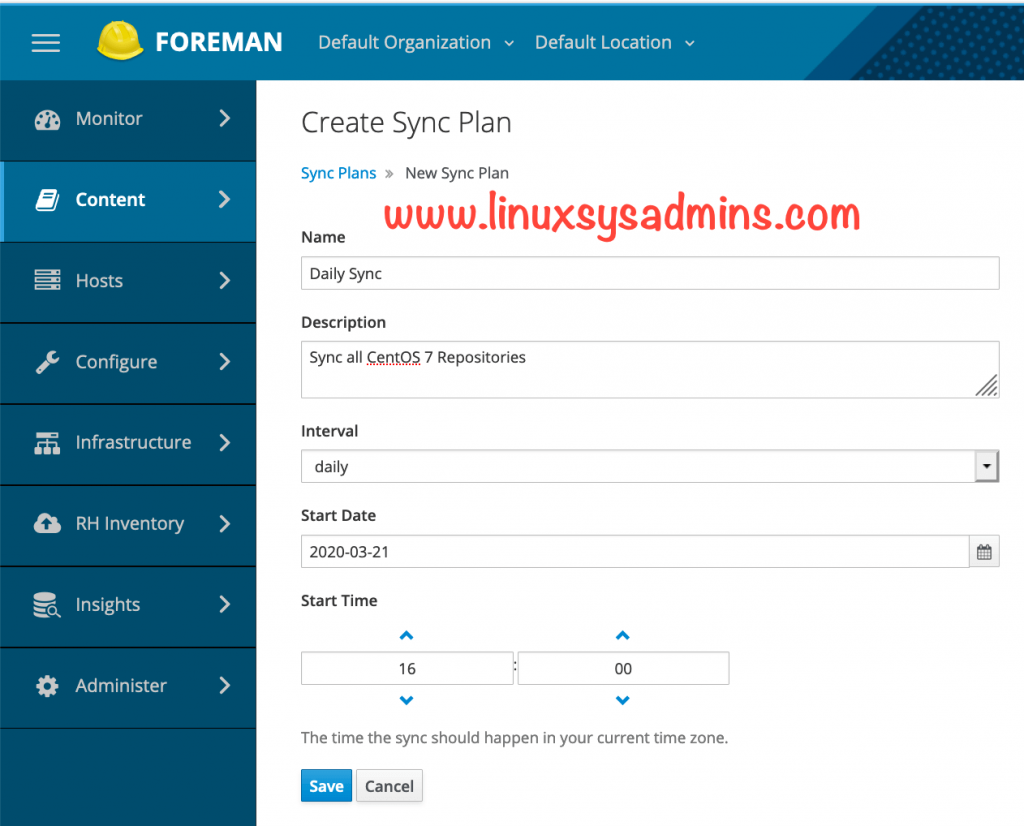
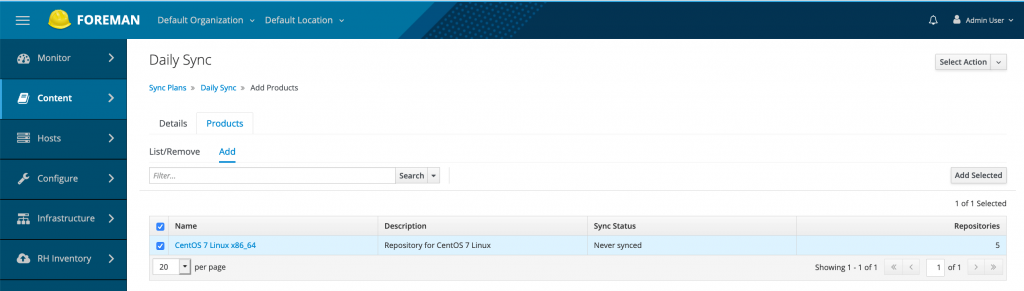
The sync plan we created is daily at 4 PM. Click save to create the Sync plan. Once created with Daily Sync plan click on Products Tab and add the listed product.
Sync Plans –> Daily Sync –> Products –> Add —> Select the products and click “Add selected”.
Syncing the Contents
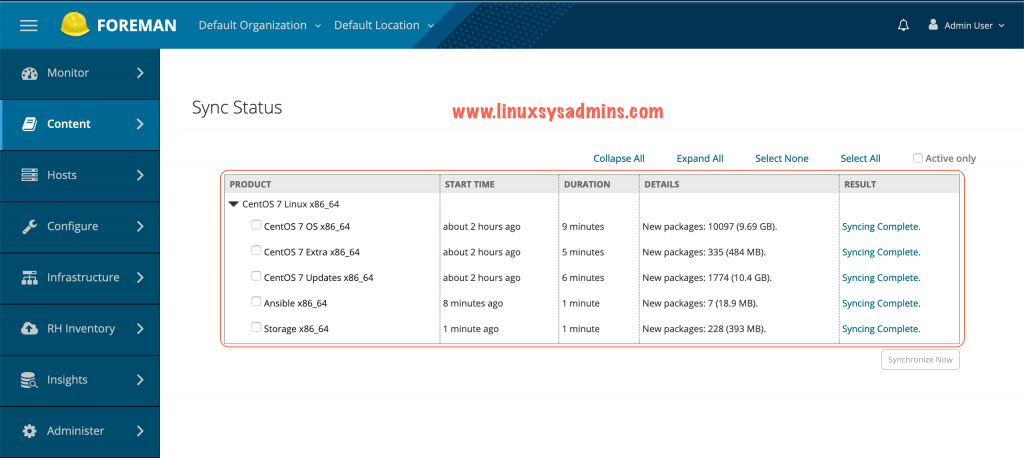
To sync the content navigate to Content –> Sync Status –> Select All –> Click the “Synchronize Now”.
To check the status from the command line run
[root@foreman ~]# hammer product list  --name "CentOS 7 Linux x86_64" --organization-id 1
---|-----------------------|-------------------------------|----------------------|--------------|-----------
ID | NAME                  | DESCRIPTION                   | ORGANIZATION         | REPOSITORIES | SYNC STATE
---|-----------------------|-------------------------------|----------------------|--------------|-----------
1  | CentOS 7 Linux x86_64 | Repository for CentOS 7 Linux | Default Organization | 5            | Running
---|-----------------------|-------------------------------|----------------------|--------------|-----------
[root@foreman ~]#
Once the sync completed it will look similar to below.
Creating a LifeCycle Environment
The LifeCycle environment helps us to provide the required stages. For example,
- A set of packages needs to be used in a development machine. The same packages need to be used under production once your developer completed his work. So what we will do is move the content from dev stage to production by promoting it to production.
- In other cases, Maybe your development team need separate content and your production required a separate set of content. It’s too possible.
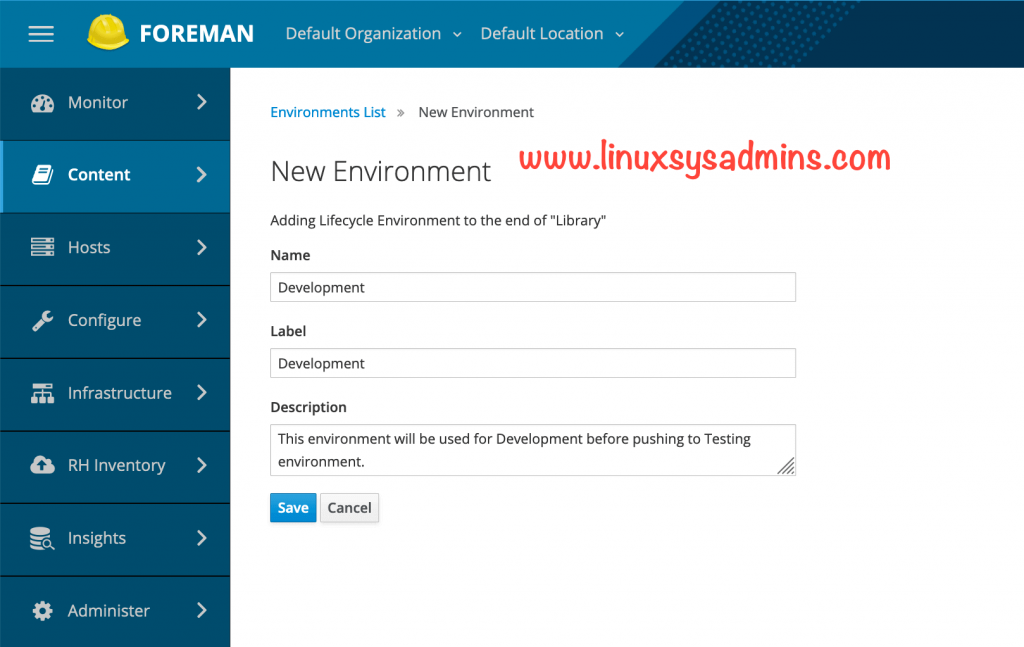
Create a lifecycle environment by navigating to Content –> Lifecycle Environments we will create three environments as follows.
- Development
- Testing
- Production
Create a Development environment.
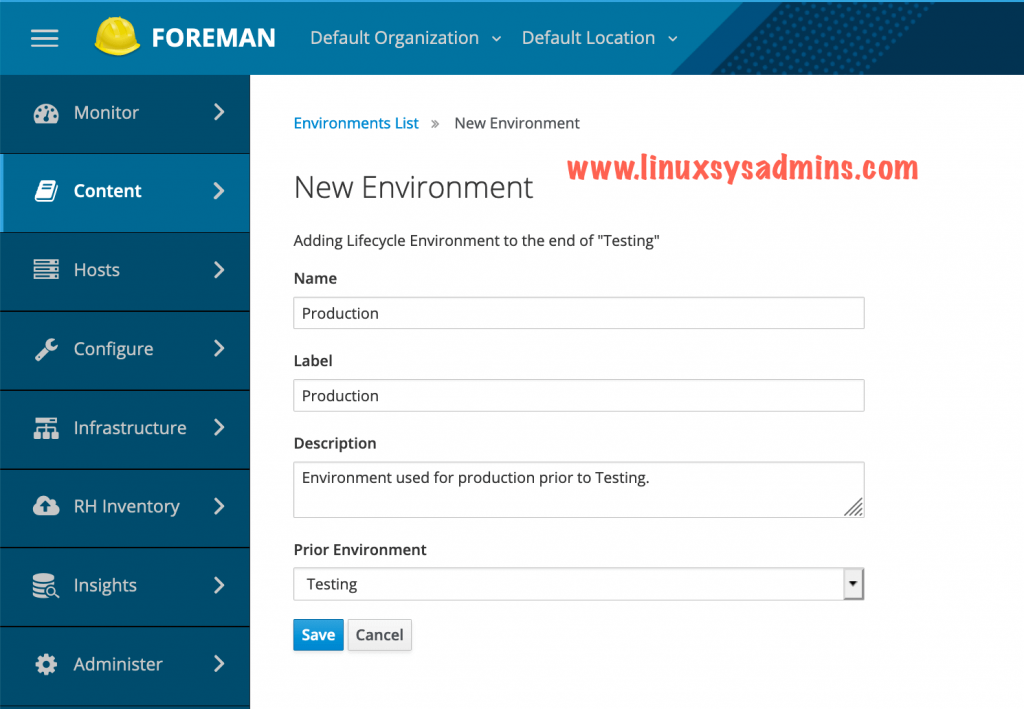
Next, create our Testing Environment. While creating the testing env choose the Prior Environment as “Development”.

Finally, create the Production environment. As shown in the previous step select the “Testing” as a prior environment while creating the Production Env.
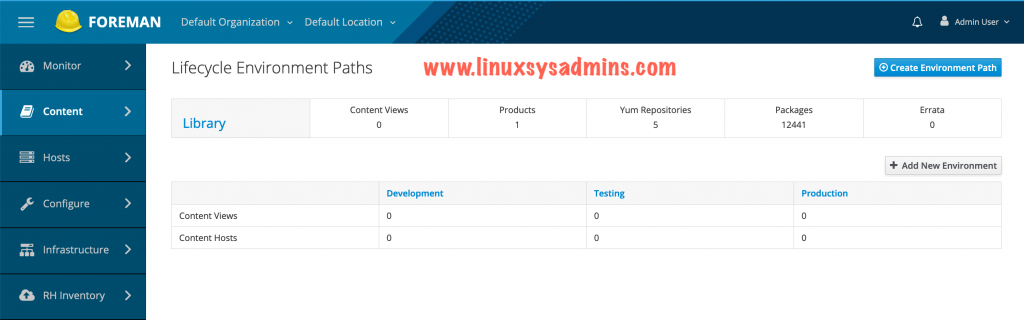
This is how our LifeCycle Environment Paths will look like.
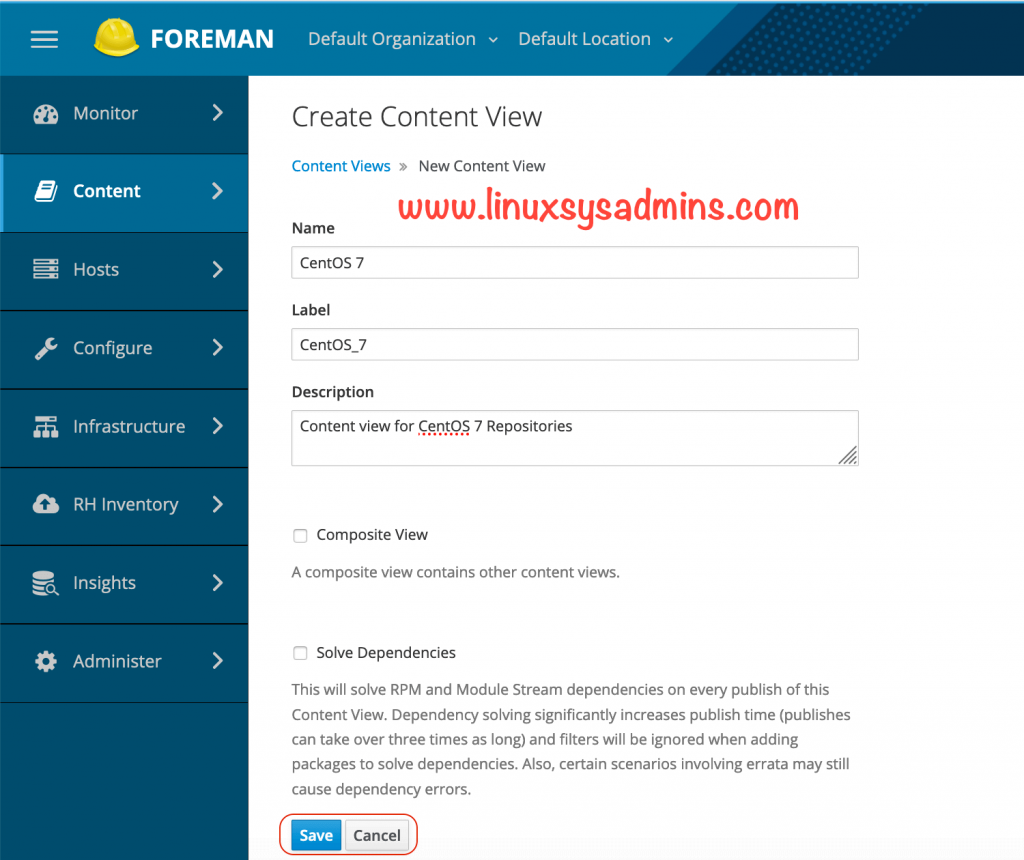
Creating Content View
The content view is a version control system in Katello/Satellite. It can consist of one or more repositories. To create a content view navigate to
Content –> Content Views –> Create New view
Click save to create the Content view.
Right after creating the content view it will take you to “Yum content” Tab under the created content view, We can see the list of repositories under this section select the required repos from the list and click “Add Repositories” to add the same.
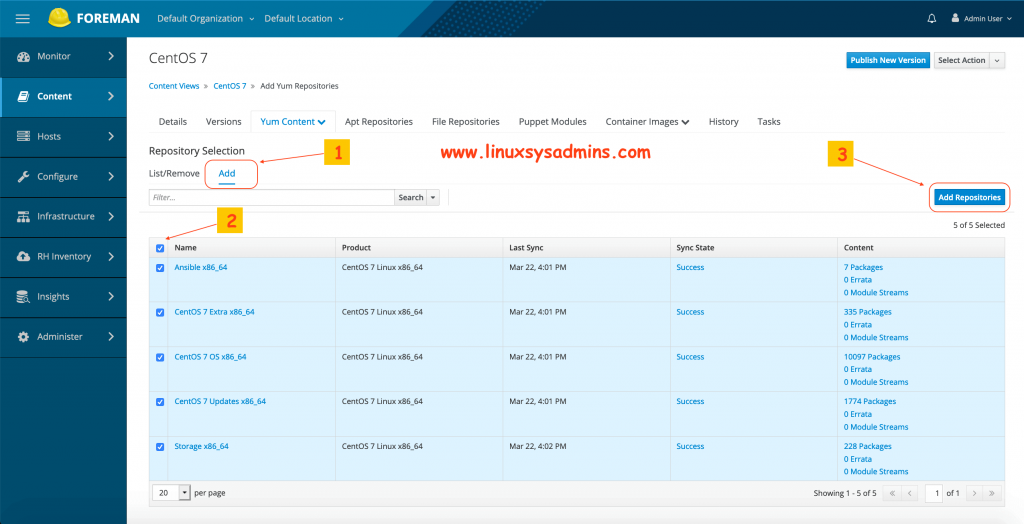
- Click Add Tab under Yum content.
- Select all repositories
- Finally, click the add repositories button at the right-hand side.
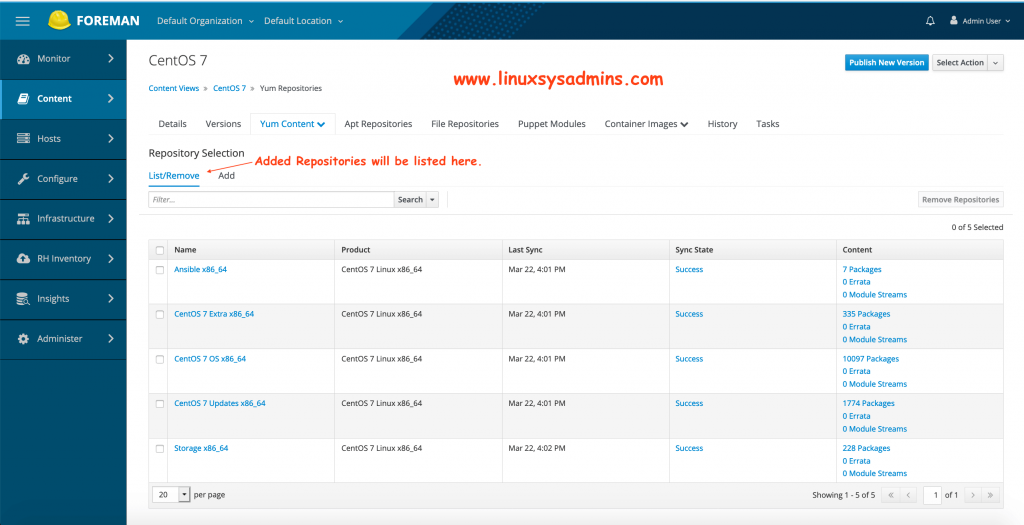
The added repositories can be seen under List TAB.
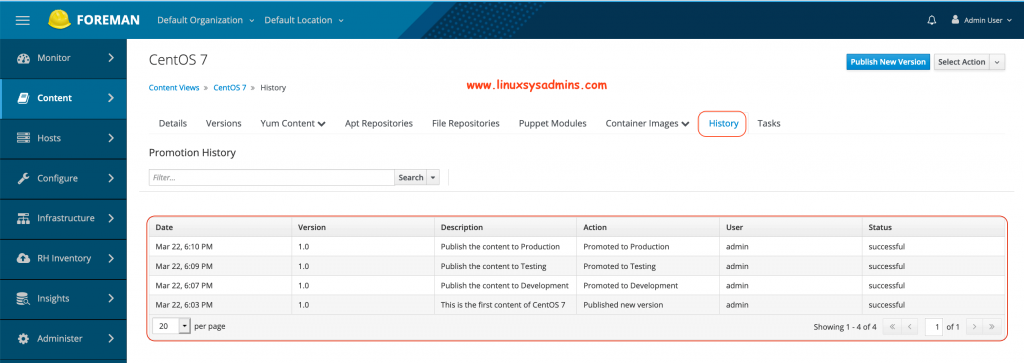
Publishing the Content
To publish the content click on “Publish New Version” at the top right-hand corner. Type with a short description and click Save.
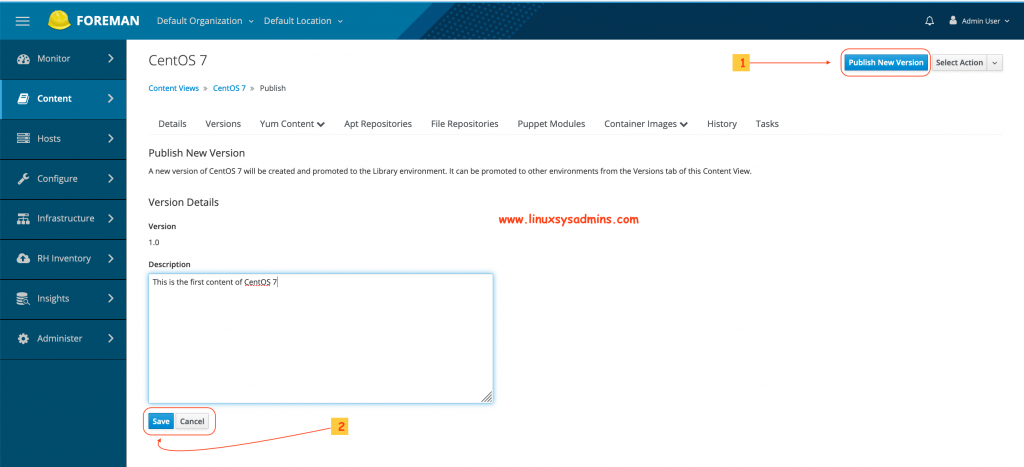
- Click Publish New version to publish the content.
- Click save with continuing to publish to the Library.
Once clicking on Save we will get the status as shown below.
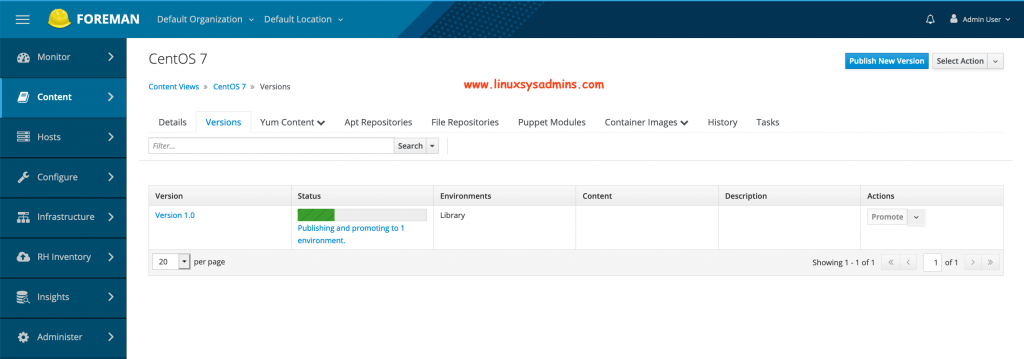
After publishing a new version it will be under Library Environment.

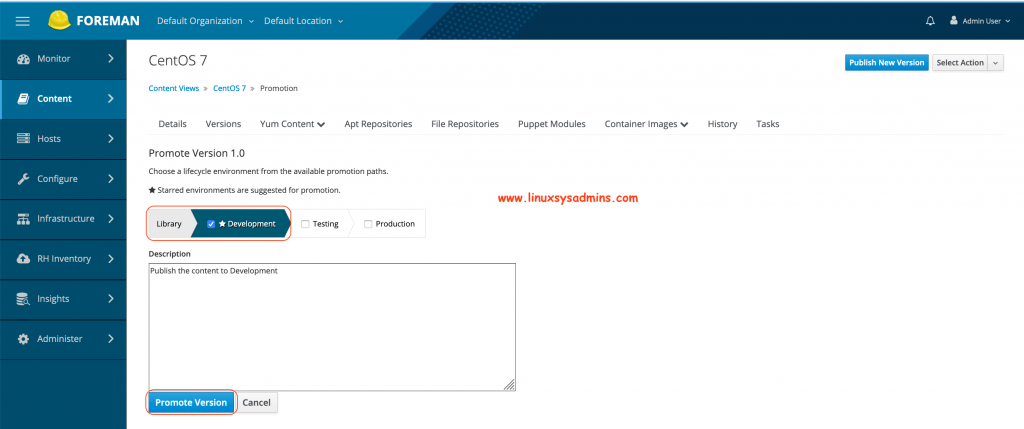
Then promote to Development. Select the tick next to Development and promote the version.
At last, promote to Production.
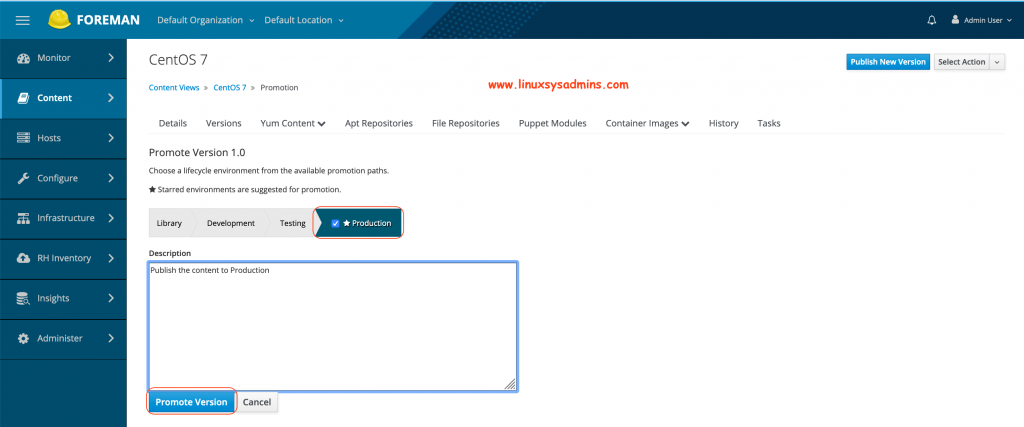
It will look similar to below.
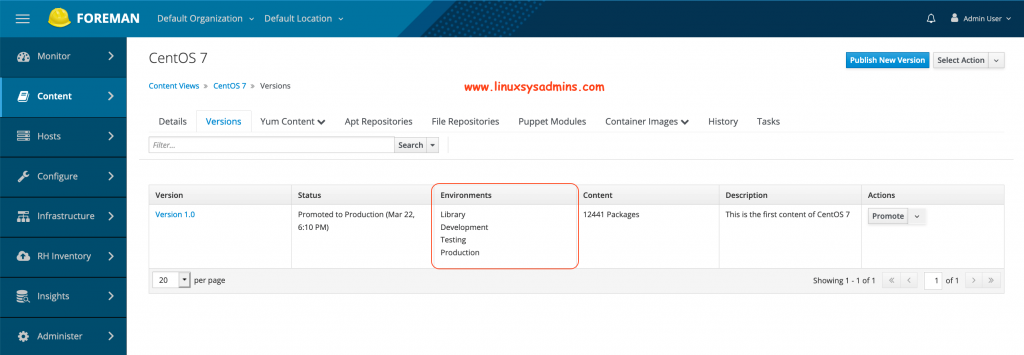
The promoted history can be viewed from the “History” tab.
Creating an Activation key
Activation Keys provide a mechanism to define properties that may be applied to Content Hosts during registration. Let’s create an activation key for our content hosts by navigating to
Content –> Activation Keys –> Create Activation key
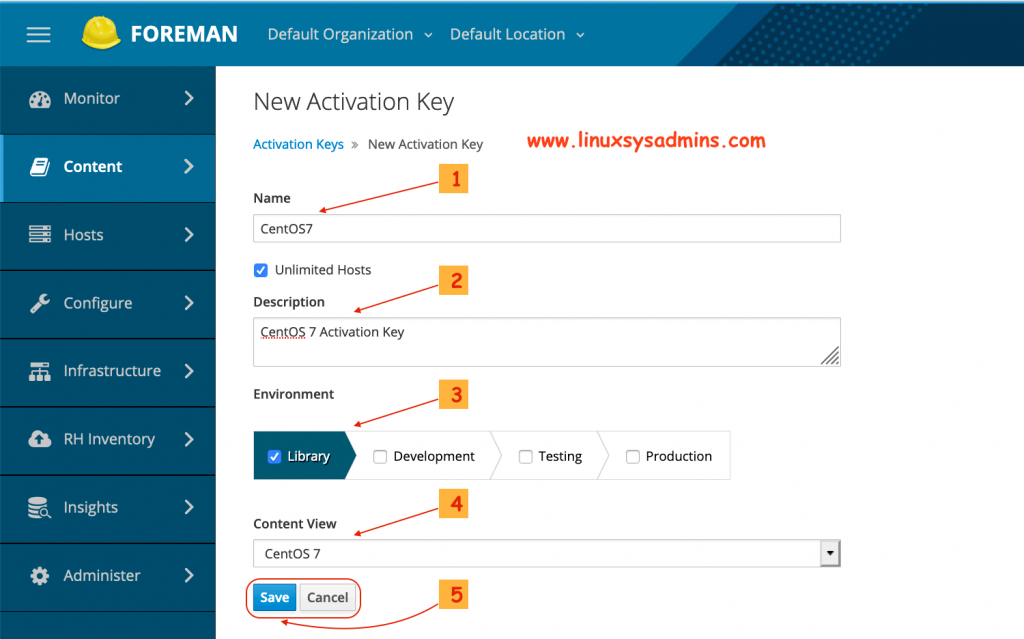
Here “content Host” means the server (clients) which we are going to register with foreman/Katello/Satellite.
- Name of the activation key
- Description of the activation key
- For which environment the key need to be used.
- Content view which needs to use the activation key
- Click save to create the activation key.
To create the key from command line we need to know about the organization, lifecycle environments and content view.
List the organization
[root@foreman ~]# hammer organization list
---|----------------------|----------------------|-------------|---------------------
ID | TITLE                | NAME                 | DESCRIPTION | LABEL
---|----------------------|----------------------|-------------|---------------------
1  | Default Organization | Default Organization |             | Default_Organization
---|----------------------|----------------------|-------------|---------------------
[root@foreman ~]#
List the LifeCycle Environments
[root@foreman ~]# hammer lifecycle-environment list
---|-------------|------------
ID | NAME        | PRIOR
---|-------------|------------
5  | Development | Library
1  | Library     |
8  | Production  | Testing
7  | Testing     | Development
---|-------------|------------
[root@foreman ~]#
And list the Content View
[root@foreman ~]# hammer content-view list
----------------|---------------------------|---------------------------|-----------|---------------------|---------------
CONTENT VIEW ID | NAME                      | LABEL                     | COMPOSITE | LAST PUBLISHED      | REPOSITORY IDS
----------------|---------------------------|---------------------------|-----------|---------------------|---------------
4               | CentOS 7                  | CentOS_7                  | false     | 2020/03/22 14:03:41 | 8, 3, 2, 4, 9
1               | Default Organization View | Default_Organization_View | false     | 2020/03/20 23:50:12 |
----------------|---------------------------|---------------------------|-----------|---------------------|---------------
[root@foreman ~]#
Once we get all above the information let’s create the activation key. We will create with separate activation key for development, testing and production.
Activation Key for Development.
# hammer activation-key create --organization-id 1 \
--name "CentOS7_Dev" \
--description "CentOS 7 Activation Key for Development/Test Servers" \
--lifecycle-environment "Development" \
--purpose-role "Red Hat Enterprise Linux Server" \
--purpose-usage "Development/Test" \
--content-view "CentOS 7" \
--unlimited-hosts
Key for Testing.
# hammer activation-key create --organization-id 1 \
--name "CentOS7_Tst" \
--description "CentOS 7 Activation Key for Development/Test Servers" \
--lifecycle-environment "Testing" \
--purpose-role "Red Hat Enterprise Linux Server" \
--purpose-usage "Development/Test" \
--content-view "CentOS 7" \
--unlimited-hosts
At last, Activation key for Production.
# hammer activation-key create --organization-id 1 \
--name "CentOS7_Prod" \
--description "CentOS 7 Activation Key for Production Servers" \
--lifecycle-environment "Production" \
--purpose-role "Red Hat Enterprise Linux Server" \
--purpose-usage "Production" \
--content-view "CentOS 7" \
--unlimited-hosts
List all created activation key from the command line for default organization “1“.
[root@foreman ~]# hammer activation-key list --organization-id 1
---|--------------|----------------|-----------------------|-------------
ID | NAME         | HOST LIMIT     | LIFECYCLE ENVIRONMENT | CONTENT VIEW
---|--------------|----------------|-----------------------|-------------
10 | CentOS7_Dev  | 0 of Unlimited | Development           | CentOS 7
12 | CentOS7_Prod | 0 of Unlimited | Production            | CentOS 7
11 | CentOS7_Tst  | 0 of Unlimited | Testing               | CentOS 7
---|--------------|----------------|-----------------------|-------------
[root@foreman ~]#
Adding Subscription to Activation Key
Now, time to add the subscription into the created activation key. So, once anyone of server registered with katello server it will be assigned with respective Subscription and Repositories.
# hammer subscription list --organization-id 1# hammer activation-key add-subscription --organization-id 1 --name "CentOS7_Dev" --quantity "1" --subscription-id "1"
# hammer activation-key add-subscription --organization-id 1 --name "CentOS7_Tst" --quantity "1" --subscription-id "1"
# hammer activation-key add-subscription --organization-id 1 --name "CentOS7_Prod" --quantity "1" --subscription-id "1"Subscribing clients with Foreman/Katello
Subscribing content host with the foreman will be taken through the below guide.
Subscribe Linux server with Foreman/Katello
That’s it, we have successfully completed with Installing foreman with Katello. In our upcoming guide let see how to subscribe to a client with katello.
Conclusion
Foreman with Katello or Satellite sever is used for content management, version control or we can call as a patch management tool. This one is most needed in any critical production environment to solve the content management / Patch Management requirements. Subscribe to our newsletter and stay with us to receive more topics on Foreman Katello.
Hi,
Thank you for sharing this wiki to everyone ,
Actually, I am trying to add ubuntu repositories (16.04 through 20.04)
can you please point me to the right direction on how to add *.deb repositories ?
if possible with the same steps as the one you described on how to add CentOS repository in your post
@Aboubacar,
Soon will post in a separate guide, subscribe to keep posted.
Thanks & Regards,
Babin Lonston
[…] I used a variety of sources including official docs and this great site […]
I just installed foreman 2.1.3-1 and katello 3.16.1-1 on CentOS 7. A lot of the services are binding to ipv6 ports instead of ipv4. We are not using ipv6. So, any idea how to rectify that?
@Brad, Disable ipv6 and give a try.
excellent, Thanks a lot, Sir.
Congratulations on the tutorial, excellent.
Have you ever tried to import CentOS 7 errata into katello? The EPEL errata is ok, but from CentOS 7 I couldn’t import it.
I’m using version 2.1 of Foreman and 3.16 RC5 from Katello
Thanks for a very good article. Can you make another for Remote Execution? I struggle to find resources on that subject.
@Danie He Jager,
Sure, You can expect it as next post.
Thanks & Regards,
Babin Lonston
Hi all right with you?
First I want to congratulate and thank you for the excellent content.
How did you manage to install ‘Insight and RH Inventory’ on Foreman + Katello?
I noticed that in my installation they don’t appear.
The rest works perfectly well.
@Marcos,
All good, Thank you. Hope you too doing well there.
The Insights is useless here until unless we don’t have a valid Red Hat Subscription.
Can you list the installed packages like below?
[root@foreman ~]# yum list installed | grep accessFailed to set locale, defaulting to C
libpciaccess.x86_64 0.14-1.el7 @anaconda
tfm-rubygem-redhat_access.noarch 2.2.6-1.fm1_23.el7 @katello
tfm-rubygem-redhat_access_lib.noarch 1.1.5-1.el7 @katello
[root@foreman ~]#
Before starting with setup whether have you enabled openscap plugin in?
/etc/foreman-installer/scenarios.d/foreman-answers.yamlforeman::plugin::openscapFor inventory check for the package.
[root@foreman ~]# yum list installed | grep invenFailed to set locale, defaulting to C
tfm-rubygem-foreman_inventory_upload.noarch
[root@foreman ~]#
Kindly update.
Thanks & Regards,
Babin Lonston
I used a variety of sources including official docs and this great site
Hi Babin
Many thanks, excellent article, I have completed the full process,
next is to add some hosts.
@Stephen,
It’s my pleasure that helped you. Subscribe for more article related to foreman in a few days.
Thanks & Regards,
Babin Lonston
Hi
Got as far as “GPG Key for Storage Repo” created the key but then you say?
Once the key created let’s assign the storage key to the storage repository.
Now navigate to content –> Products –> click on “CentOS 7 Linux x86_64” under repositories
click on “Storage x86_64” scroll down to GPG Key and select the “RPM-GPG-KEY-CentOS-
SIG-Storage from the drop-down list and click save.
There are no repositories?
You currently don’t have any Repositories included in this Product, you can add Repositories using the button on the right.
@Stephen Weaver,
Thanks for reporting, the order was little messed, I have updated the article.
Once you created the GPG key for storage repo, continue with creating the repositories. After completing with creating all repositories follow with remaining steps as below.
Now navigate to content –> Products –> click on “CentOS 7 Linux x86_64” under repositories
click on “Storage x86_64” scroll down to GPG Key and select the “RPM-GPG-KEY-CentOS-
SIG-Storage from the drop-down list and click save.
Thanks & Regards,
Babin Lonston
Hi
Very sorry, discovered the problem, I had installed puppet, pushed it up to puppet6
and all is OK.
Hi
All was OK upto
foreman-installer –scenario katello –foreman-initial-admin-username admin –foreman-initial-admin-password ‘xxxxxxx’
Then got loads of errors, have I missed something?
Will try to list errors:
/Stage[main]/Foreman::Database/Foreman::Rake[db:seed]/Exec[foreman-rake-db:seed]: ‘/usr/sbin/foreman-rake db:seed’ returned 1 instead of one of [0]
/opt/puppetlabs/puppet/lib/ruby/vendor_ruby/puppet/util/errors.rb:157:in `fail’
/opt/puppetlabs/puppet/lib/ruby/vendor_ruby/puppet/type/exec.rb:183:in `sync’
/opt/puppetlabs/puppet/lib/ruby/vendor_ruby/puppet/type/exec.rb:649:in `refresh’
/opt/puppetlabs/puppet/lib/ruby/vendor_ruby/puppet/transaction/event_manager.rb:149:in `process_callback’
/opt/puppetlabs/puppet/lib/ruby/vendor_ruby/puppet/transaction/event_manager.rb:34:in `block in process_events’
/opt/puppetlabs/puppet/lib/ruby/vendor_ruby/puppet/transaction/event_manager.rb:121:in `block in queued_events’
/opt/puppetlabs/puppet/lib/ruby/vendor_ruby/puppet/transaction/event_manager.rb:120:in `each’
/opt/puppetlabs/puppet/lib/ruby/vendor_ruby/puppet/transaction/event_manager.rb:120:in `queued_events’
/opt/puppetlabs/puppet/lib/ruby/vendor_ruby/puppet/transaction/event_manager.rb:33:in `process_events’
/opt/puppetlabs/puppet/lib/ruby/vendor_ruby/puppet/transaction.rb:288:in `eval_resource’
/opt/puppetlabs/puppet/lib/ruby/vendor_ruby/puppet/transaction.rb:191:in `call’
/opt/puppetlabs/puppet/lib/ruby/vendor_ruby/puppet/transaction.rb:191:in `block (2 levels) in evaluate’
/opt/puppetlabs/puppet/lib/ruby/vendor_ruby/puppet/util.rb:521:in `block in thinmark’
/opt/puppetlabs/puppet/lib/ruby/2.5.0/benchmark.rb:308:in `realtime’
/opt/puppetlabs/puppet/lib/ruby/vendor_ruby/puppet/util.rb:520:in `thinmark’
/opt/puppetlabs/puppet/lib/ruby/vendor_ruby/puppet/transaction.rb:191:in `block in evaluate’
/opt/puppetlabs/puppet/lib/ruby/vendor_ruby/puppet/graph/relationship_graph.rb:122:in `traverse’
/opt/puppetlabs/puppet/lib/ruby/vendor_ruby/puppet/transaction.rb:178:in `evaluate’
/opt/puppetlabs/puppet/lib/ruby/vendor_ruby/puppet/resource/catalog.rb:240:in `block (2 levels) in apply’
/opt/puppetlabs/puppet/lib/ruby/vendor_ruby/puppet/util.rb:521:in `block in thinmark’
/opt/puppetlabs/puppet/lib/ruby/2.5.0/benchmark.rb:308:in `realtime’
/opt/puppetlabs/puppet/lib/ruby/vendor_ruby/puppet/util.rb:520:in `thinmark’
/opt/puppetlabs/puppet/lib/ruby/vendor_ruby/puppet/resource/catalog.rb:239:in `block in apply’
/opt/puppetlabs/puppet/lib/ruby/vendor_ruby/puppet/util/log.rb:161:in `with_destination’
/opt/puppetlabs/puppet/lib/ruby/vendor_ruby/puppet/transaction/report.rb:146:in `as_logging_destination’
/opt/puppetlabs/puppet/lib/ruby/vendor_ruby/puppet/resource/catalog.rb:238:in `apply’
/opt/puppetlabs/puppet/lib/ruby/vendor_ruby/puppet/configurer.rb:185:in `block (2 levels) in apply_catalog’
/opt/puppetlabs/puppet/lib/ruby/vendor_ruby/puppet/util.rb:521:in `block in thinmark’
/opt/puppetlabs/puppet/lib/ruby/2.5.0/benchmark.rb:308:in `realtime’
/opt/puppetlabs/puppet/lib/ruby/vendor_ruby/puppet/util.rb:520:in `thinmark’
/opt/puppetlabs/puppet/lib/ruby/vendor_ruby/puppet/configurer.rb:184:in `block in apply_catalog’
/opt/puppetlabs/puppet/lib/ruby/vendor_ruby/puppet/util.rb:233:in `block in benchmark’
/opt/puppetlabs/puppet/lib/ruby/2.5.0/benchmark.rb:308:in `realtime’
/opt/puppetlabs/puppet/lib/ruby/vendor_ruby/puppet/util.rb:232:in `benchmark’
/opt/puppetlabs/puppet/lib/ruby/vendor_ruby/puppet/configurer.rb:183:in `apply_catalog’
/opt/puppetlabs/puppet/lib/ruby/vendor_ruby/puppet/configurer.rb:387:in `run_internal’
/opt/puppetlabs/puppet/lib/ruby/vendor_ruby/puppet/configurer.rb:227:in `block in run’
/opt/puppetlabs/puppet/lib/ruby/vendor_ruby/puppet/context.rb:62:in `override’
/opt/puppetlabs/puppet/lib/ruby/vendor_ruby/puppet.rb:290:in `override’
/opt/puppetlabs/puppet/lib/ruby/vendor_ruby/puppet/configurer.rb:210:in `run’
/opt/puppetlabs/puppet/lib/ruby/vendor_ruby/puppet/application/apply.rb:343:in `apply_catalog’
/opt/puppetlabs/puppet/lib/ruby/vendor_ruby/puppet/application/apply.rb:260:in `block (2 levels) in main’
/opt/puppetlabs/puppet/lib/ruby/vendor_ruby/puppet/context.rb:62:in `override’
/opt/puppetlabs/puppet/lib/ruby/vendor_ruby/puppet.rb:290:in `override’
/opt/puppetlabs/puppet/lib/ruby/vendor_ruby/puppet/application/apply.rb:243:in `block in main’
/opt/puppetlabs/puppet/lib/ruby/vendor_ruby/puppet/context.rb:62:in `override’
/opt/puppetlabs/puppet/lib/ruby/vendor_ruby/puppet.rb:290:in `override’
/opt/puppetlabs/puppet/lib/ruby/vendor_ruby/puppet/application/apply.rb:207:in `main’
/opt/puppetlabs/puppet/lib/ruby/vendor_ruby/puppet/application/apply.rb:177:in `run_command’
/opt/puppetlabs/puppet/lib/ruby/vendor_ruby/puppet/application.rb:382:in `block in run’
/opt/puppetlabs/puppet/lib/ruby/vendor_ruby/puppet/util.rb:710:in `exit_on_fail’
/opt/puppetlabs/puppet/lib/ruby/vendor_ruby/puppet/application.rb:382:in `run’
/opt/puppetlabs/puppet/lib/ruby/vendor_ruby/puppet/util/command_line.rb:143:in `run’
/opt/puppetlabs/puppet/lib/ruby/vendor_ruby/puppet/util/command_line.rb:77:in `execute’
Hi there, thanks for sharing this article. Very helpful for a neophyte like me. I need some guidance for my school project using Foreman. What’s the best email to contact you for some further advice to fully leverage Foreman+Ansible. Looking for a book in Amazon or other online bookstores I can’t find any for Foreman/Katello+Ansible. When you get a chance please reply to my email at xxxxxx@gmail.com. Thank you.